
This Wire Winged Amigurumi Bat Is the Most Rewarding Halloween Make You’ll Try This Year
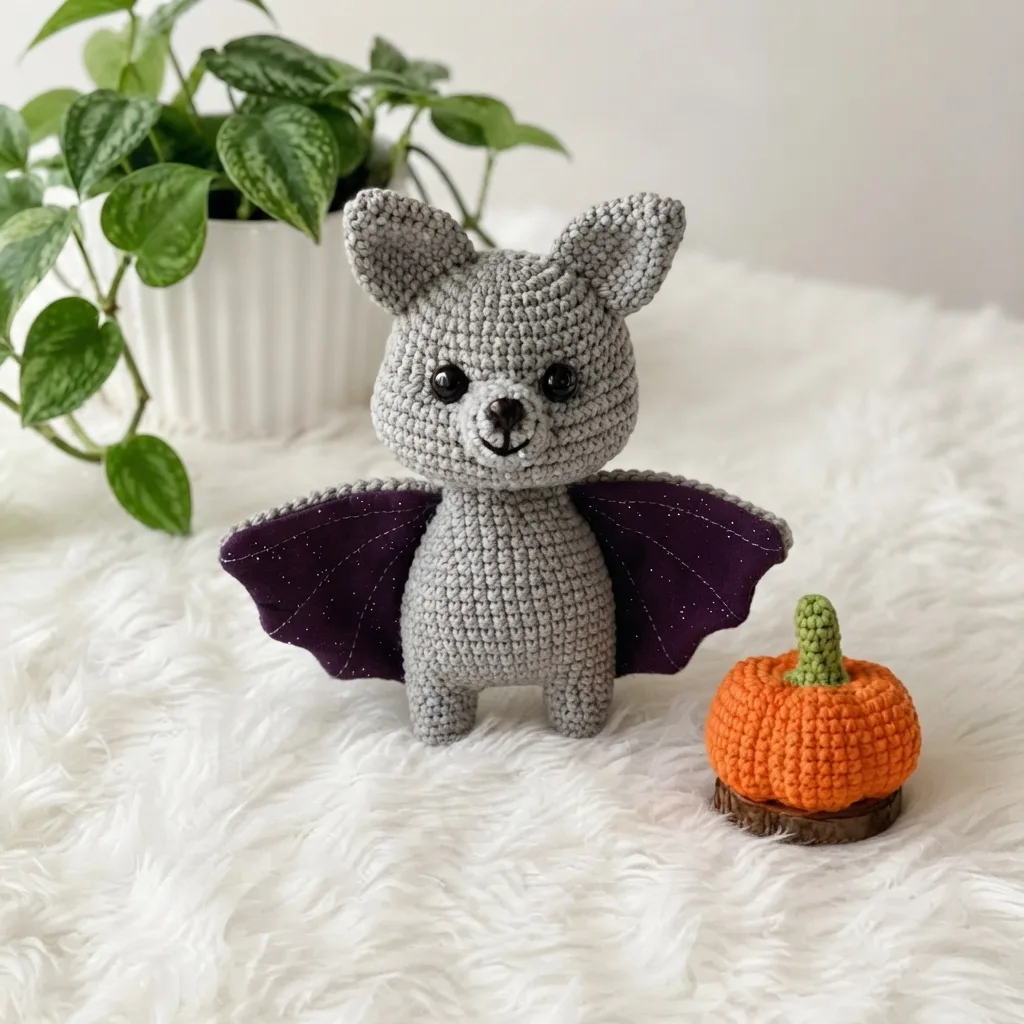
Key takeaways:
- Intermediate pattern, worked mostly in continuous spiral single crochet, with wings worked flat in turning rows
- Finished bat stands about 6 inches tall, ready in roughly 4 to 6 hours
- Craft wire replaces stuffing in the wings and arms, which is what lets them hold a pose instead of flopping
- Comes with a companion pumpkin worked at a much finer gauge, cinched into six ribs with a single length of yarn
- Safety eyes go in on Round 11 to 12 of the head and cannot be repositioned once secured, so that step is worth double-checking before you push them through
Some amigurumi patterns hand you a plush little blob and call it a day. This one hands you a bat that actually looks like it is about to take off. The wings are not stitched flat and left to lie there, they are wired, shaped, and finished with picot points at every tip, so they hold a genuine curve. Set him next to his companion piece, a small ribbed pumpkin worked on a needle so fine it barely counts as a hook, and you have got a scene rather than a single toy.
This is a step up from a beginner pattern, mostly because of two techniques: wiring the wings and arms so they pose instead of collapse, and building the pumpkin’s ribbed texture after the fact by wrapping yarn around a loosely stuffed sphere. Neither is difficult once you have done it, but both reward a bit of patience the first time through.
Why this pattern works so well
The wings are the real star here. Instead of one flat triangle, each wing is built from three separate triangles joined along their bases, then edged in single crochet with a picot stitch worked into every outer point. That is what gives the wing its scalloped, batlike silhouette instead of a plain fan shape. Threading wire through in place of stuffing means the finished wings genuinely hold whatever angle you bend them to, rather than drooping the moment you let go.
The pumpkin companion is a clever contrast in technique. It is worked at a much tighter gauge (a 1.75 mm hook against the bat’s 2.0 mm), stuffed loosely rather than firmly, then cinched with a single long tail wrapped around the outside to divide it into six even ribs. It is a completely different approach to shaping than anything used on the bat itself, so you come away from this pattern with two genuinely different amigurumi skills in your back pocket.
Materials You’ll Need
- Worsted weight yarn, 55% cotton / 45% acrylic, in gray and black, about 50g/160m per color
- Worsted weight yarn, 55% cotton / 45% acrylic, in orange and green for the pumpkin, about 50g/160m per color
- Hook: US B-1 (2.0 mm) for the bat
- Hook: 1.75 mm (a small steel hook, if you don’t have a direct US letter equivalent) for the pumpkin
- Safety eyes, 10 mm (1 pair)
- Safety nose, 10 x 7 mm (1)
- Craft wire for shaping the wings
- Fiberfill stuffing
- Stitch marker
- Yarn needle
- Scissors
Pattern at a Glance
| Item | Details |
| Difficulty | Intermediate |
| Time | 4 to 6 hours |
| Hook | 2.0 mm (bat), 1.75 mm (pumpkin) |
| Size | Bat stands about 6 inches tall; varies with yarn and hook |
| Language | EN (US crochet terminology) |
| Abbreviation | Meaning |
| ch | Chain |
| dec | Decrease (invisible decrease) |
| hdc | Half Double Crochet |
| inc | Increase |
| MR | Magic Ring |
| Rnd | Round |
| Row | Row |
| sc | Single Crochet |
| sl st | Slip Stitch |
| st(s) | Stitch(es) |
A note before you start: the head, muzzle, ears, legs, body, arms, and pumpkin are all worked in continuous spirals, no joining or chaining between rounds unless noted. The wings are the exception, worked flat in turning rows, then joined and edged separately. Gauge is not critical, just keep your tension tight enough that the stuffing does not peek through.
Step-by-Step Instructions
1. Head
| Round | Instructions | Stitches |
| 1 | 6 sc in MR | 6 |
| 2 | inc in each st around | 12 |
| 3 | 1 sc, inc repeat around | 18 |
| 4 | 2 sc, inc repeat around | 24 |
| 5 | 3 sc, inc repeat around | 30 |
| 6 | 4 sc, inc repeat around | 36 |
| 7 | 5 sc, inc repeat around | 42 |
| 8 | 6 sc, inc repeat around | 48 |
| 9 to 12 | sc in each st around | 48 |
| 13 | 14 sc, 6 inc, 8 sc, 6 inc, 14 sc | 60 |
| 14 to 18 | sc in each st around | 60 |
| 19 | 14 sc, 6 dec, 8 sc, 6 dec, 14 sc | 48 |
| 20 | 6 sc, dec repeat around | 42 |
| 21 | 5 sc, dec repeat around | 36 |
| 22 | 4 sc, dec repeat around | 30 |
| 23 | 3 sc, dec repeat around | 24 |
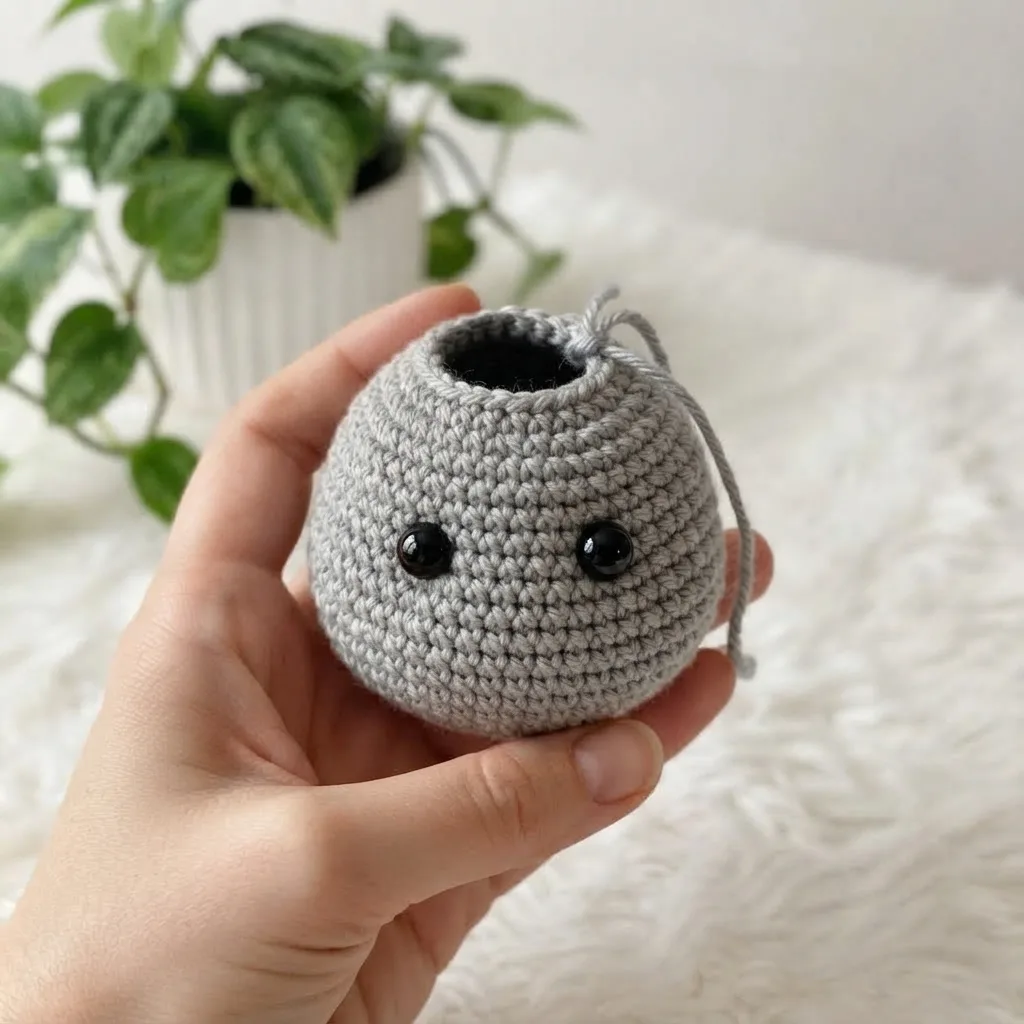
Insert the safety eyes between rounds 11 and 12, with 9 stitches between the two eye holes, before you continue on to round 12. Once you reach round 23, fasten off leaving a tail, stuff firmly before closing, and use that tail to cinch the eye area for a bit more definition around the face.
2. Muzzle
| Round | Instructions | Stitches |
| 1 | 6 sc in MR | 6 |
| 2 | inc in each st around | 12 |
| 3 | sc in each st around | 12 |
| 4 | 1 sc, inc repeat around | 18 |
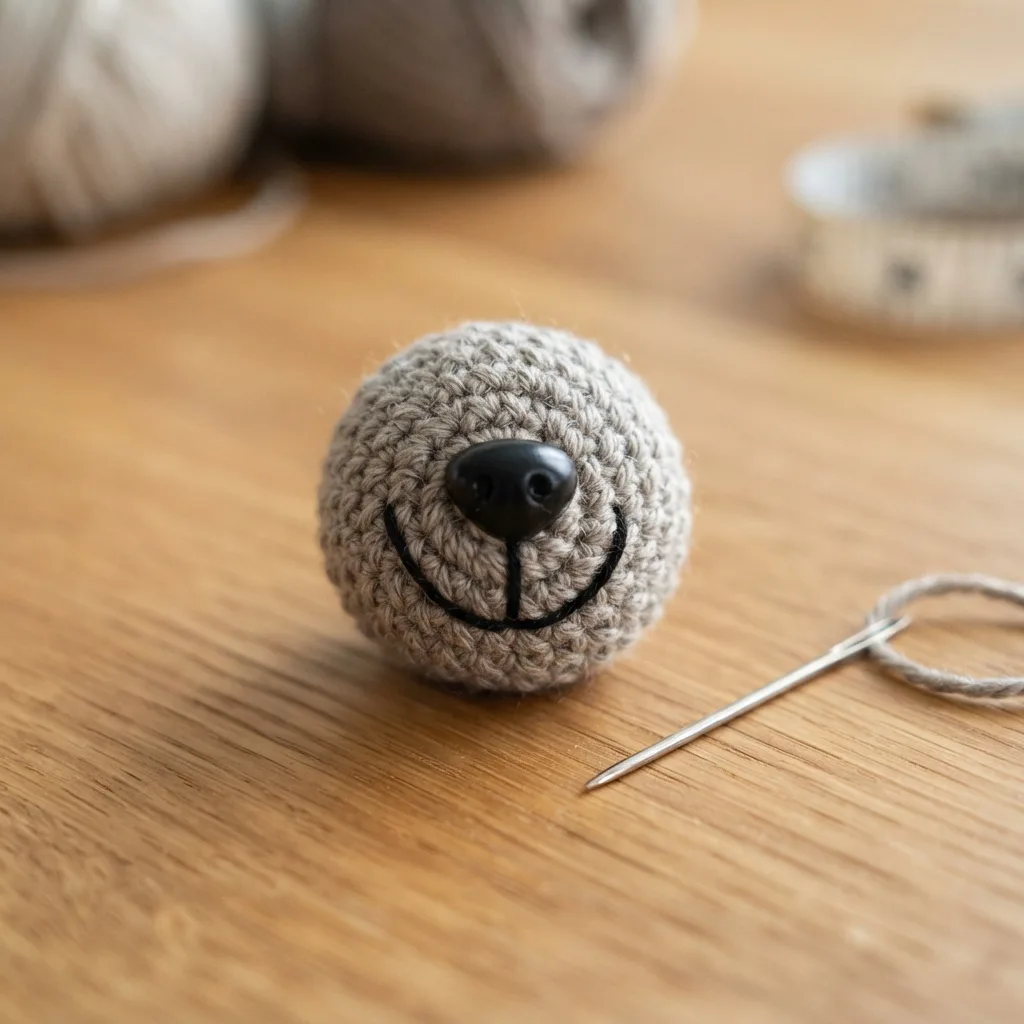
Leave a 6-inch tail, insert the safety nose, embroider the mouth and teeth, add a small amount of stuffing, and sew the muzzle onto the head.
3. Ears (Make 2)
| Round | Instructions | Stitches |
| 1 | 6 sc in MR | 6 |
| 2 | 1 sc, inc repeat 3 times | 9 |
| 3 | 2 sc, inc repeat 3 times | 12 |
| 4 | sc in each st around | 12 |
| 5 | 2 sc, inc repeat 4 times | 16 |
| 6 | 3 sc, inc repeat 4 times | 20 |
| 7 to 10 | sc in each st around | 20 |
| 11 | 3 sc, dec repeat 4 times | 16 |
| 12 | sc in each st around | 16 |
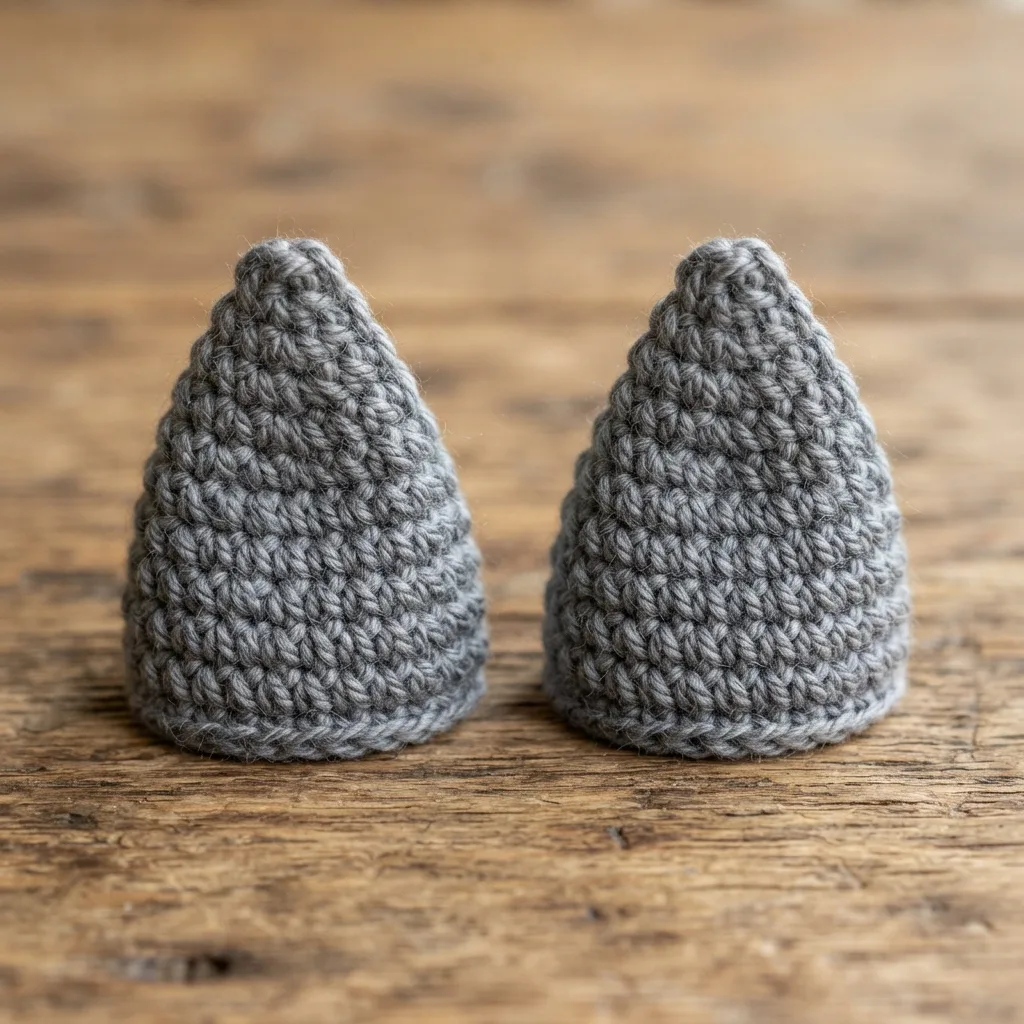
Leave an 8-inch tail and sew the ears symmetrically to the head, aligned with the muzzle.
4. Legs (Make 2) and Body
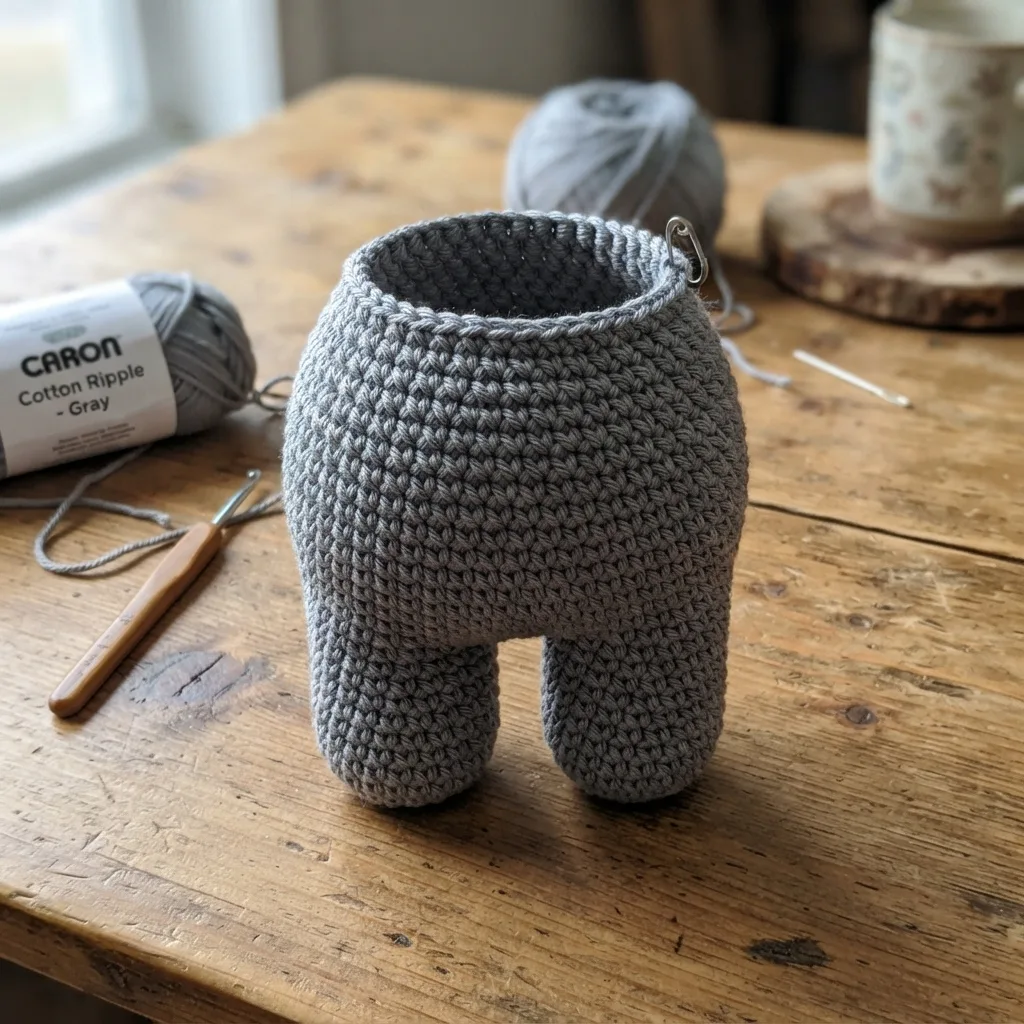
| Round | Instructions | Stitches |
| 1 | 6 sc in MR | 6 |
| 2 | inc in each st around | 12 |
| 3 to 4 | sc in each st around | 12 |
Work the second leg the same way, but don’t fasten off, you will continue directly into the body from there.
| Round | Instructions | Stitches |
| 5 | Ch 6, sl st to join to the second leg. Work 12 sc around the first leg, 6 sc along one side of the ch-6, 12 sc around the second leg, then 6 sc along the other side of the ch-6 | 36 |
| 6 | 12 sc, (1 sc, inc) x3, 12 sc, (1 sc, inc) x3 | 42 |
| 7 to 16 | sc in each st around | 42 |
| 17 | 5 sc, dec repeat around | 36 |
| 18 to 19 | sc in each st around | 36 |
| 20 | 4 sc, dec repeat around | 30 |
| 21 to 22 | sc in each st around | 30 |
| 23 | 3 sc, dec repeat around | 24 |
| 24 to 25 | sc in each st around | 24 |
Leave an 8 to 10 inch tail and stuff firmly before closing.
5. Arms (Make 2)
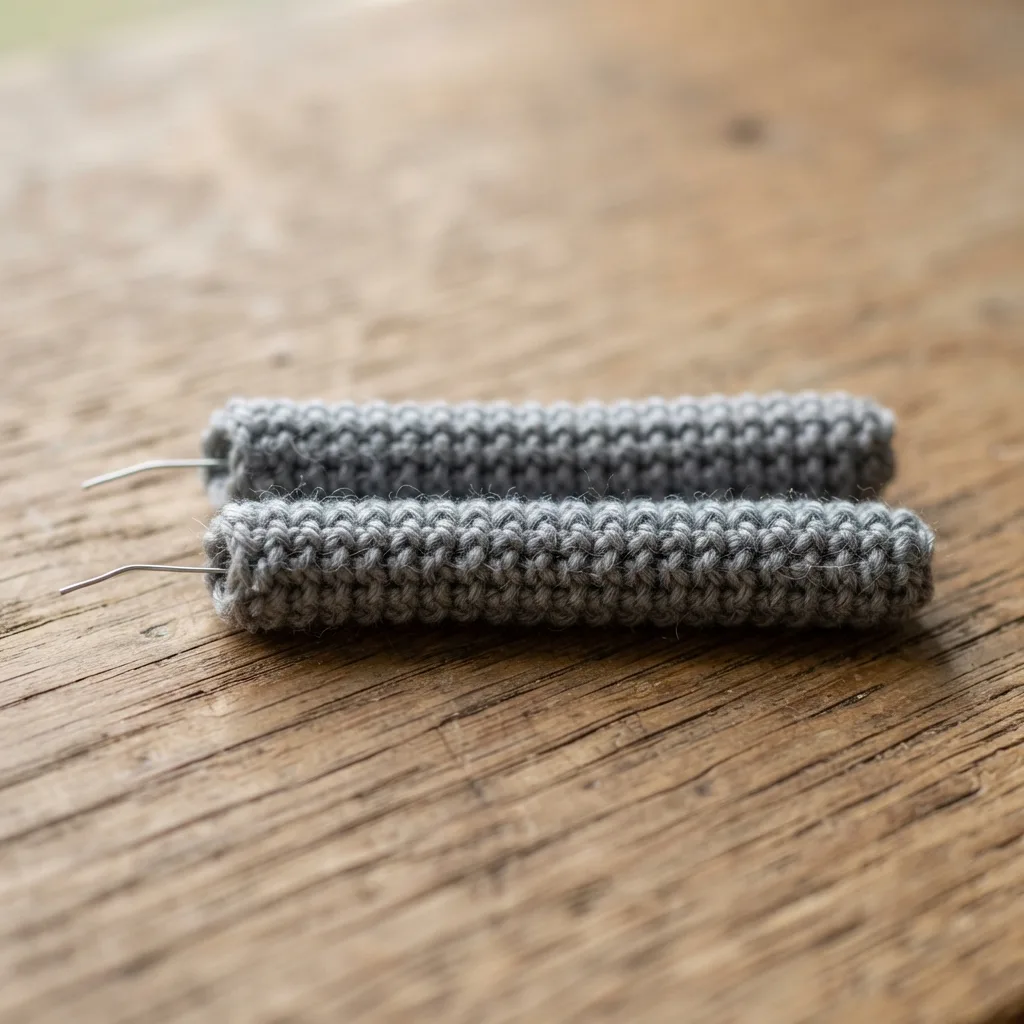
| Round | Instructions | Stitches |
| 1 | 6 sc in MR | 6 |
| 2 | 1 sc, inc repeat 3 times | 9 |
| 3 to 5 | sc in each st around | 9 |
| 6 | dec, 7 sc repeat around | 8 |
| 7 to 20 | sc in each st around | 8 |
Leave a 6-inch tail, insert wire in place of stuffing so the arm holds its pose, then sew it to the body.
6. Wings (Make 2, each built from 3 joined triangles)
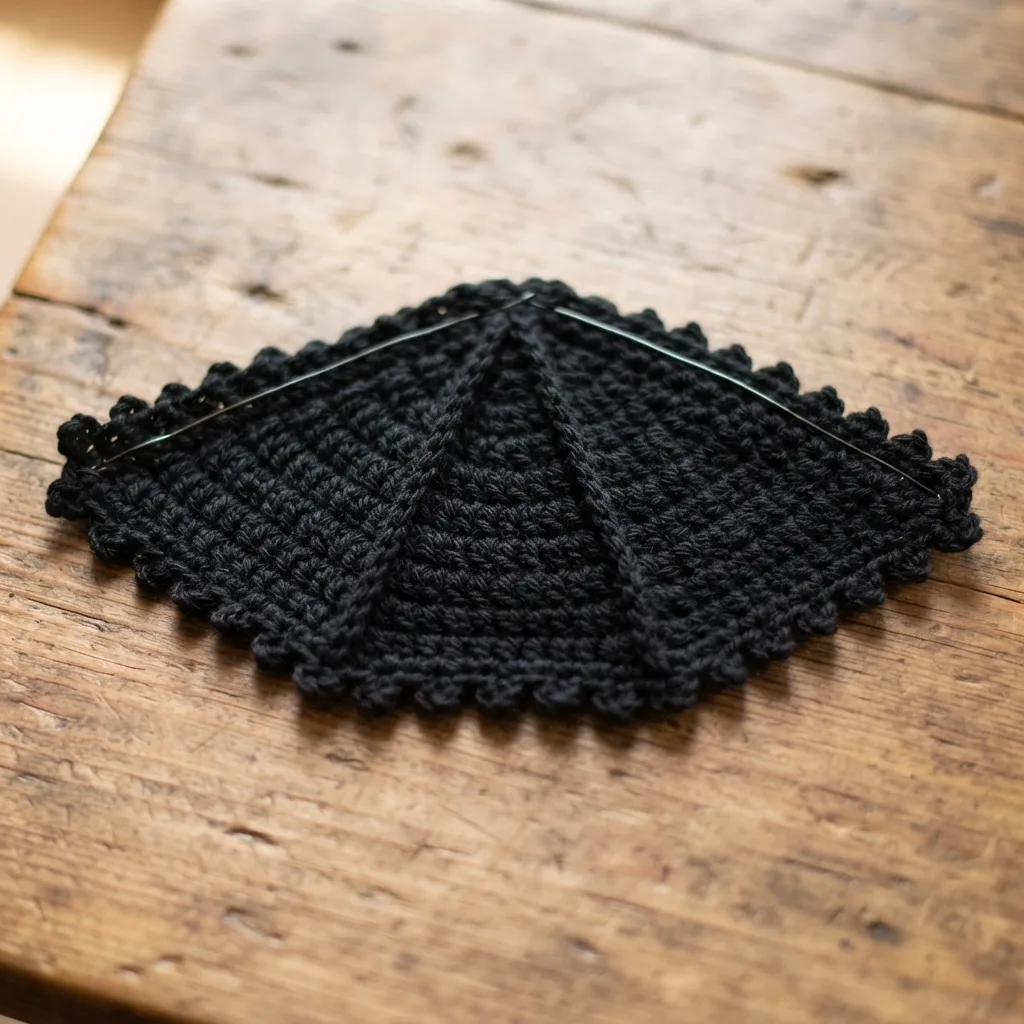
Worked flat in black yarn. Chain 7, starting in the 2nd chain from the hook.
| Row | Instructions | Stitches |
| 1 | 6 sc, ch 1, turn | 6 |
| 2 | 6 sc, ch 1, turn | 6 |
| 3 | 2 sc, dec, 2 sc, ch 1, turn | 5 |
| 4 | 5 sc, ch 1, turn | 5 |
| 5 | 2 sc, dec, 1 sc, ch 1, turn | 4 |
| 6 | 4 sc, ch 1, turn | 4 |
| 7 | 1 sc, dec, 1 sc, ch 1, turn | 3 |
| 8 | 3 sc, ch 1, turn | 3 |
| 9 | dec, 1 sc, ch 1, turn | 2 |
| 10 | 2 sc, ch 1, turn | 2 |
| 11 | dec | 1 |
Make 3 triangles per wing. Join the triangles by working 11 sc across their bases, weaving in all yarn tails as you go. Single crochet evenly around the entire perimeter of the joined wing, and at each outer point, work (1 sc, ch 3, 1 sc) into the same stitch to form a picot tip.
7. Pumpkin
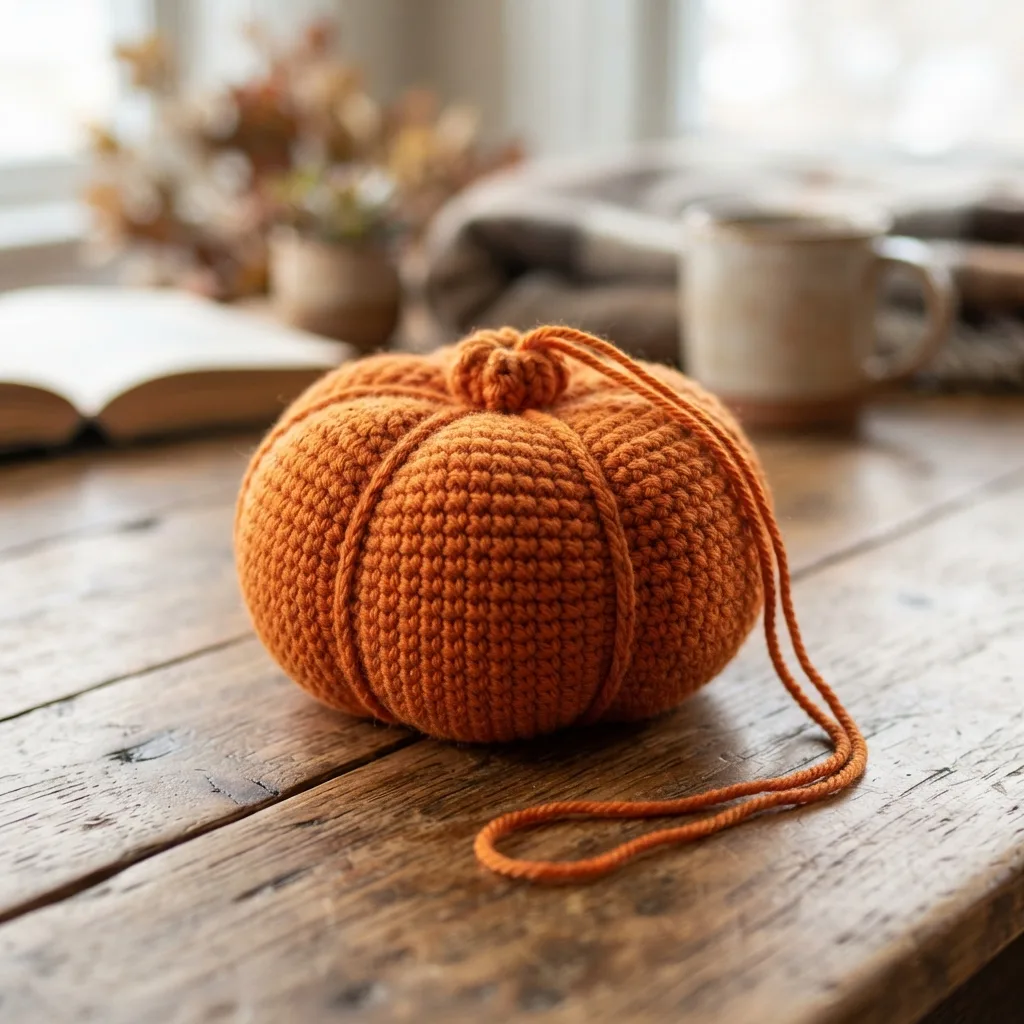
| Round | Instructions | Stitches |
| 1 | 6 sc in MR | 6 |
| 2 | inc in each st around | 12 |
| 3 | 1 sc, inc repeat around | 18 |
| 4 | 2 sc, inc repeat around | 24 |
| 5 | 3 sc, inc repeat around | 30 |
| 6 | 4 sc, inc repeat around | 36 |
| 7 | 5 sc, inc repeat around | 42 |
| 8 to 14 | sc in each st around | 42 |
| 15 | 5 sc, dec repeat around | 36 |
| 16 | 4 sc, dec repeat around | 30 |
| 17 | 3 sc, dec repeat around | 24 |
| 18 | 2 sc, dec repeat around | 18 |
| 19 | 1 sc, dec repeat around | 12 |
| 20 | dec around | 6 |
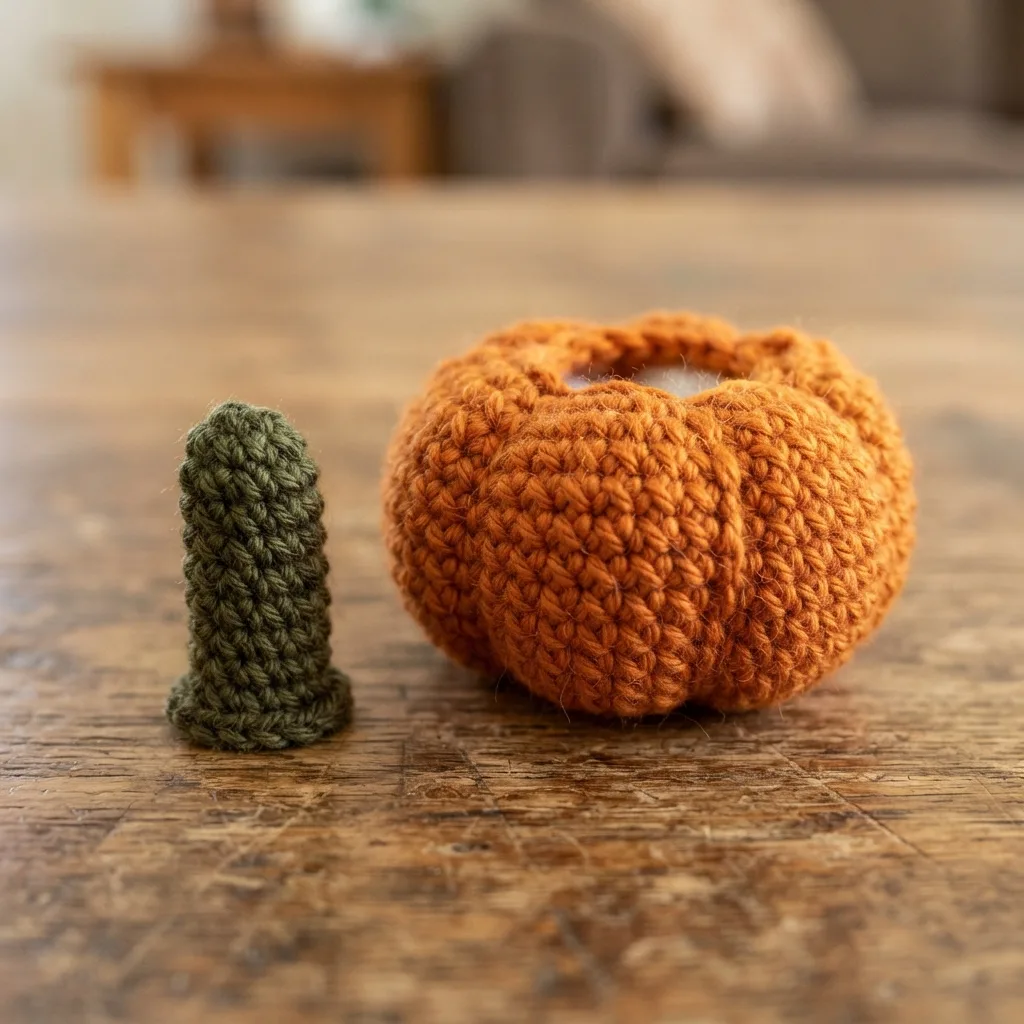
Stuff loosely, not too firmly, before closing. Leave a 10-inch tail (or slightly longer) and cinch the opening closed with a wide-eye needle. Using the same tail, pass the needle through the center of the pumpkin and wrap the yarn around the outside, dividing the sphere into 6 evenly spaced ribs, holding each wrap in place with your finger as you go. Secure the tail, trim, and hide the end inside the piece.
8. Stem / Vine
| Round | Instructions | Stitches |
| 1 | 7 sc in MR | 7 |
| 2 to 6 | sc in each st around | 7 |
| 7 | inc in each st around | 14 |
| 8 | sc in each st around | 14 |
Fill the base with stuffing. Leave an 8-inch tail and sew the stem to the pumpkin.
9. Assembly
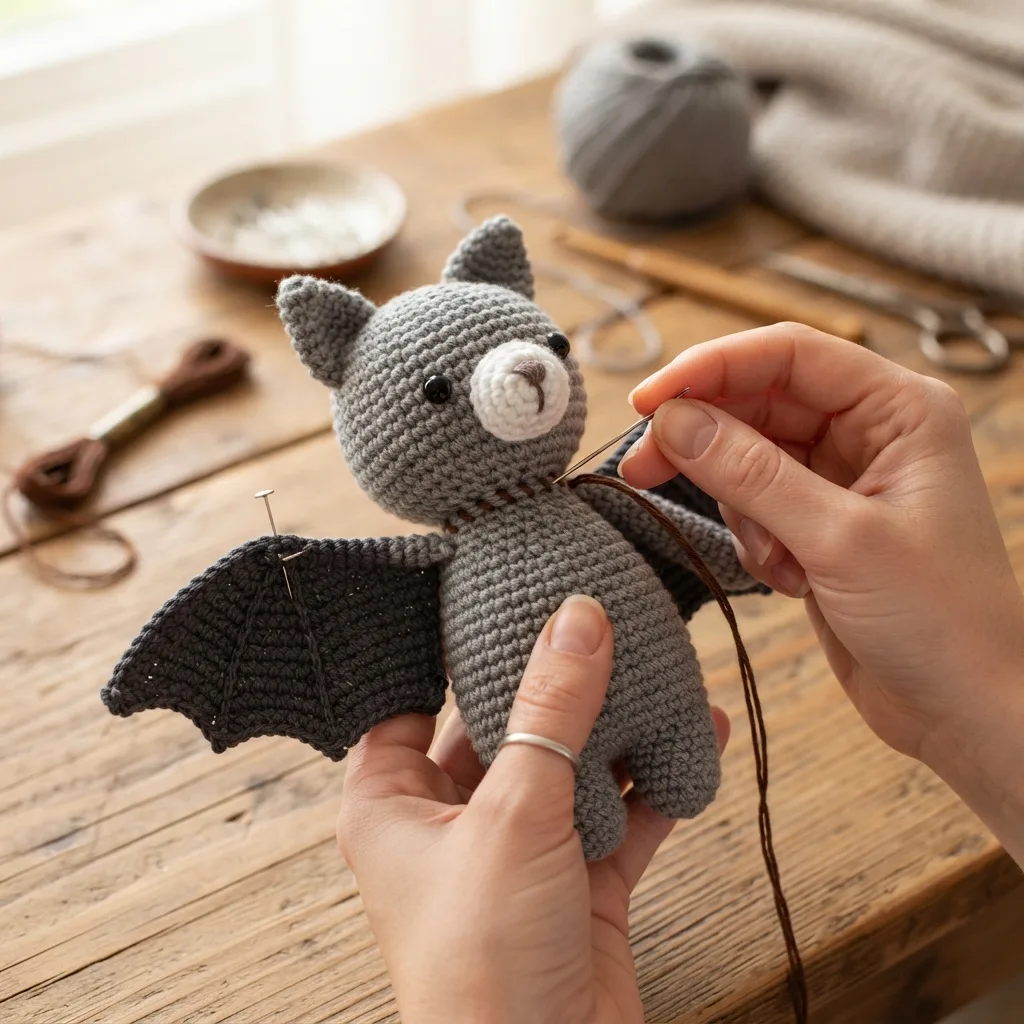
- Sew the muzzle onto the head, centering it below the eyes, then attach the ears symmetrically on either side.
- Sew each arm to the body at the shoulder position, using the wire core to help set the pose.
- Sew one edge of each wing to an arm and the opposite edge to the body, so the wing spans naturally between the two.
- Sew the head onto the body using a whipstitch, aligning the muzzle with the front of the body.
- Sew the stem onto the top of the pumpkin.
- Weave in all remaining ends throughout both pieces.
Practical Tips for a Cleaner Finish
- Keep your tension slightly tighter than you would for a garment. Amigurumi worked in worsted weight cotton-acrylic blends needs a snug fabric so stuffing doesn’t show through the stitches.
- When working invisible decreases, insert your hook into the front loops only of the next two stitches before pulling through, which keeps the decrease nearly seamless on a rounded surface like the head.
- Stuff the head and body firmly enough that they hold their shape when squeezed gently, but stop before the fabric starts to stretch or distort. The pumpkin, by contrast, wants a looser fill so the ribbing technique can cinch it into that classic pumpkin shape.
- If you substitute yarn, stick with a cotton-acrylic or all-cotton worsted weight. Pure acrylic will make the stitch definition softer and less crisp, which matters most on the wing points.
- For nearly invisible seams when sewing the wings to the arms and body, use a whipstitch through the back loops only on both pieces, catching small amounts of yarn with each pass.
Frequently Asked Questions
What size hook should I use for this amigurumi bat pattern?
Use a US B-1 (2.0 mm) hook for the bat itself. The companion pumpkin is worked separately on a much finer 1.75 mm hook, which is what gives it that tight, crisp stitch definition at a smaller scale.
Does the pumpkin need wire the way the bat’s wings do?
No. Wire is specific to the bat’s wings and arms, where it replaces the stuffing so those pieces hold a pose. The pumpkin gets its shape from a completely different technique: it’s stuffed loosely, then cinched from the outside with wrapped yarn to form the ribs, no wire involved.
When should I insert the safety eyes on the bat’s head?
Between rounds 11 and 12, with 9 stitches between the two eye holes. Place them before you continue crocheting the rest of the head, since they lock into place and can’t be repositioned once secured.
How do I get the ribbed texture on the crochet pumpkin?
After stuffing the pumpkin loosely and cinching the opening closed, pass the same long tail through the center of the sphere and wrap it around the outside, dividing the piece into 6 evenly spaced ribs. Hold each wrap in place with your finger as you go so the ribs stay even before you secure the tail.
Give him a try. Between the wired wings and the ribbed pumpkin, this pattern packs in two techniques worth having in your amigurumi toolkit, and the finished pair looks genuinely gallery-worthy next to a stack of pumpkins or on a fall mantel. If you make your own, I would love to hear how the wing wiring went, that is usually the step that trips people up the first time.