
Reversible Crochet Octopus Amigurumi Pattern — Free & Easy
Key takeaways:
- Beginner-friendly pattern, worked entirely in continuous spiral single crochet with a stitch marker tracking each round’s start
- Made from two identical head-and-tentacle pieces, seamed back to back so the finished toy flips to show a different color and face
- Finished size is approximately 10 cm, about 4 inches, worked up in plush bulky yarn on a 4 mm hook
- Round 19’s back-loop-only tentacle round is the trickiest step, everything else is straightforward single crochet
- Only lightly stuffed on purpose, so the two halves can seam together and still lie flat
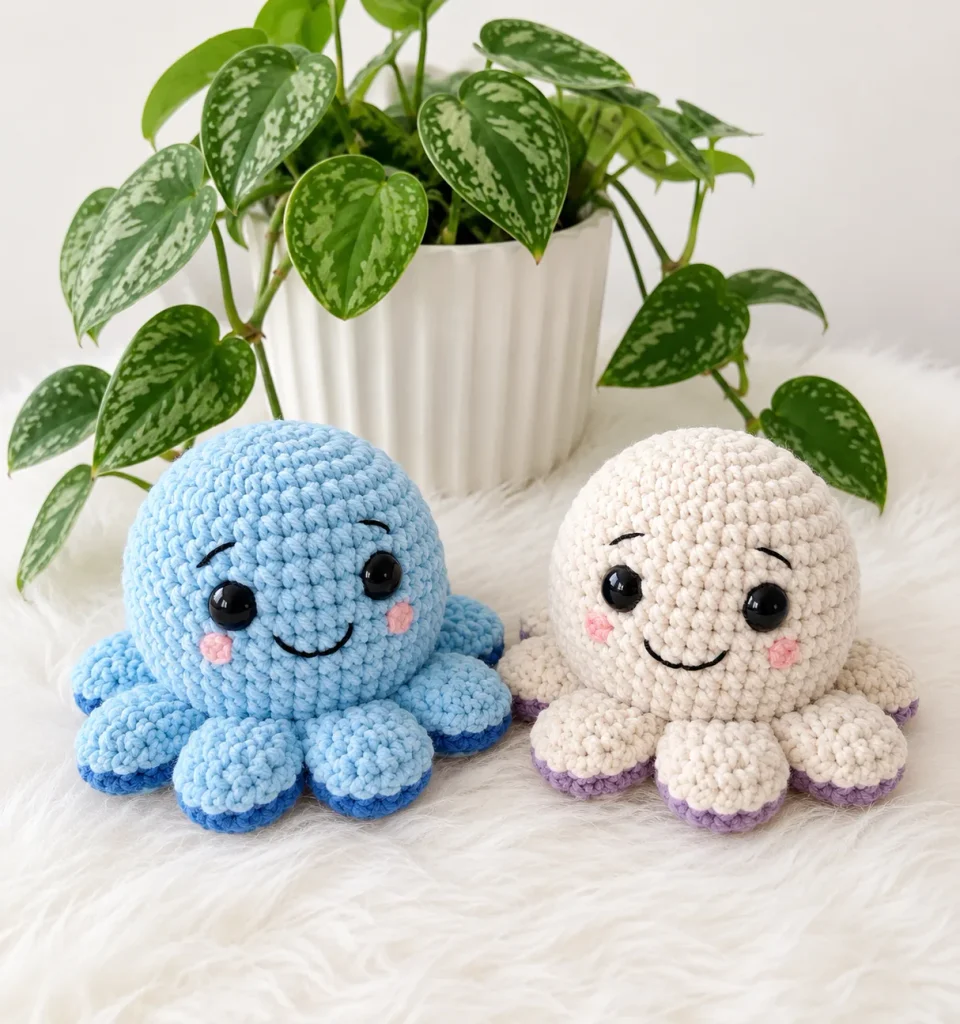
There is something genuinely clever about a toy that is two toys. This octopus is not just cute from one angle, it is a full, separate face on each side, joined at the tentacles so the whole thing flips like a tiny plush coin. One side gets a calm smile in soft blue, the other a matching smile in cream, and which face you see just depends on how you set it down.
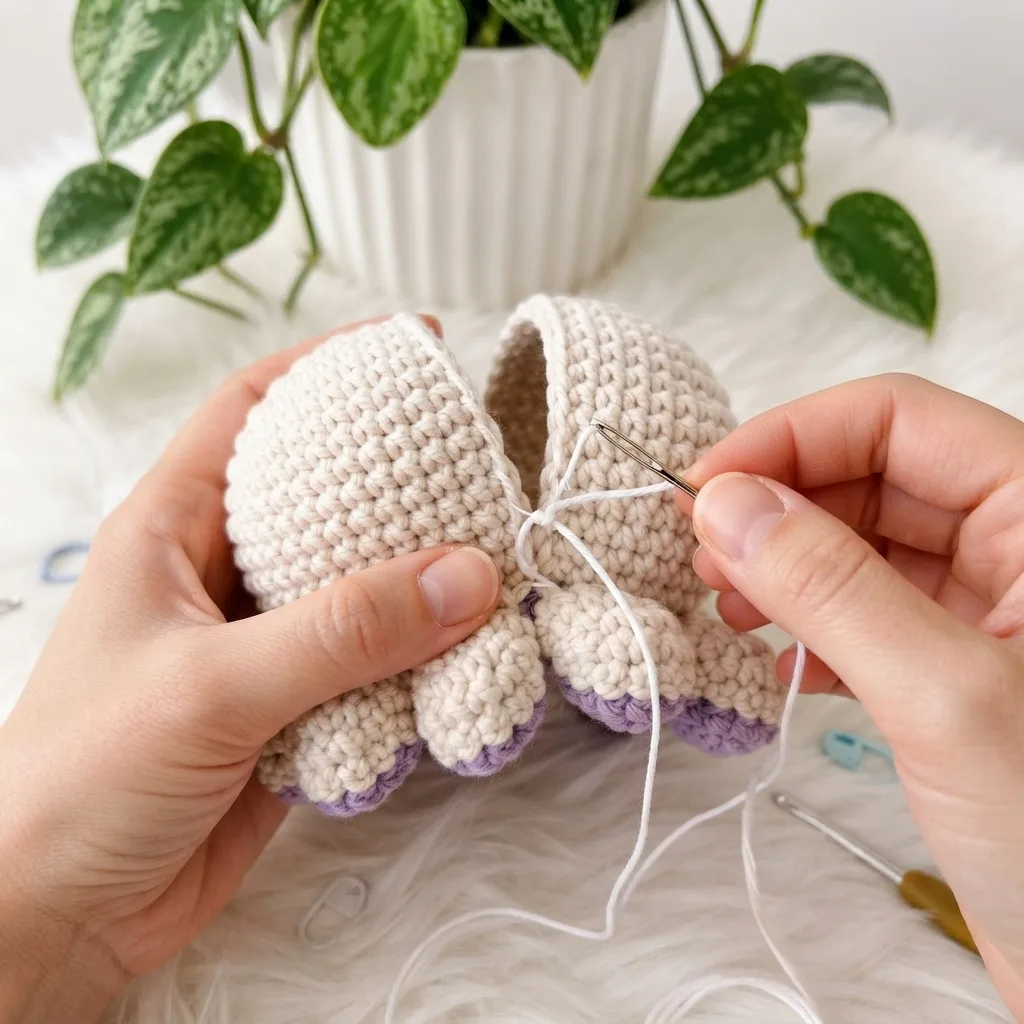
The construction trick is simpler than it looks: you are not building one octopus and adding a second face to it, you are building two complete, identical head-and-tentacle pieces from scratch, then seaming them wrong sides together around the tentacle edge. That is the entire concept, and it is what makes this pattern feel far more impressive than its actual difficulty level.
Why this pattern works so well
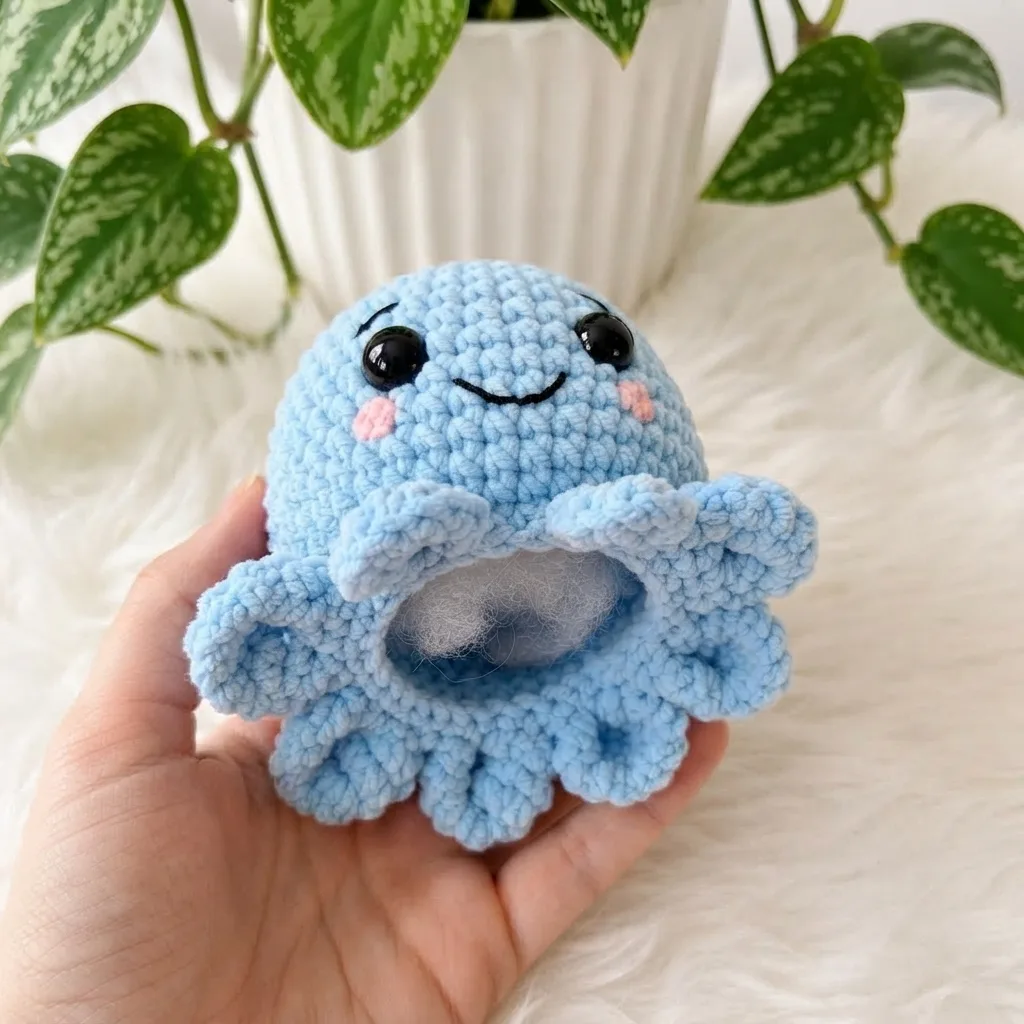
Round 19 is the piece’s signature move. Working back loop only, you skip two stitches, work eight double crochet into the next stitch to fan out a tentacle tip, skip two more stitches, single crochet, and repeat that eight times around. That single round is what turns a plain round head into eight distinct scalloped tentacles, all in one pass, no separate pieces to attach later.
The reversibility is the other half of the appeal. Because both pieces are seamed wrong sides together first through the half-loops of Round 20 and then around the full tentacle perimeter, the toy has no real “back.” It is built to be picked up, turned over, and displayed either way, which is part of why the color pairing matters so much. A deep espresso trim against ivory reads classic, while coral against sky blue reads playful, and either choice changes the whole personality of the finished toy.
Materials You’ll Need
- Plush/velvet yarn (CYCA #6 super bulky), two colors, one for the body and one for the tentacle trim, about half a skein of each. Himalaya Dolphin Baby or YarnArt Dolce work well, or any comparable plush velvet yarn
- G-6 (4 mm) crochet hook
- 16 mm safety eyes, 2 pairs (one pair per side)
- Polyfill fiberfill, light amount
- Stitch marker
- Yarn needle / tapestry needle
- Scissors
- Dental floss or strong thread, for seaming the two halves together
- Black embroidery floss, for the mouth and eyebrows on both sides
Pattern at a Glance
| Item | Details |
| Difficulty | Beginner |
| Time | A weekend |
| Hook | 4 mm (G-6) |
| Size | Approximately 10 cm, about 4 inches |
| Language | EN (US crochet terminology) |
| Abbreviation | Meaning |
| ch | Chain |
| dc | Double Crochet |
| dec | Decrease (invisible decrease) |
| BLO | Back Loop Only |
| inc | Increase (2 sc in same stitch) |
| MR | Magic Ring |
| Rnd | Round |
| sc | Single Crochet |
| sl st | Slip Stitch |
| st(s) | Stitch(es) |
A note before you start: both pieces are worked in a continuous spiral, no joining at the end of rounds unless stated. Use a stitch marker to track the first stitch of every round, since there is no slip stitch join to mark your place otherwise. Gauge is not critical, but tighter tension gives a cleaner fabric that hides the stuffing better, so aim for a firm, closed fabric throughout.
Step-by-Step Instructions
1. Head and Tentacles (Make 2)
| Round | Instructions | Stitches |
| 1 | 6 sc in MR | 6 |
| 2 | inc in each st around | 12 |
| 3 | sc, inc repeat 6 times | 18 |
| 4 | 2 sc, inc repeat 6 times | 24 |
| 5 | 3 sc, inc repeat 6 times | 30 |
| 6 | 4 sc, inc repeat 6 times | 36 |
| 7 | 5 sc, inc repeat 6 times | 42 |
| 8 | sc in each st around | 42 |
| 9 | 6 sc, inc repeat 6 times | 48 |
| 10 to 18 | sc in each st around (9 rounds total) | 48 |
| 19 | BLO: skip 2 sts, 8 dc in next st, skip 2 sts, 1 sc, repeat 8 times | 72 |
| 20 | 2 sc, inc 4 times (working into dc sts), 5 sc, inc 4 times (working into dc sts), repeat 7 times, 3 sc |
Insert the 16 mm safety eyes between rounds 11 and 12, spaced 7 stitches apart, before continuing on to round 12. This step happens on each of the two pieces separately, since every part of this pattern is doubled. Add just a small amount of stuffing to the head after round 20, enough to give it light shape without over-filling it, since too much stuffing will keep the two halves from sitting flat once joined.
2. Assembly
- Finish both head-and-tentacle pieces completely, including safety eyes, embroidery, and light stuffing on each.
- Embroider the mouth and eyebrows onto the face side of both pieces using black embroidery floss.
- Hold both pieces with wrong sides facing each other, aligning the tentacles evenly around the perimeter.
- Using dental floss or strong matching thread threaded onto a yarn needle, seam the two pieces together first through the half-loops of round 20 all the way around.
- Continue seaming around the full outer perimeter of the tentacle edge to secure the join completely.
- Weave in all yarn ends securely.
Practical Tips for a Cleaner Finish
- Keep your tension firm throughout. Plush velvet yarn has a lot of loft, and a tight gauge keeps the fabric from gaping between stitches. If you can see stuffing through your stitches, go down half a hook size.
- Mark round 19 before you start it. The BLO tentacle round is the trickiest part of this pattern, so place a stitch marker in the back loop of the first stitch you will work into. Slipping into the front loop by accident here would change the finished look of the tentacle edge significantly.
- Don’t over-stuff. The magic of this toy is that it flips and lies flat, and too much fiberfill will create a stiff, lumpy shape that resists the natural drape of the tentacle section. A palm-sized handful per side is plenty.
- Use dental floss for seaming, seriously. Regular yarn, especially plush velvet, can fray or pull unevenly when used to sew two amigurumi pieces together under tension, while dental floss is invisible once woven in, incredibly strong, and glides smoothly through plush fabric.
- Choose your color pair thoughtfully, since the tentacle trim color is what you will see most prominently when the toy is displayed. A deep espresso brown against ivory reads classic and cozy, while coral against sky blue reads playful and modern.
Frequently Asked Questions
Can I use a different yarn than the recommended plush velvet?
The pattern is written for plush/velvet super bulky (CYCA #6) yarn like Himalaya Dolphin Baby or YarnArt Dolce, and any comparable plush velvet yarn will work. The tighter tension guidance in the tips section matters most if you do substitute, since a looser or less lofted yarn will show stuffing more readily through the stitches.
How do I keep the tentacles even in Round 19?
Place a stitch marker in the back loop of the first stitch before you start the round, since this is worked in back loop only and it is easy to slip into the front loop by mistake. Working into the wrong loop here would visibly change the shape of the finished tentacle edge, so marking your starting point is worth the extra few seconds.
Do I really need to use dental floss for seaming?
It is strongly recommended. Regular yarn, especially plush velvet, tends to fray or pull unevenly when used to seam two amigurumi pieces together under tension, while dental floss stays strong, glides smoothly through the plush fabric, and disappears once woven in.
What is the finished size of this octopus?
Approximately 10 cm, or about 4 inches, once both pieces are joined and lightly stuffed.
Give it a try. Two identical pieces, one clever seam, and a toy that never really has a “back” to hide. If you make your own, I would love to hear how you picked your color pairing, and whether Round 19 gave you any trouble the first time through.