
Rosewood Floral Granny Square Cardigan Crochet Pattern
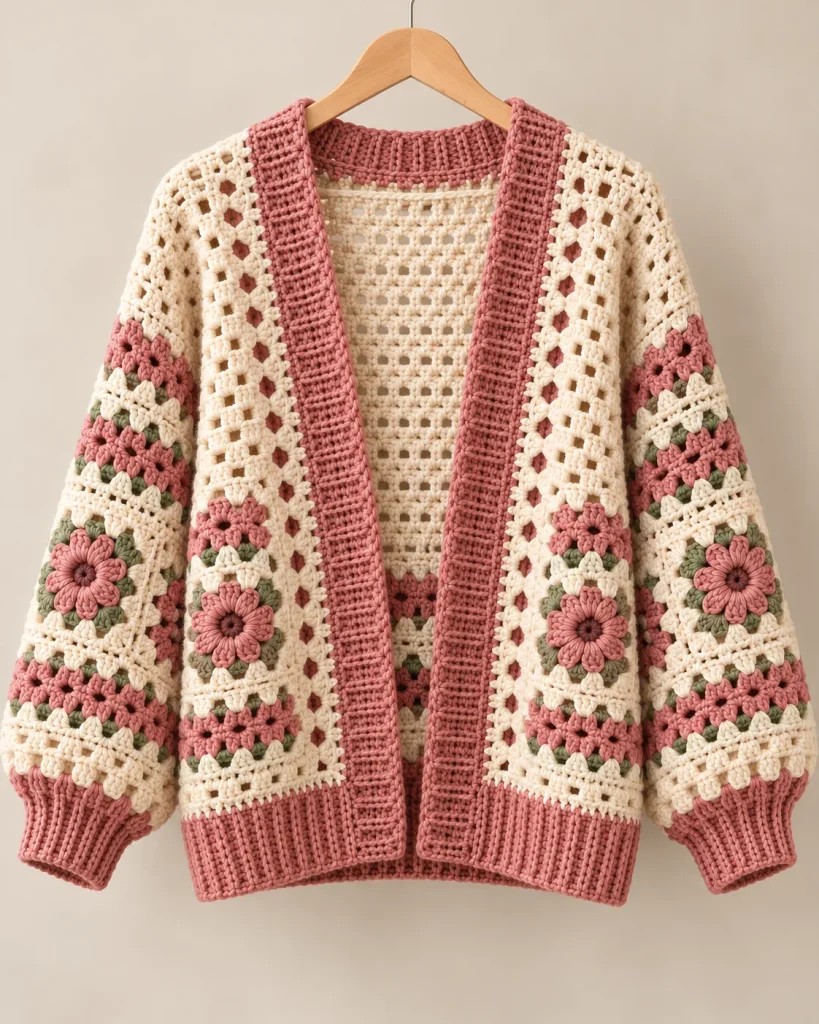
There are some crochet projects that feel special before they are even finished, and this floral granny square cardigan is definitely one of them.
The combination of a soft cream mesh body, dusty rose ribbing, little sage-green accents, and floral granny squares gives it such a cozy handmade look. I especially love how the flowers break up the open mesh without making the cardigan feel too heavy. It has that slightly vintage, cottage-inspired feeling while still being easy to wear with jeans, dresses, or a simple neutral outfit.
This version is designed with an oversized drop-shoulder fit, approximately 24 inches (61 cm) long, and is intended as a starting size for a 34–40 inch (86–102 cm) bust. Because this is an original made-from-scratch design and several stitch counts are intentionally approximate, I strongly recommend making a gauge swatch and checking your measurements as you work rather than relying on the stitch counts alone.
Make It in Your Own Colors
The cream, dusty rose, and sage combination gives this cardigan a soft romantic look, but you can completely change the personality of the design by changing the palette.
You could try cream with dusty blue flowers, oatmeal with rust and olive, soft gray with blush pink, or even a darker background with colorful flower motifs.
The most important thing is to keep the same yarn weight and match your gauge before beginning the full cardigan. Changing yarn fiber or thickness can noticeably change the size and drape of an oversized garment.
Quick Pattern Details
| Detail | Information |
| Pattern | Rosewood Floral Granny Cardigan |
| Skill Level | Advanced |
| Fit | Oversized, drop shoulder |
| Bust Range | Approx. 34–40 in / 86–102 cm |
| Finished Length | Approx. 24 in / 61 cm |
| Sleeve Seam | Approx. 18 in / 46 cm |
| Estimated Time | 40–55 hours |
| Main Hook | 6 mm |
| Ribbing Hook | 5 mm |
| Construction | Flat panels, seamed body, floral motifs and ribbed finishing |
| Terminology | US crochet terms |
The cardigan is constructed from a cream mesh back, two front panels, two sleeves, floral motifs, and contrasting ribbed bands. The pieces are blocked before assembly and then sewn together for the relaxed drop-shoulder silhouette.
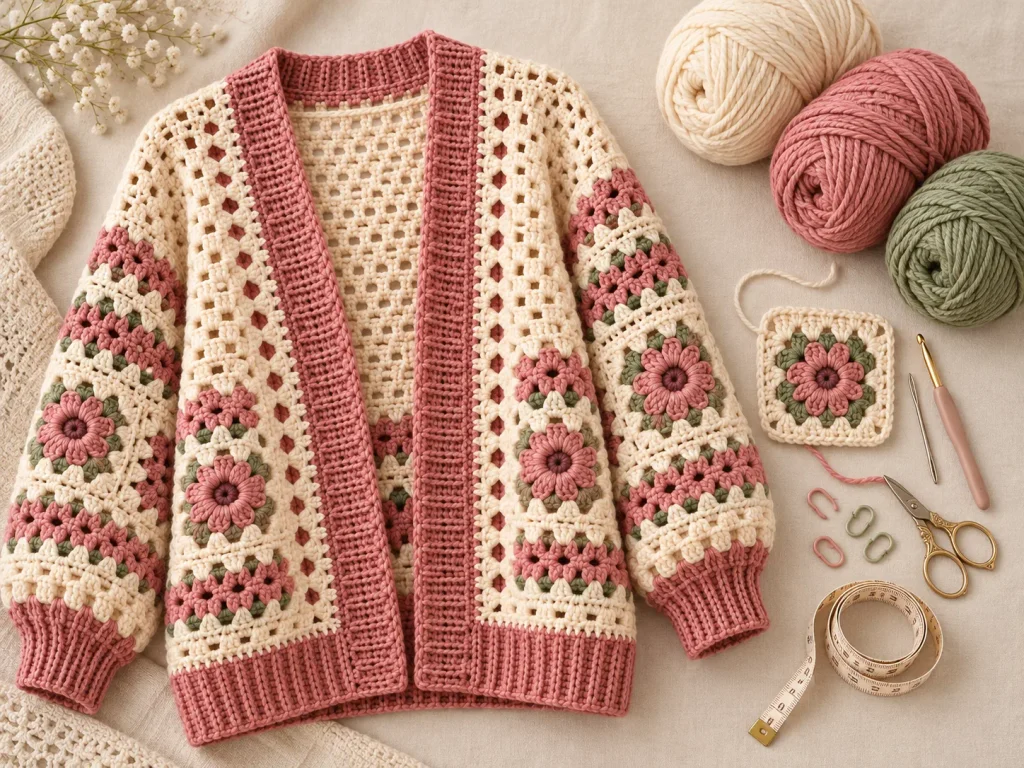
Materials You’ll Need
- Bulky / weight 5 soft wool-blend or acrylic-blend yarn
- Approx. 700–850 g cream
- Approx. 350–450 g dusty rose
- Approx. 60–80 g sage green
- 6 mm crochet hook for the main fabric and motifs
- 5 mm crochet hook for cuffs and ribbed bands
- Yarn needle
- Stitch markers
- Measuring tape
- Blocking pins
The quantities in this design are estimates, so having a little extra yarn is a good idea, especially if you plan to lengthen the cardigan or add more floral motifs.
Abbreviations
- MR – Magic ring
- ch – Chain
- sc – Single crochet
- hdc – Half double crochet
- dc – Double crochet
- cl – Cluster
- sp – Space
- FLO / BLO – Front / Back loop only
- sl st – Slip stitch
- st(s) – Stitch(es)
- FO – Fasten off
- CC – Color change
Gauge
With the 6 mm hook, the suggested starting gauge for the mesh fabric is:
10 stitches and 8 rows = 4 × 4 in (10 × 10 cm)
The floral motifs are designed to finish at approximately:
6 in / 15 cm square after blocking.
For a garment like this, I would not skip the swatch. The cardigan is intentionally oversized, but there is still a big difference between a relaxed fit and a garment that grows several inches larger than expected.
Wash or block your swatch in the same way you plan to treat the finished cardigan before taking your final measurement.
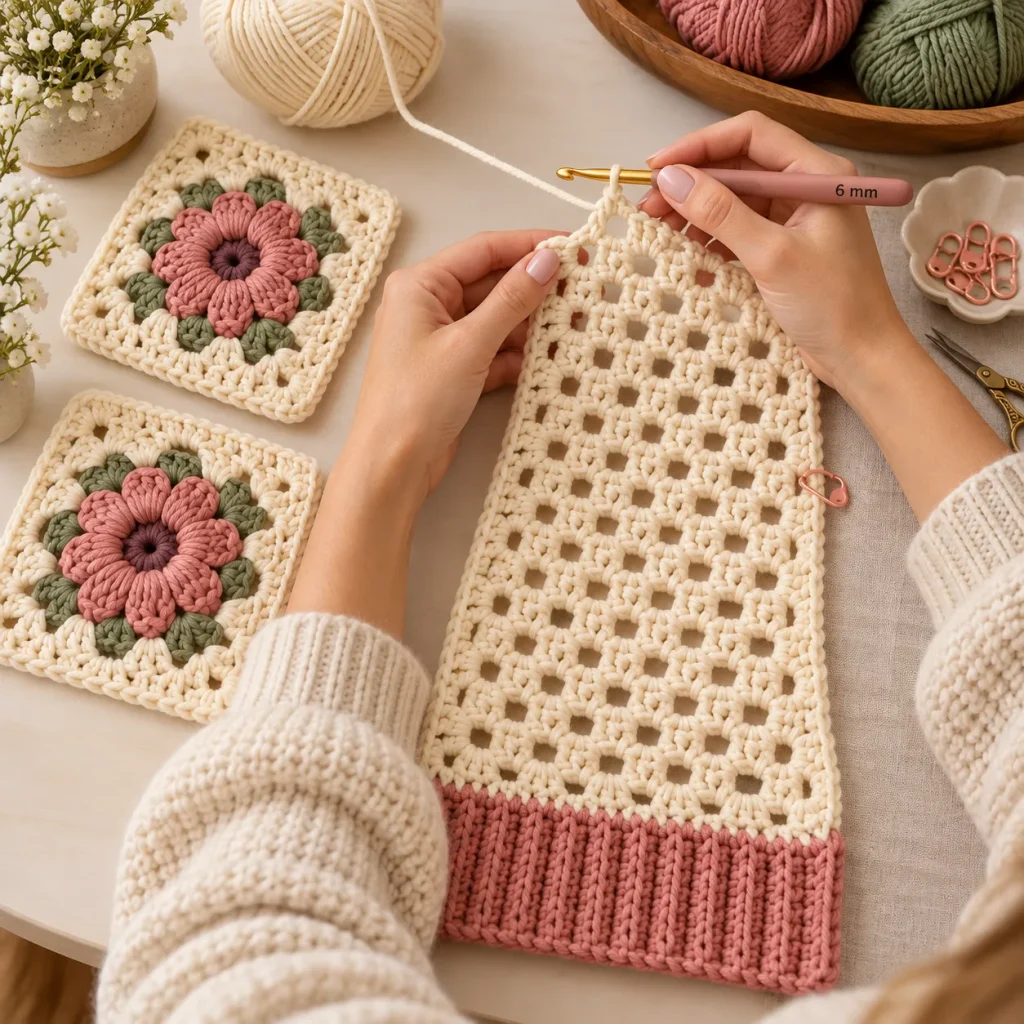
Mesh Stitch Pattern
The cream body uses a simple open mesh repeat.
Work over a multiple of 2 stitches + 1.
Row 1
Dc in the 4th ch from the hook.
Repeat:
ch 1, skip 1, dc in next stitch
across, ending with a dc in the final chain.
Row 2
Ch 4, which counts as dc + ch 1, and turn.
Skip the next stitch and dc in the next dc.
Continue:
ch 1, skip 1, dc in next dc
across.
Repeat Row 2 for the mesh pattern.
The openness of this stitch is one of the things that makes the cardigan feel lighter than you might expect from bulky yarn. Mesh crochet is commonly used when a garment needs more drape and breathability rather than a dense fabric.
Piece 1: Floral Granny Square Motifs
The floral motifs bring all three colors together and are used on the fronts and sleeves.
The design calls for approximately 10 motifs:
- 2 for each front
- about 3 for each sleeve
You can adjust the exact number depending on your preferred layout.
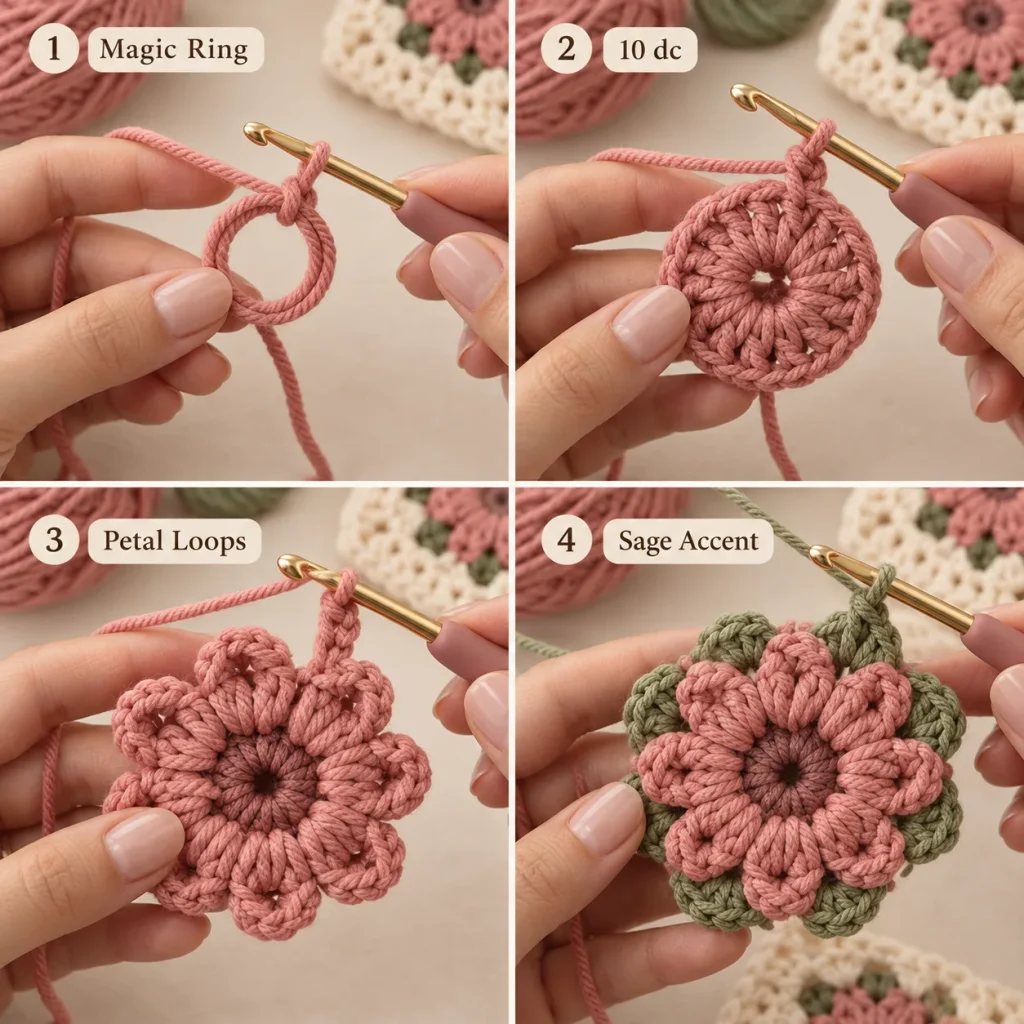
Flower Center
With dusty rose, begin with a magic ring.
Work:
10 dc into MR
Join with a sl st.
Petal Round
Continue in dusty rose:
ch 3, sl st into next dc
Repeat around to create 10 petal loops.
Sage Accent
Join sage yarn behind the petals and work a small green round using sc and ch spaces.
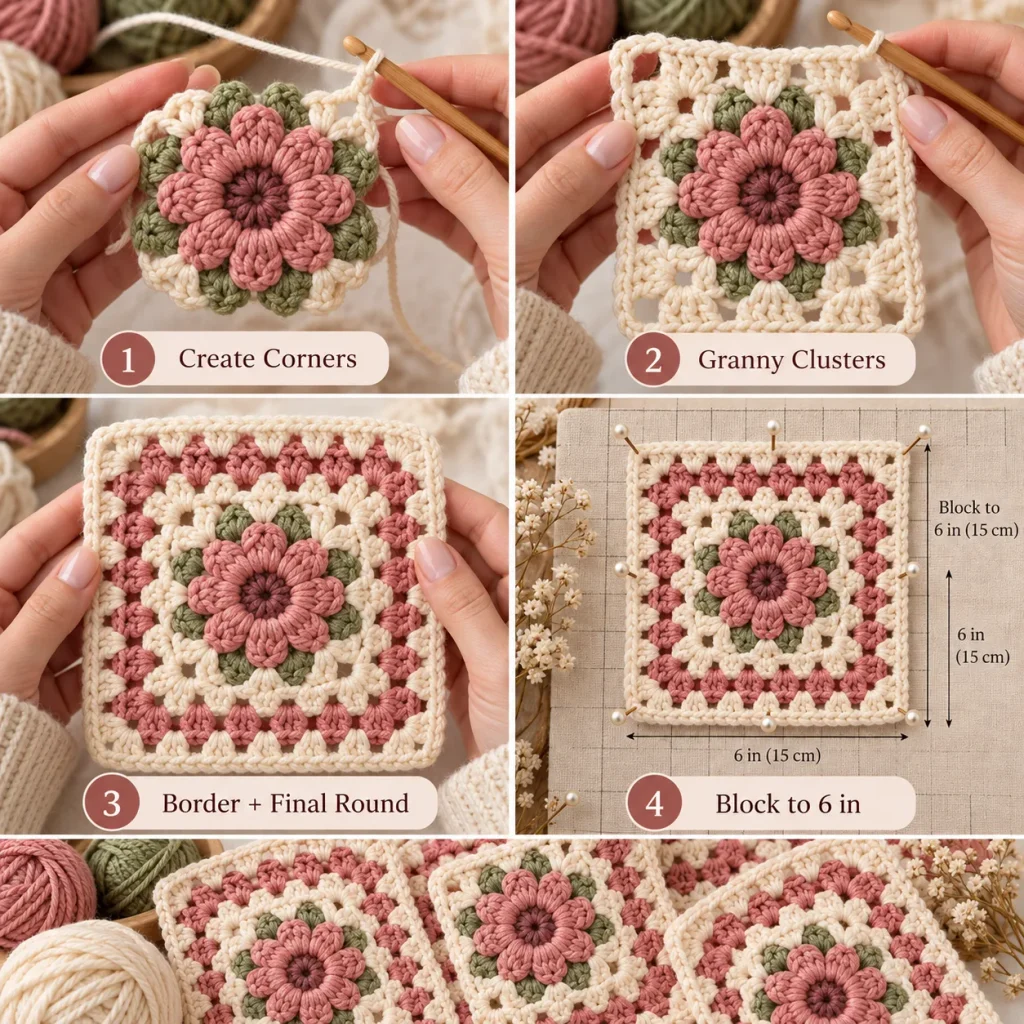
Square the Motif
This is the one area of the original sheet I would treat as a design stage rather than a locked stitch count.
The supplied squaring instructions do not divide perfectly around the 10-petal base, so do not force the listed clusters if the motif starts to cup or twist.
Instead, distribute four clear corner spaces evenly around the flower, work cream granny-style clusters between them, and adjust the spacing until the motif lies flat.
Finish with a dusty-rose border and a final cream round.
Block every finished motif to approximately 6 in / 15 cm square before attaching it to the cardigan.
That blocking step matters because all of your motifs need to finish at approximately the same size before assembly.
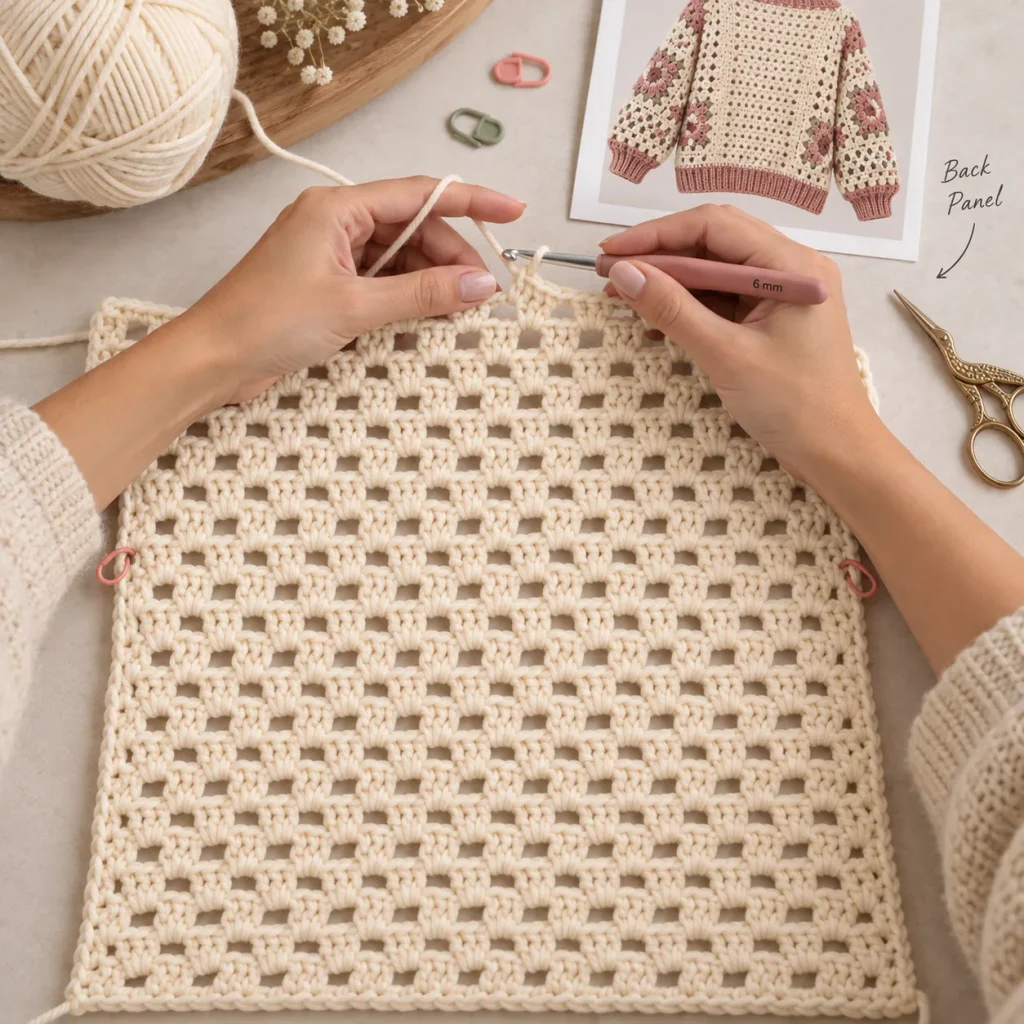
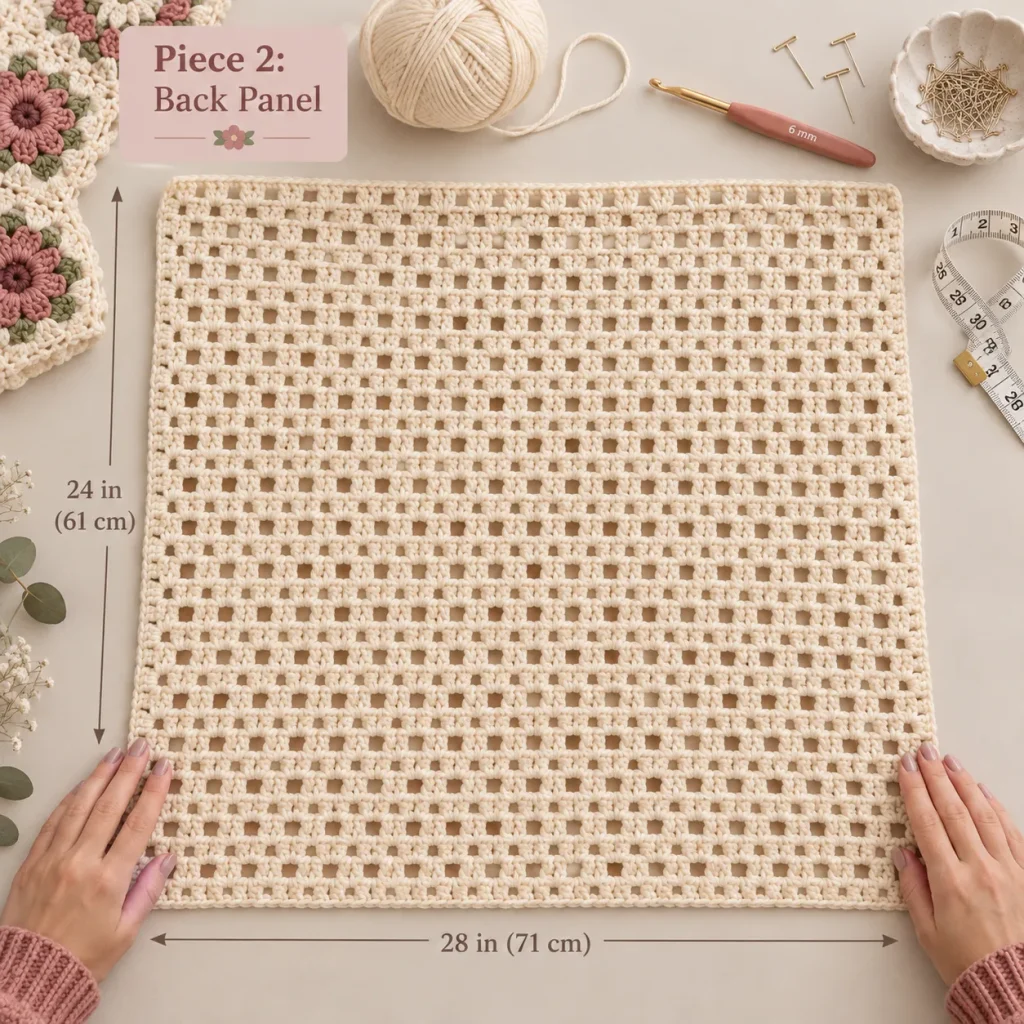
Piece 2: Back Panel
Using cream and the 6 mm hook:
Ch approximately 71.
Work the mesh stitch pattern until the panel measures approximately:
- 28 in / 71 cm wide
- 24 in / 61 cm long
The sheet suggests approximately 48 rows, but your finished measurement is more important than the row number because individual gauge can vary.
Fasten off.
Lay the panel flat before continuing and check that both side edges are straight.
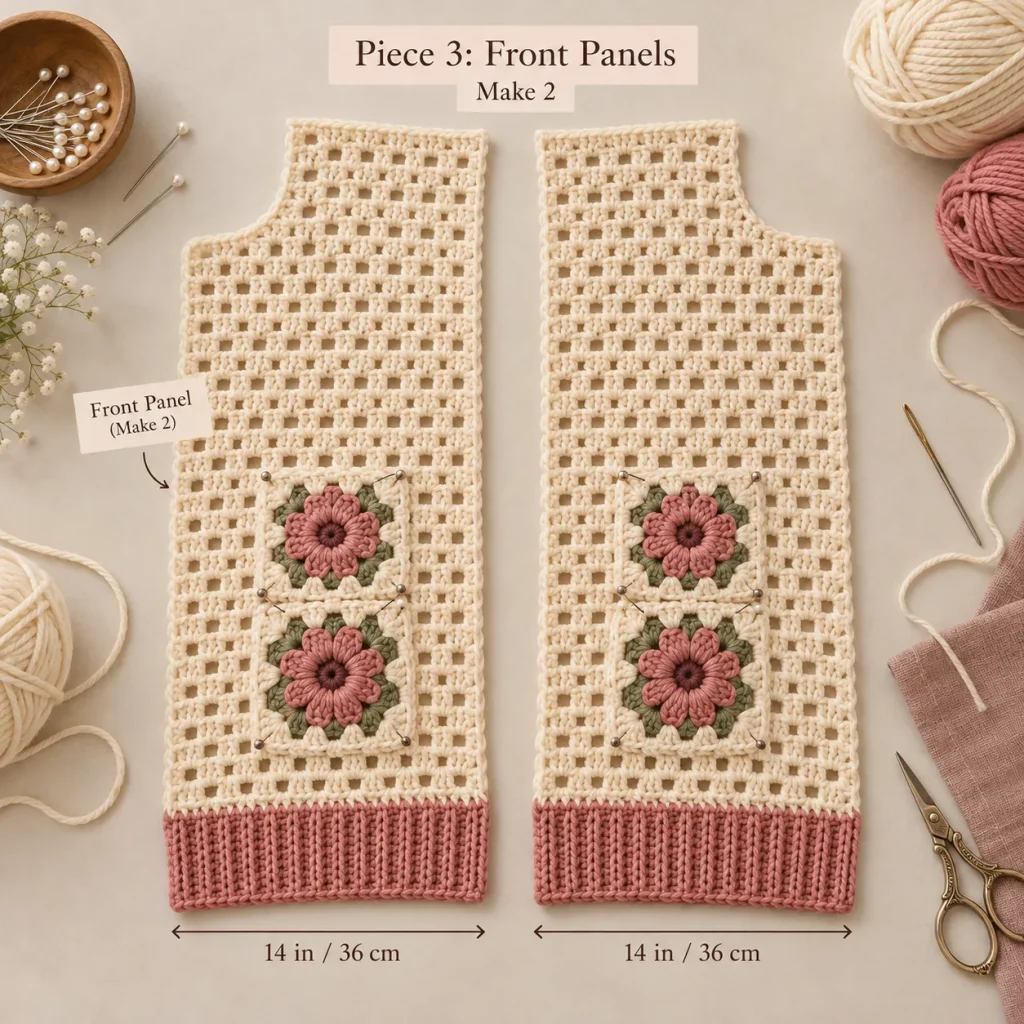
Piece 3: Front Panels — Make 2
With cream:
Ch approximately 37.
Work in the same mesh stitch pattern until each front matches the height of the back panel.
The original design uses approximately 48 rows.
Each front should measure around 14 in / 36 cm wide before the front band is added.
Add the Floral Motifs
Position two blocked floral motifs vertically toward the lower portion of each front panel.
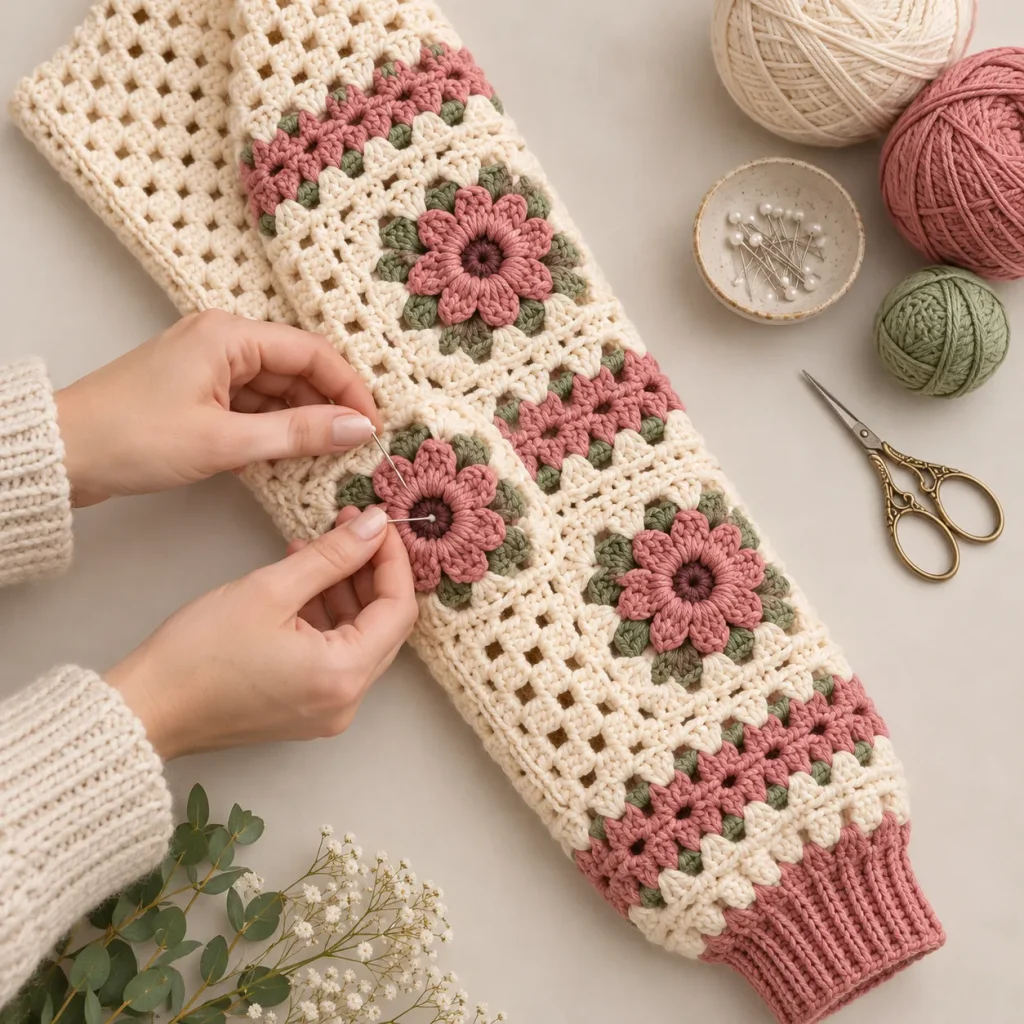
Rather than treating them as structural insets, I recommend sewing them securely onto the finished mesh, because that is the actual construction method described in the source sheet.
Pin the motifs first so you can compare both fronts before sewing anything permanently.
I like to step back and look at the whole cardigan at this stage. A tiny placement difference can be surprisingly noticeable once both fronts are hanging side by side.
Piece 4: Sleeves — Make 2
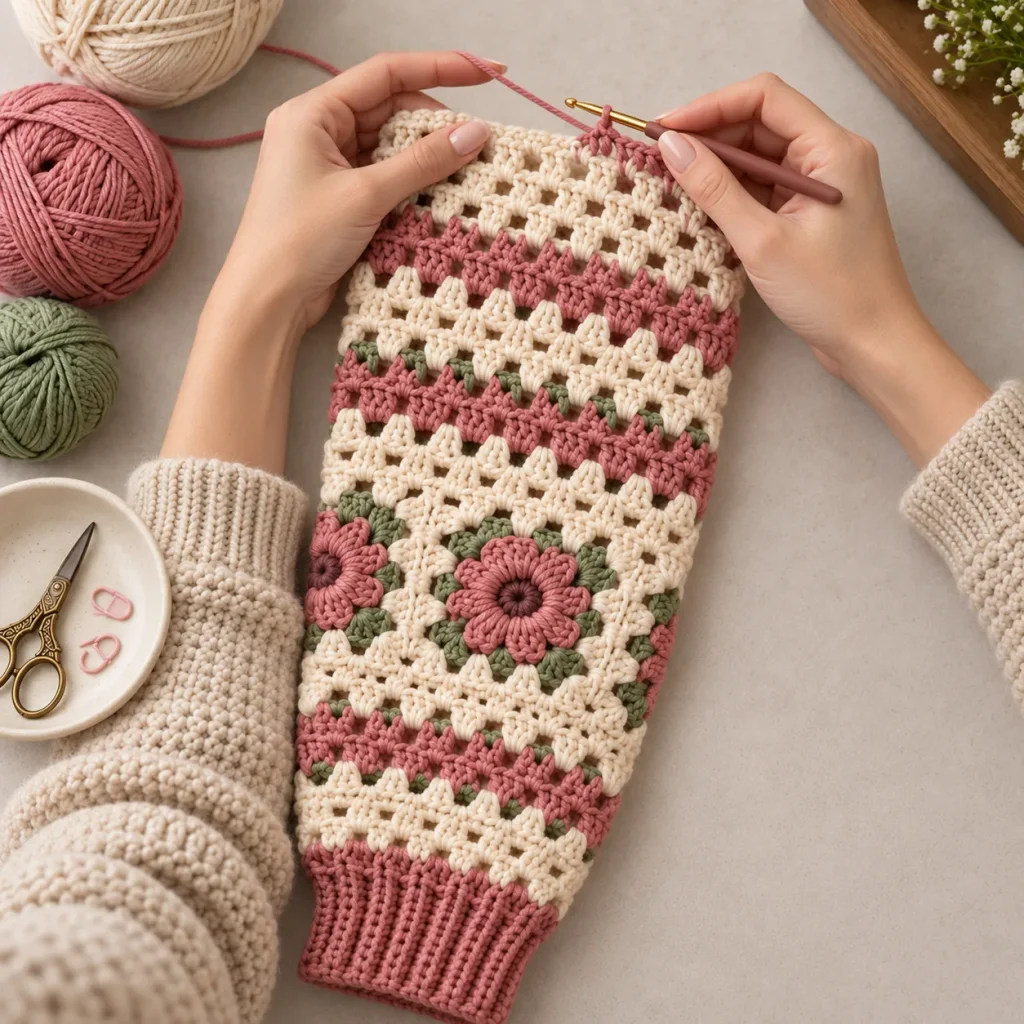
The sleeves are worked flat and seamed afterward.
Begin with approximately:
ch 47
for an upper-arm width around 18 in / 46 cm.
Work the first six rows in a granny-stripe style, using groups of 3 dc with ch-1 spaces.
Alternate cream and dusty rose approximately every two rows, adding a small sage accent row around the color changes if desired.
Continue working the sleeve in granny stripe or coordinating open mesh while gradually tapering toward the wrist.
The design suggests reducing approximately one repeat every eighth row until about 33 stitches remain near the cuff.
Because those sleeve counts are design estimates, try the sleeve against your arm measurement before finishing it.
The important measurements are:
- comfortable upper arm
- approximately 18 in / 46 cm sleeve seam
- wrist edge small enough to ease into the cuff
Once the sleeve is complete, seam the underside.
Position 2–3 floral motifs along the outside of each sleeve and sew them securely in place.
Piece 5: Ribbed Front Bands and Hem
Switch to dusty rose and the 5 mm hook.
Front and Neck Band
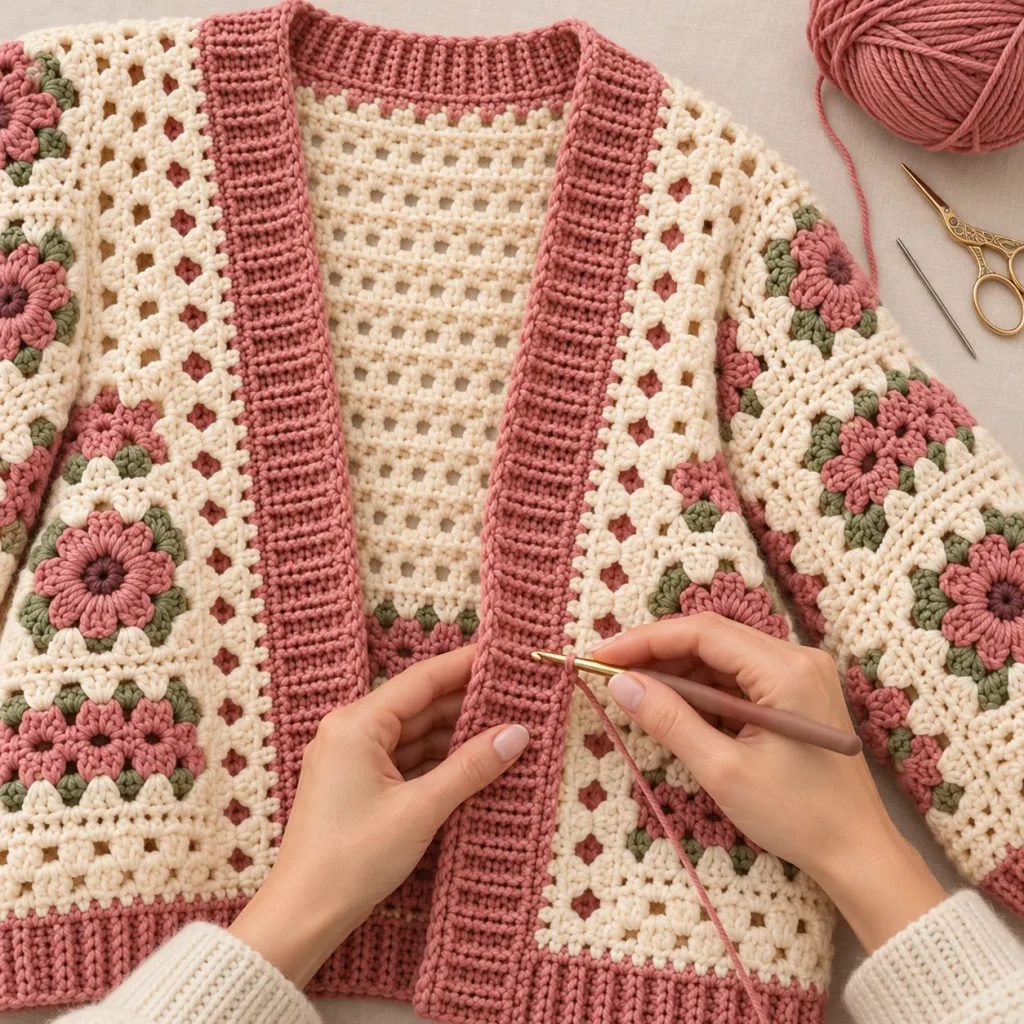
Join yarn at one lower front corner and work sc evenly:
- up the first front
- around the neckline
- down the opposite front
The sheet suggests approximately 120–130 stitches, but even spacing is more important than forcing an exact number.
Work approximately 8 rows of sc BLO to create the contrasting ribbed band.
Hem Band
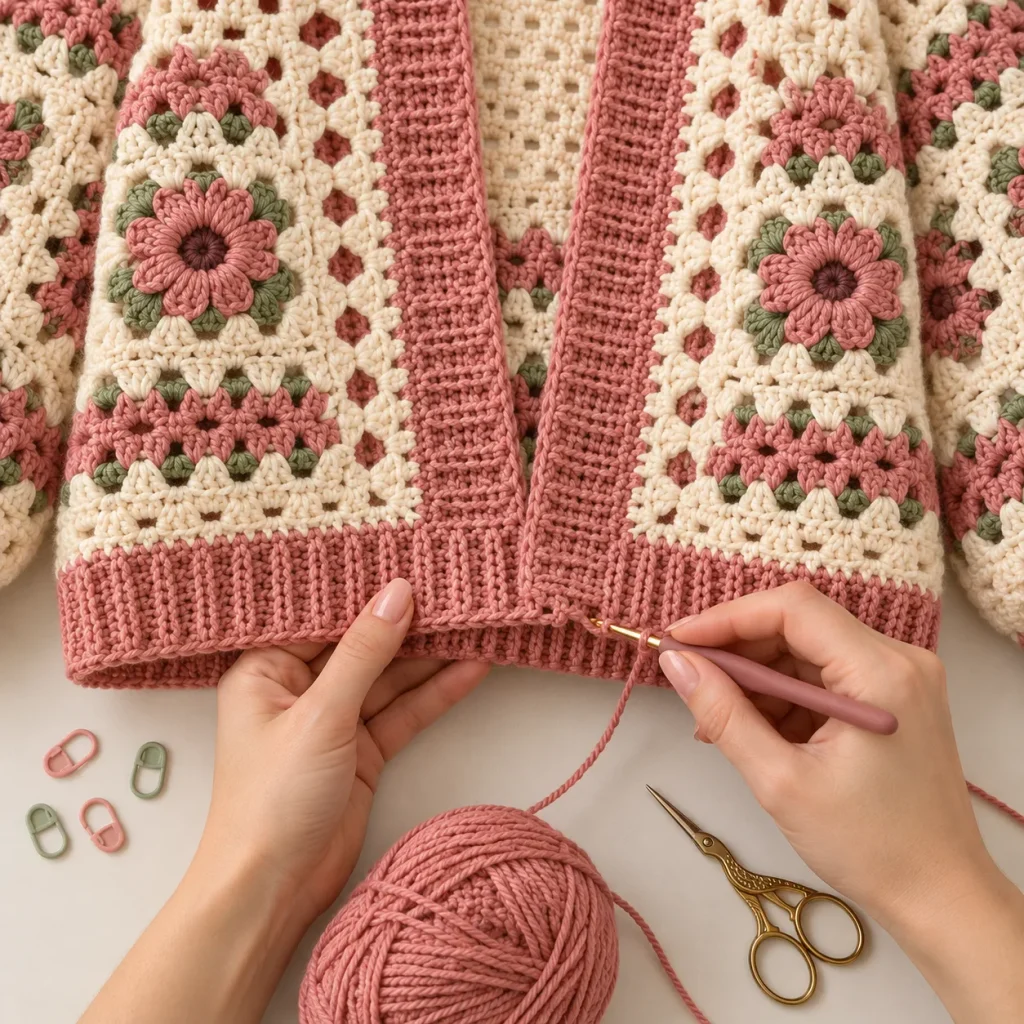
Pick up stitches evenly across the bottom edge.
Work approximately 8 rows of sc BLO in dusty rose.
Keep checking that the bands lie flat. If the cardigan begins to flare or pull inward, adjust the number of picked-up stitches before continuing.
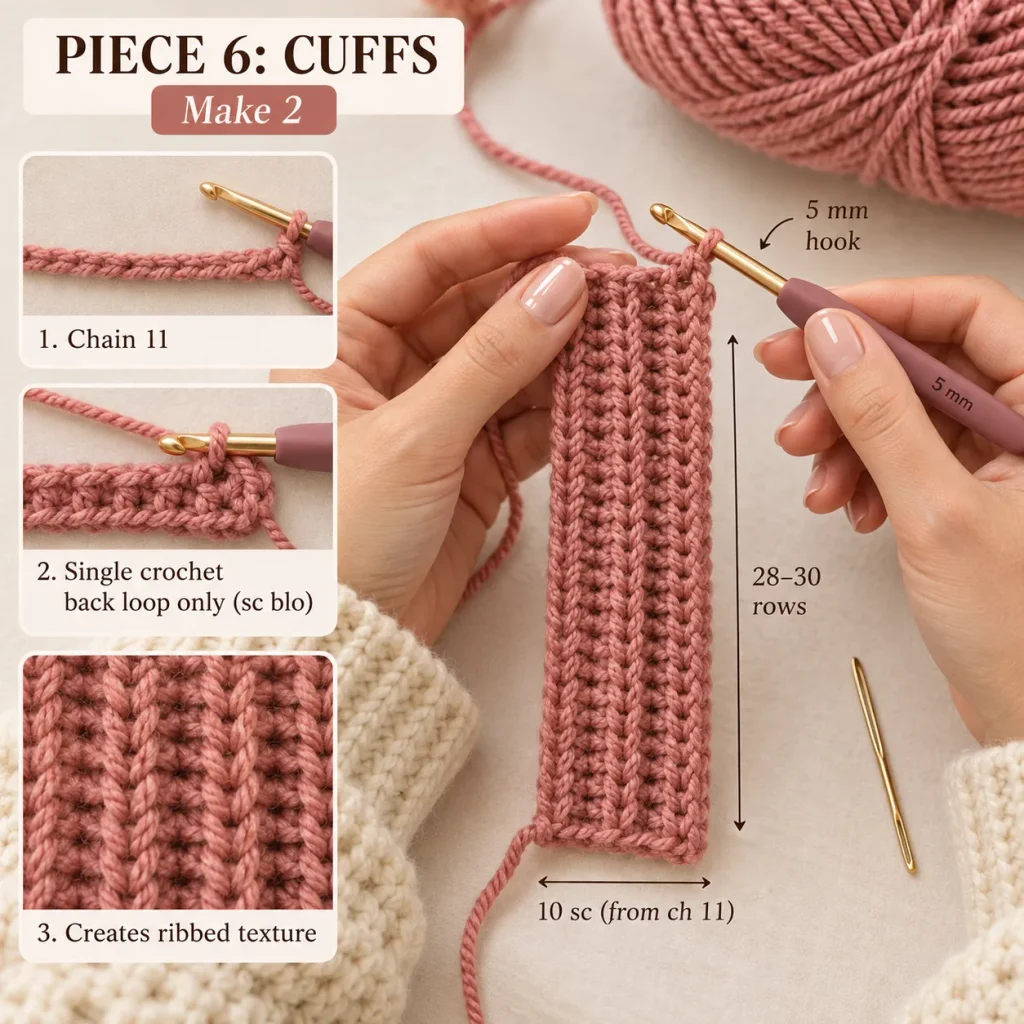
Piece 6: Cuffs — Make 2
Using dusty rose and the 5 mm hook:
Ch 11.
Row 1
Sc in the second chain from hook and across.
You should have 10 sc.
Following Rows
Ch 1, turn and work:
sc BLO across
for approximately 28–30 rows, or until the ribbed strip fits comfortably around the wrist.
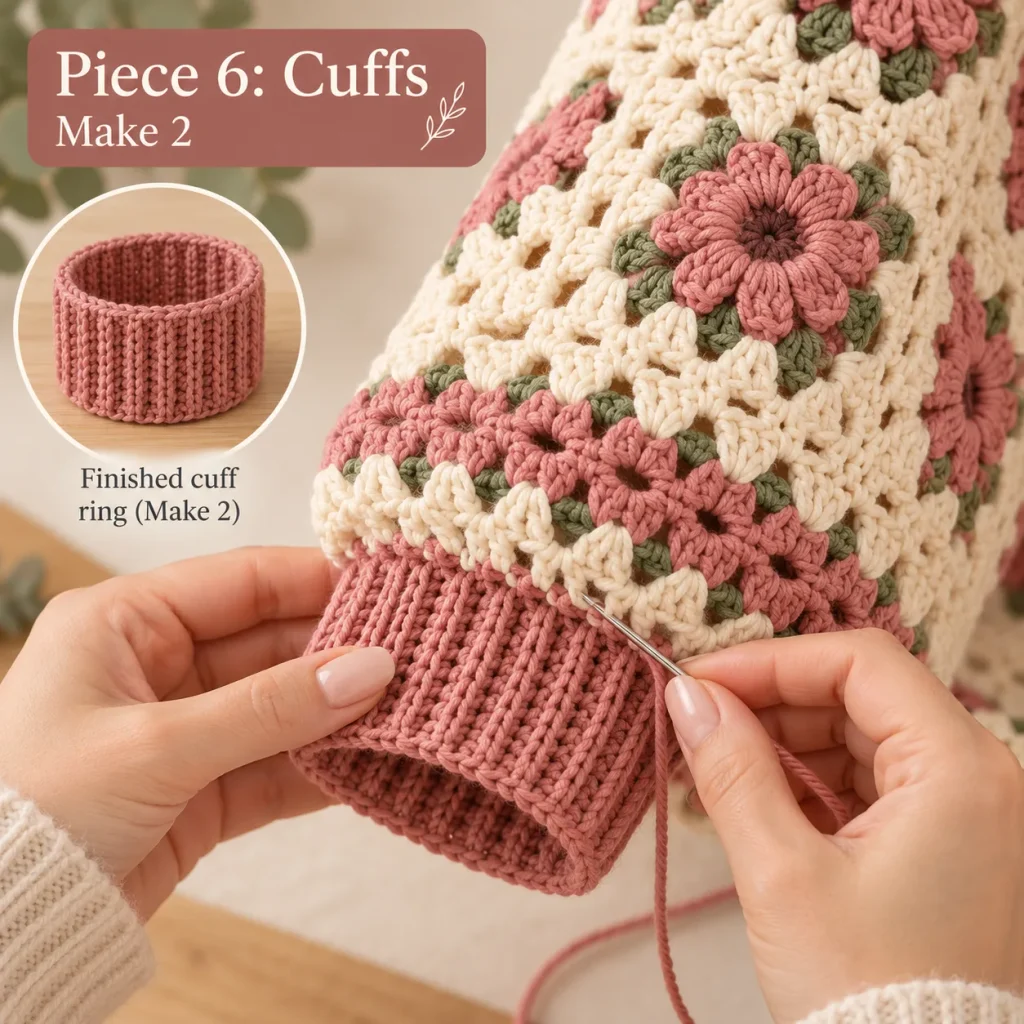
Join the short ends to make a ring.
Sew the cuff to the sleeve edge, easing the wider sleeve fabric evenly into the smaller cuff without creating large gathers.
Assembly
This is the stage where all those separate pieces finally start looking like a cardigan.
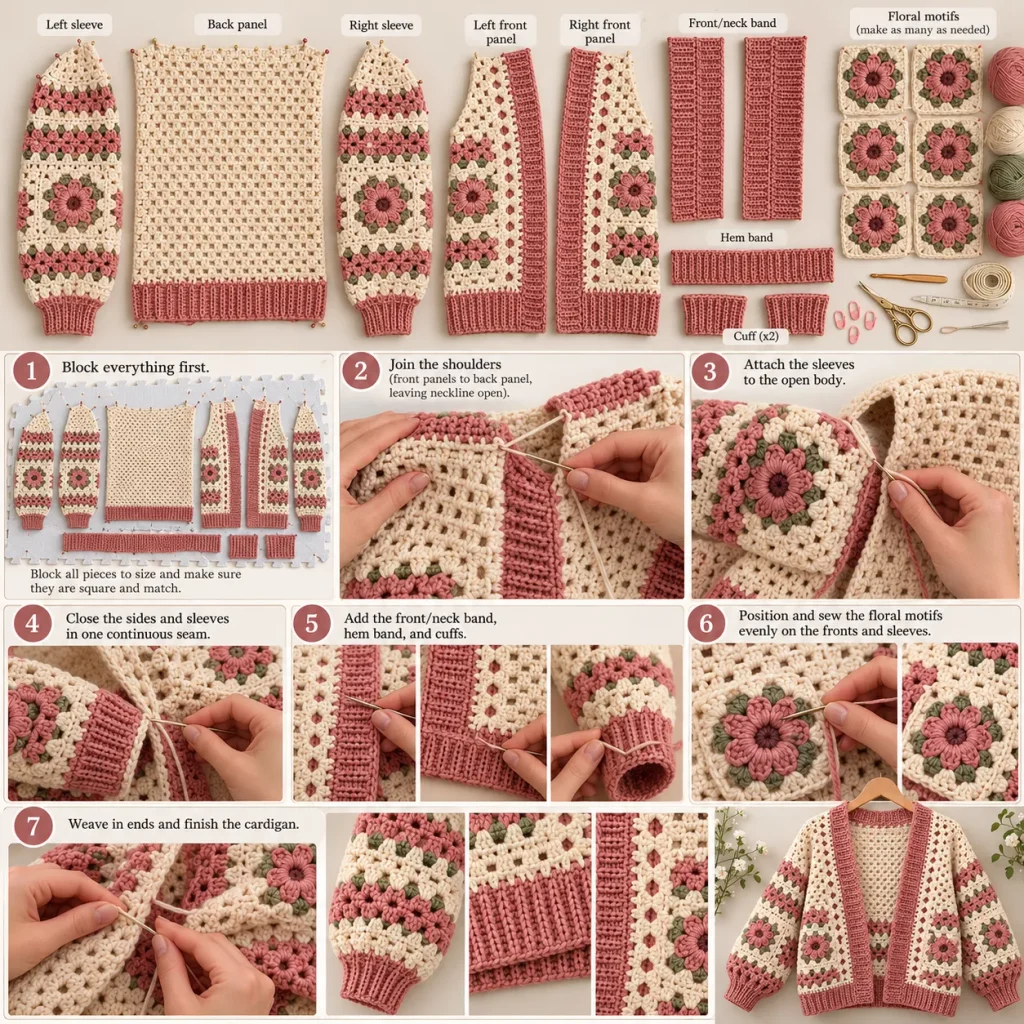
1. Block Everything First
Block:
- back panel
- both fronts
- both sleeves
- all floral motifs
Make sure matching pieces finish at matching measurements.
2. Join the Shoulders
Place the front panels against the back panel and sew approximately 5 in / 13 cm at each shoulder.
Leave the center open for the neckline.
3. Attach the Sleeves
With the body still open and flat, center each sleeve along the drop-shoulder edge.
Pin first, then seam the sleeve to the body.
4. Close the Sides and Sleeves
Fold the cardigan so front and back align.
Sew from the lower hem upward, continue through the underarm, and then along the sleeve seam.
5. Add the Bands and Cuffs
Attach the dusty-rose front/neck band, hem band, and cuffs.
6. Position the Floral Motifs
Arrange the blocked flowers on the two fronts and sleeves.
Compare both sides before sewing.
Once you are happy with the layout, stitch around the motifs securely so the edges stay flat against the mesh.
7. Finish the Cardigan
Weave in every remaining yarn end and give the cardigan one final gentle block.
The original assembly sequence follows this same basic order: block, join shoulders, attach sleeves, seam the body, add bands and cuffs, attach motifs, and finish.
A Few Fit Notes Before You Finish
Because this cardigan is intentionally oversized, it is much better to work toward measurements than blindly follow every estimated stitch count.
Before permanently seaming the garment, check:
- overall back width
- front-panel width
- shoulder opening
- sleeve length
- upper-arm circumference
- finished cardigan length
If you want more ease, add width to the body panels.
For less volume, reduce the panel width while keeping the mesh repeat intact.
And if you are changing yarn, make another swatch rather than assuming the same chain count will produce the same size.
Final Thoughts
This cardigan is definitely not a one-evening project, but I think that is part of its charm.
You get several different crochet experiences in one piece: simple mesh rows, colorful floral motifs, granny-style sleeves, textured ribbing, and finally the satisfying assembly stage where everything comes together.
The cream keeps the cardigan soft and wearable, while the dusty rose and sage flowers add just enough color to make it feel special.
And because the floral placement and color palette are so easy to personalize, two cardigans made from the same basic design could still look completely different.
Take your time with the swatching, block your motifs before assembly, and use the measurements as your guide whenever the estimated counts and your actual fabric do not agree. That little bit of patience at the beginning will give you a much more polished cardigan at the end.