
Cream and Pink Flower Crochet Cardigan Pattern
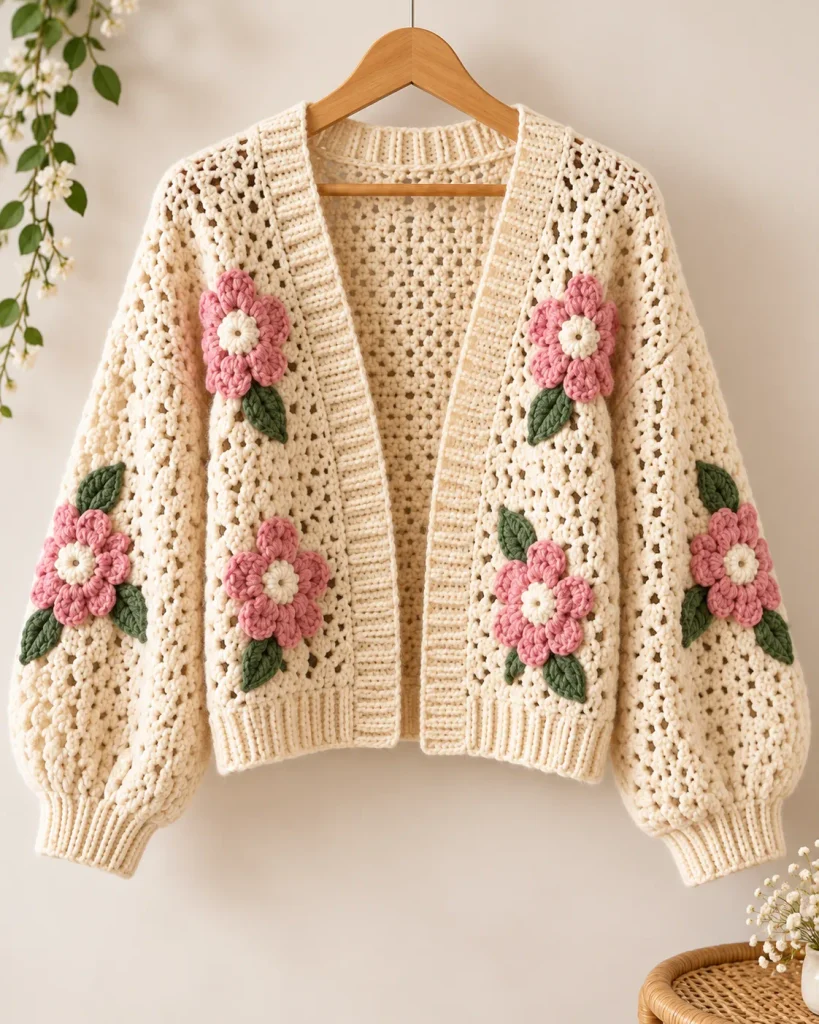
There is something so lovely about a handmade cardigan that feels soft, feminine, and a little romantic without looking too delicate to actually wear. This cream crochet cardigan has exactly that balance. The open mesh fabric keeps it light, while the ribbed edging gives the shape a clean finish, and the pink flowers with green leaves make the whole piece feel special.
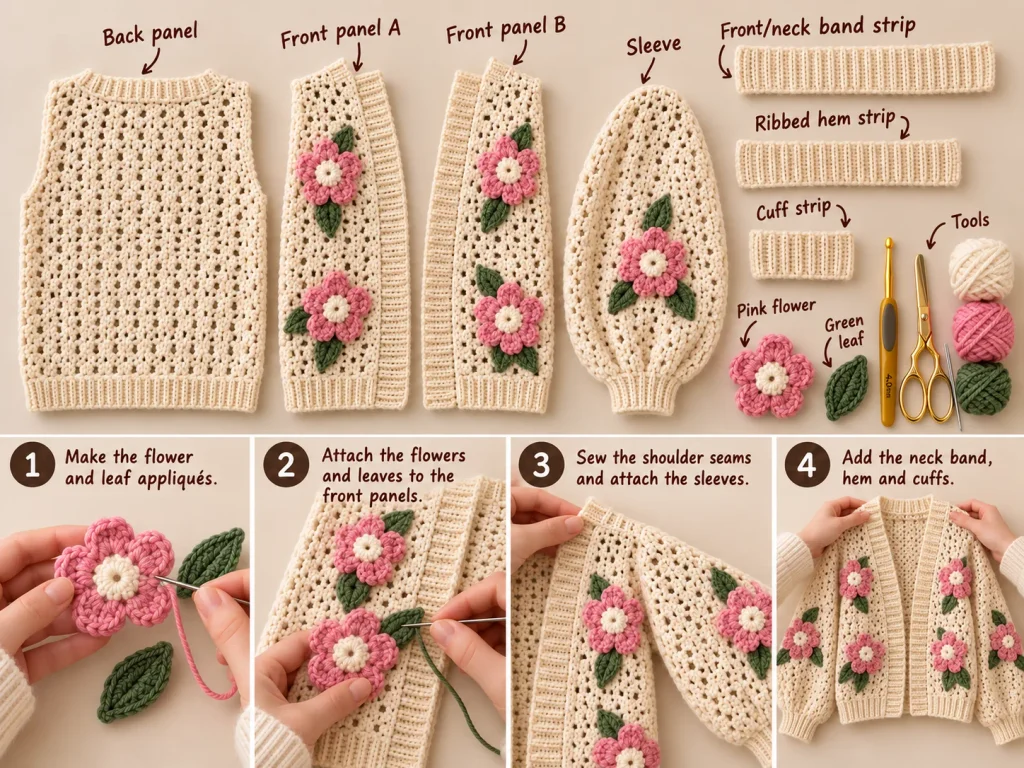
What I like most is that the cardigan itself is fairly simple in construction. It is made from flat panels, then the ribbing and floral appliqués are added afterward. That means you can focus on one stage at a time instead of trying to manage shaping, texture, and decoration all at once.
The finished cardigan has a relaxed open-front shape with soft floral details on the fronts and sleeves.
This pattern is designed for a women’s medium with a relaxed fit. It suits a body bust of about 90–96 cm (35.4–37.8 in) and finishes at about 107 cm (42.1 in) around the chest, giving 11–17 cm (4.3–6.7 in) of positive ease. The finished length is about 61 cm (24 in). I would allow around 25–35 hours for the full project, including the flowers, leaves, ribbing, assembly, and finishing.
Quick Pattern Details
| Detail | Information |
| Skill Level | Intermediate |
| Size | Women’s M, relaxed fit |
| Body Bust | 90–96 cm / 35.4–37.8 in |
| Finished Chest | 107 cm / 42.1 in |
| Finished Length | 61 cm / 24 in |
| Sleeve Length | 43.5 cm / 17.1 in |
| Time to Make | Approx. 25–35 hours |
| Construction | 5 flat panels + separate ribbing + floral appliqués |
| Terminology | US crochet terms |
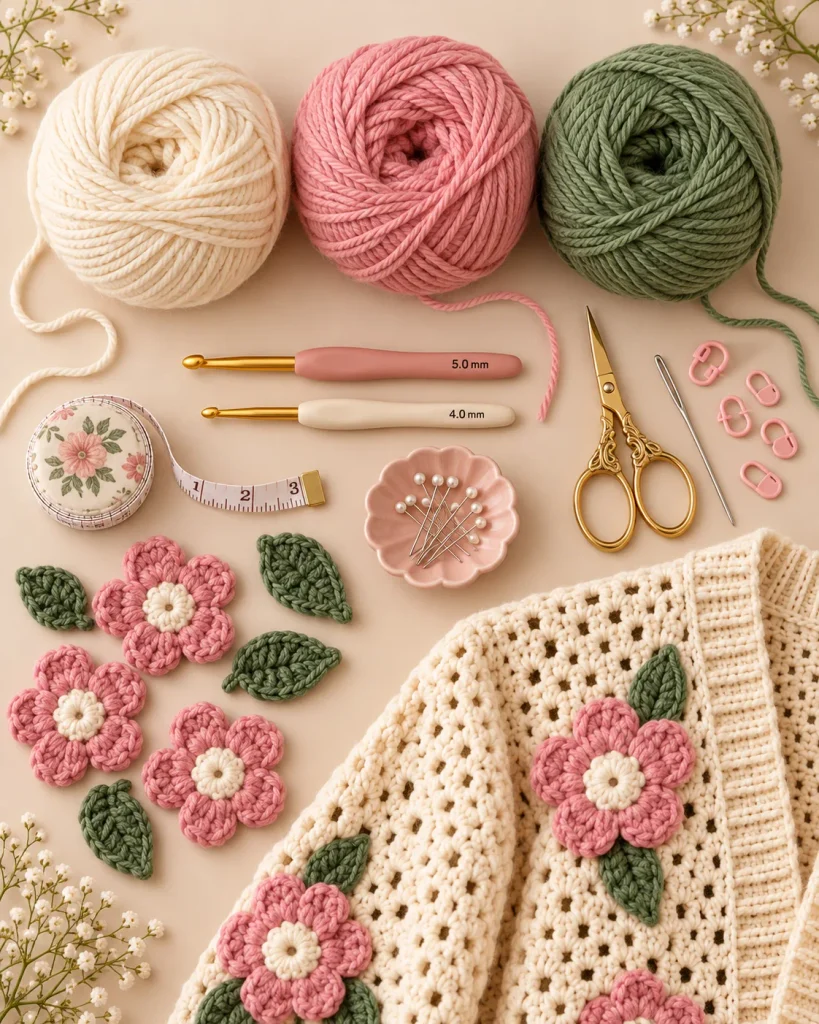
Materials
- Worsted / medium weight 4 yarn
- Cream: about 700 g / 1,400 m; 800 g / 1,600 m recommended for swatching and tension allowance
- Dusty rose pink: about 60 g / 120 m
- Sage or muted forest green: about 30 g / 60 m
- 5 mm hook for the main fabric, or size needed to meet gauge
- 4 mm hook for ribbing and appliqués
- Yarn needle
- Scissors
- Measuring tape
- Removable stitch markers
- Pins
- Blocking surface and rustproof pins
The cardigan is designed as an open-front style, so there are no buttons or buttonholes.
Gauge — Please Don’t Skip This Part
For a wearable, gauge matters much more than it does for a small amigurumi project.
Main mesh gauge: 16 stitch positions and 8 mesh rows = 10 × 10 cm (4 × 4 in), after washing and drying flat.
Ribbing gauge: 18 sc and 20 rows = 10 × 10 cm (4 × 4 in), worked in sc BLO with the smaller hook.
Make the swatches first and adjust your hook size if needed. Once your gauge is correct, keep the panel stitch counts unchanged.
Main Body Stitch Pattern
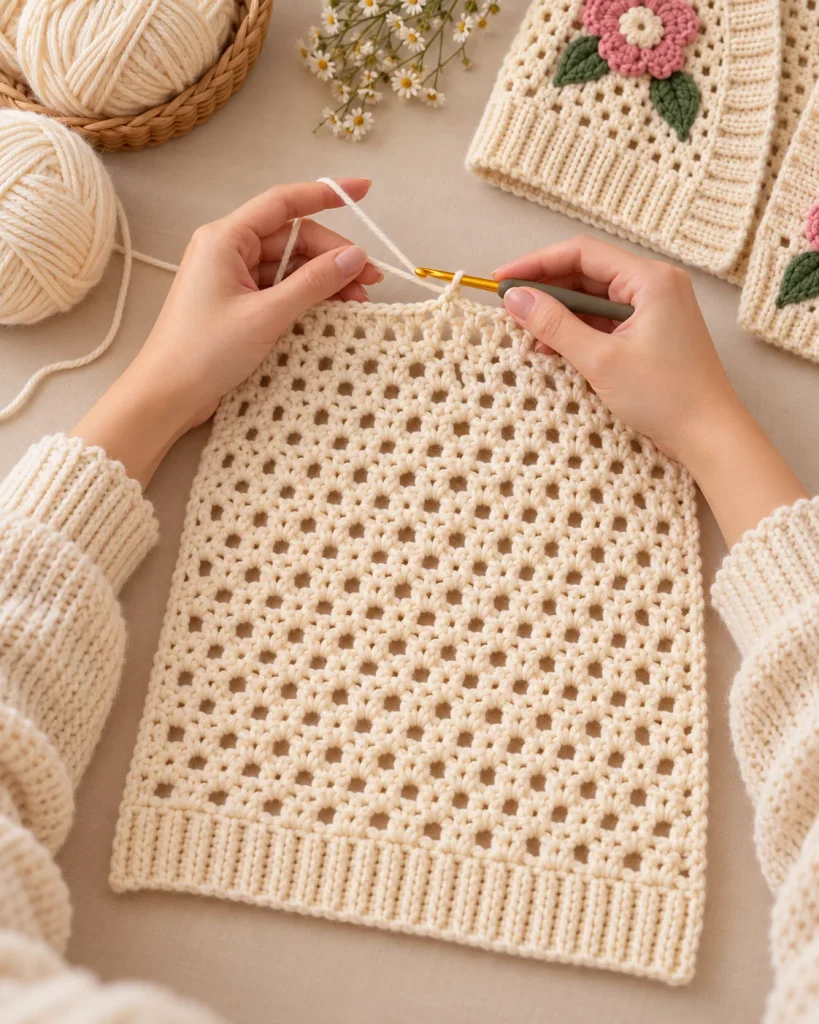
The cardigan uses a simple open mesh.
Standard mesh row: ch 3, turn; repeat (ch 1, skip the next position, dc in the next dc) across, ending with a dc at the far edge.
The ch 3 counts as the first dc.
Crochet Instructions
Back Panel
With cream and the main hook:
- Foundation: ch 82
- Foundation row: sc in second ch from hook and across (81 sc)
- Row 1: ch 3, turn; (ch 1, skip 1 sc, dc in next sc) ×40 — 81 positions
- Rows 2–44: standard mesh row, keeping 81 positions
Finished panel: about 50.6 cm wide × 55.5 cm tall.
Mark 25 positions at each upper side for the shoulders. The central 31 positions form the back neckline.
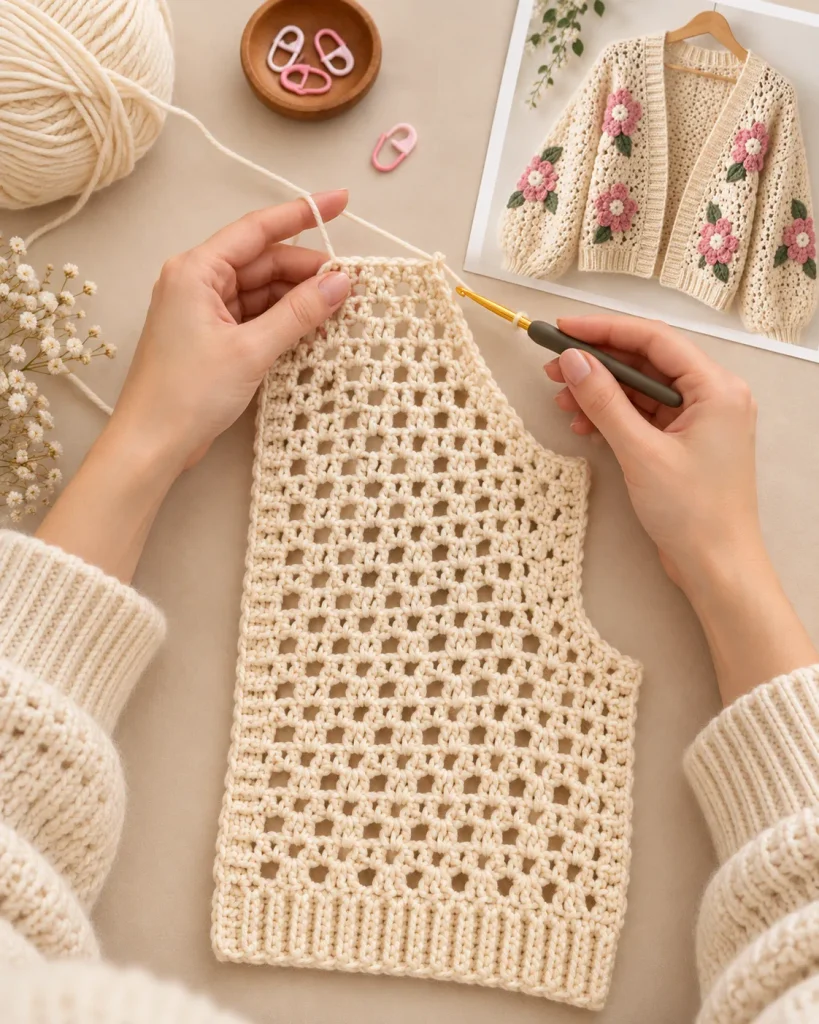
Front Panel A
- Foundation: ch 38
- Foundation row: 37 sc
- Row 1: ch 3, turn; (ch 1, skip 1 sc, dc in next sc) ×18 — 37 positions
- Rows 2–32: standard mesh row (37)
Shape the neckline at the end of odd-numbered rows:
- Row 33: 35 positions
- Row 34: 35
- Row 35: 33
- Row 36: 33
- Row 37: 31
- Row 38: 31
- Row 39: 29
- Row 40: 29
- Row 41: 27
- Row 42: 27
- Row 43: 25
- Row 44: 25
For each decrease row, stop before the final ch-1 space and dc, removing two positions.
Front Panel B
Work the same foundation and rows 1–32 as Panel A.
Mirror the shaping by decreasing at the beginning of odd-numbered rows. Slip stitch across the first dc, ch-1 space, and next dc, then ch 3 and continue the mesh row.
Use the same position counts as Panel A from rows 33–44.
Both fronts should measure about 23.1 cm wide below the neckline, with a 15.6 cm shoulder edge.
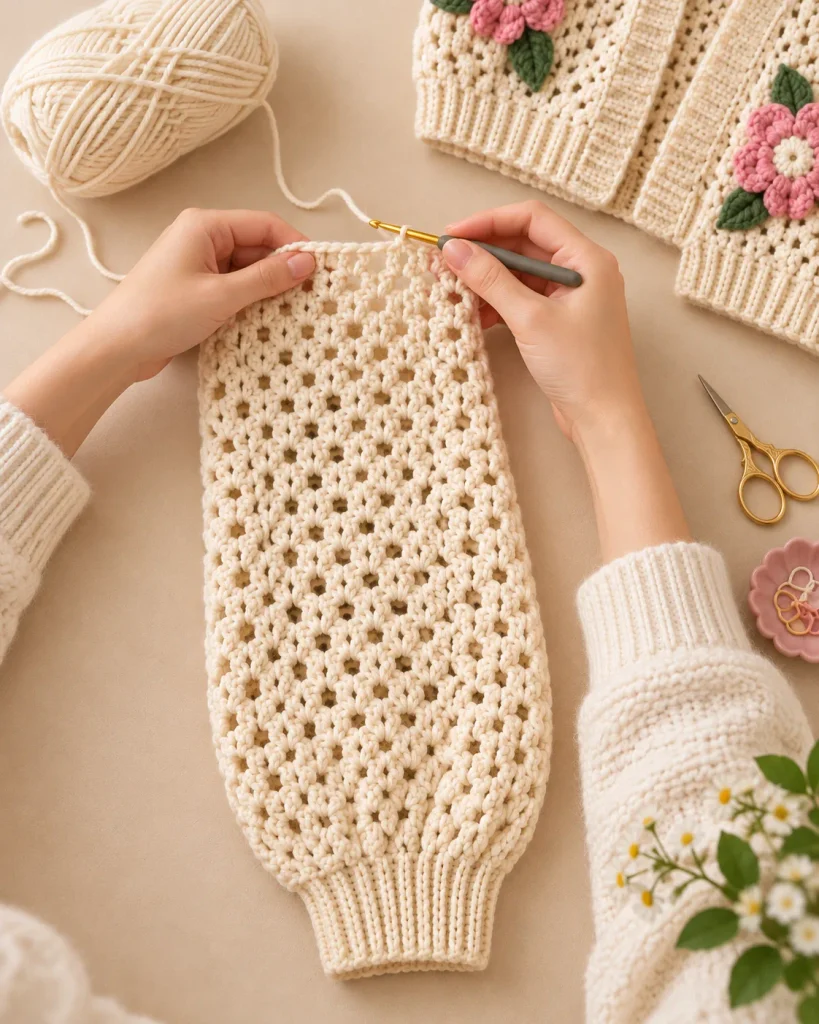
Sleeves — Make 2
Work from the upper arm toward the wrist.
- Foundation: ch 74
- Foundation row: 73 sc
- Row 1: mesh pattern — 73 positions
- Rows 2–3: 73 positions
Decrease at both edges on rows:
- Row 4 → 69
- Row 7 → 65
- Row 10 → 61
- Row 13 → 57
- Row 16 → 53
- Row 19 → 49
- Row 22 → 45
- Row 25 → 41
Work standard mesh rows between decreases, then continue rows 26–30 at 41 positions.
Each sleeve should measure about 45.6 cm across the top and 25.6 cm at the wrist.
Assembly
Block all five panels before sewing.
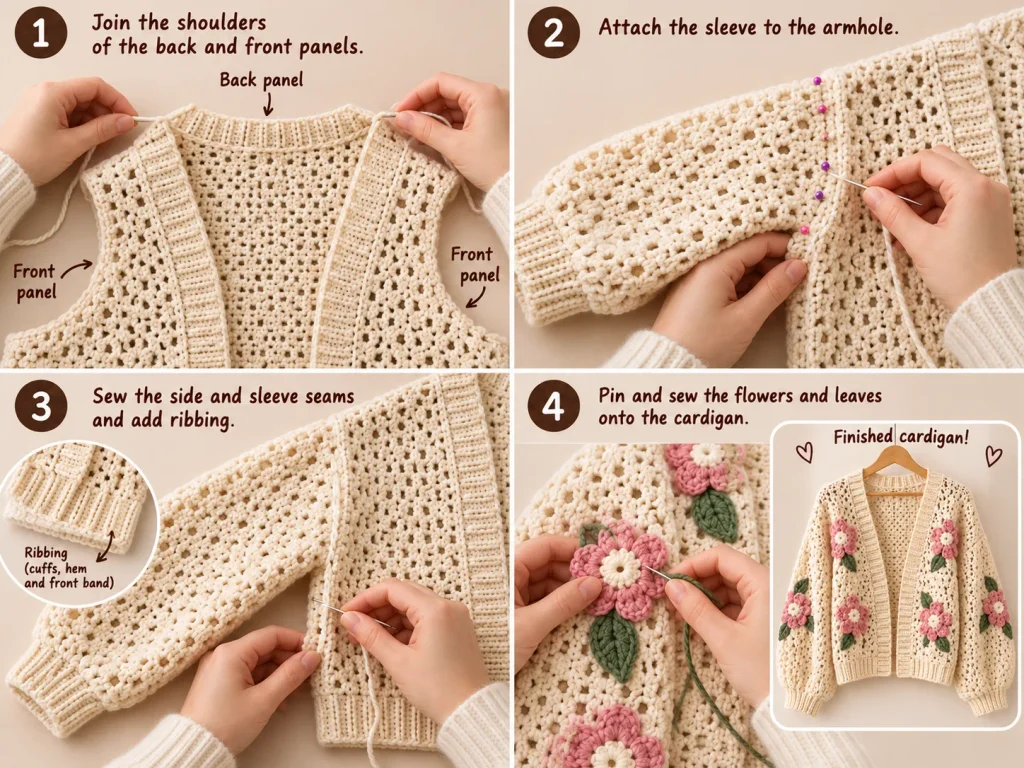
- Sew each front shoulder to the outer 25 positions of the back.
- Leave the central 31 back positions open for the neckline.
- Mark 18 mesh rows down from each shoulder for the armholes.
- Center each sleeve over the shoulder seam and sew it into the armhole.
- Fold the cardigan with right sides together.
- Sew the side seams, then continue down each sleeve seam.
- Turn right side out and check the fit before adding ribbing.
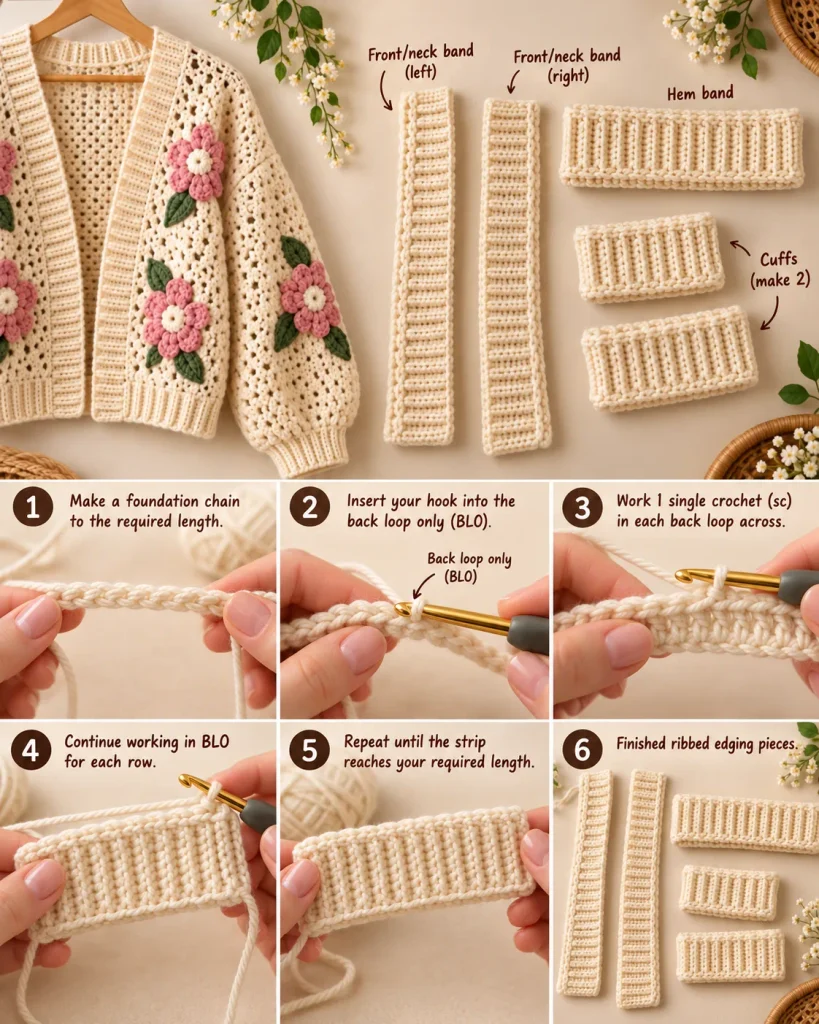
Ribbed Edging
Hem
With cream and the smaller hook:
- ch 10
- Row 1: 9 sc
- Rows 2–194: ch 1, turn, sc BLO across
The strip should measure about 5 cm deep × 97 cm long. Sew it evenly around the lower edge.
Front and Neck Band
Make another 9-sc BLO ribbed strip long enough to travel from one lower front corner, around the neckline, and down the opposite front.
At the stated ribbing gauge, a 143 cm edge needs about 286 rows.
Cuffs — Make 2
- ch 12
- Row 1: 11 sc
- Rows 2–44: sc BLO across
Join each strip into a ring and sew it evenly to the sleeve wrist.
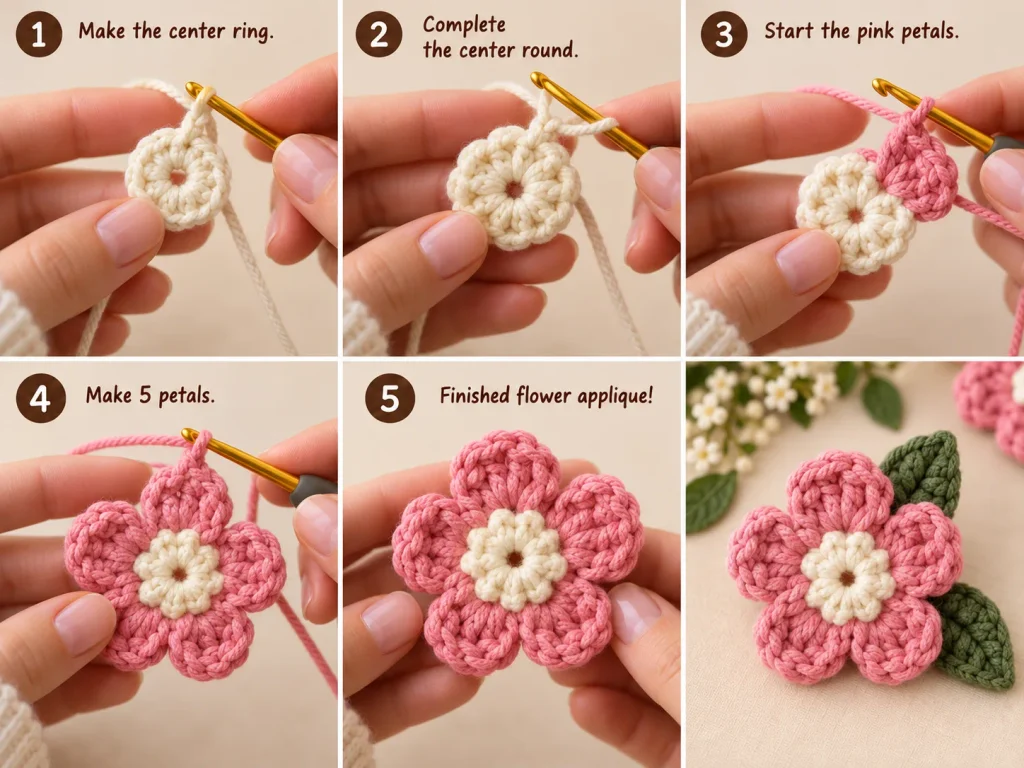
Crochet Flowers — Make 8
Use the smaller hook.
- Rnd 1, cream: 8 sc in MR; join
- Rnd 2, cream: inc around (16); FO cream
- Rnd 3, pink: join pink; (ch 3, skip 1 sc, sl st in next sc) ×8
- Rnd 4: in each ch-3 loop work (sc, hdc, 3 dc, hdc, sc)
Each flower measures about 7–8 cm across.
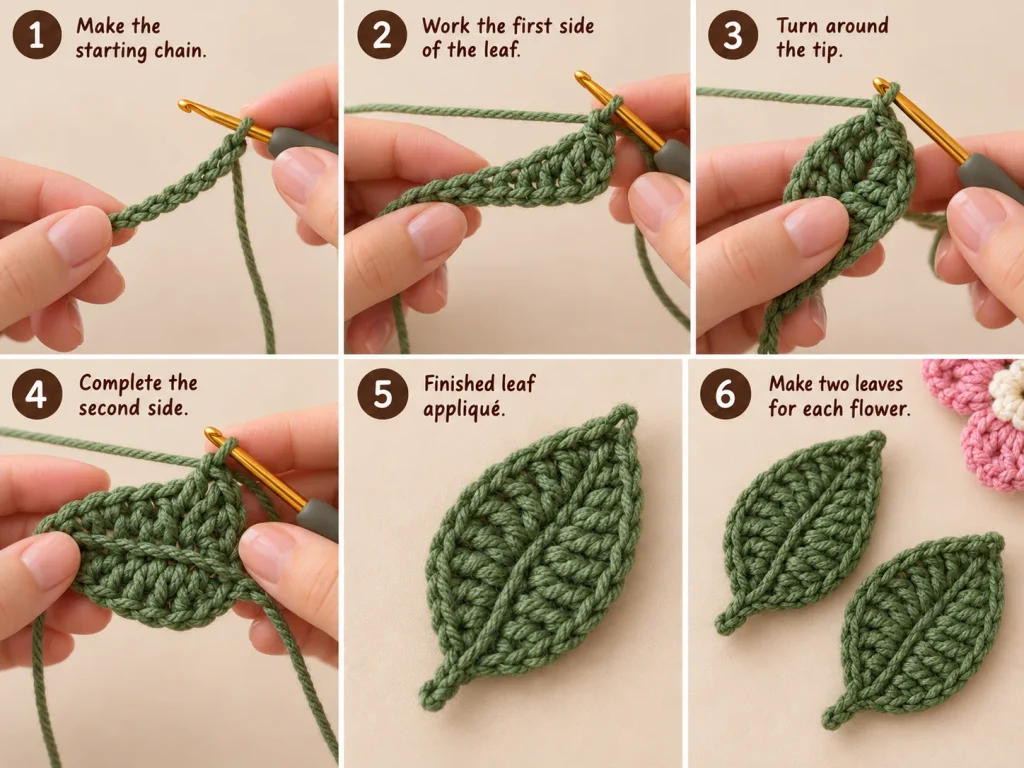
Green Leaves — Make 16
- Foundation: ch 9
- First side: sc, hdc, 4 dc, hdc, 3 sc in final chain
- Other side: hdc, 4 dc, hdc, sc
- Join with sl st
Each leaf measures about 4–5 cm long.
Flower Placement
Place two flowers on each front and two on each sleeve.
For each front:
- Upper flower: about 37 cm above the hem join and 9 cm inward
- Lower flower: about 12 cm above the hem join and 10 cm inward
For each sleeve:
- First flower: about 11 cm below the shoulder seam
- Second flower: about 26 cm below the shoulder seam
Add two leaves behind every flower and alternate their direction for a natural clustered look.
Final Finishing
Weave in all ends securely, smooth the ribbed bands, and check that the cardigan measures about 107 cm around the chest and 61 cm long with the front bands touching but not overlapping.
Wash or lightly block according to your yarn care instructions, then dry flat with the flowers facing upward. Shape the petals and leaves by hand before the cardigan is completely dry.
I really love how this cardigan combines a simple airy base with dimensional floral details. The cream keeps it wearable and easy to style, while the dusty pink flowers and green leaves give it that handmade look that makes the whole piece feel special.
It would be beautiful over a simple top with jeans, a spring dress, or even layered for a cozy handmade outfit when the weather starts cooling down.
If you make this cardigan, take your time with the flowers and placement — those final little details are what give it its personality.