
Snoopy Dog Amigurumi Crochet Pattern
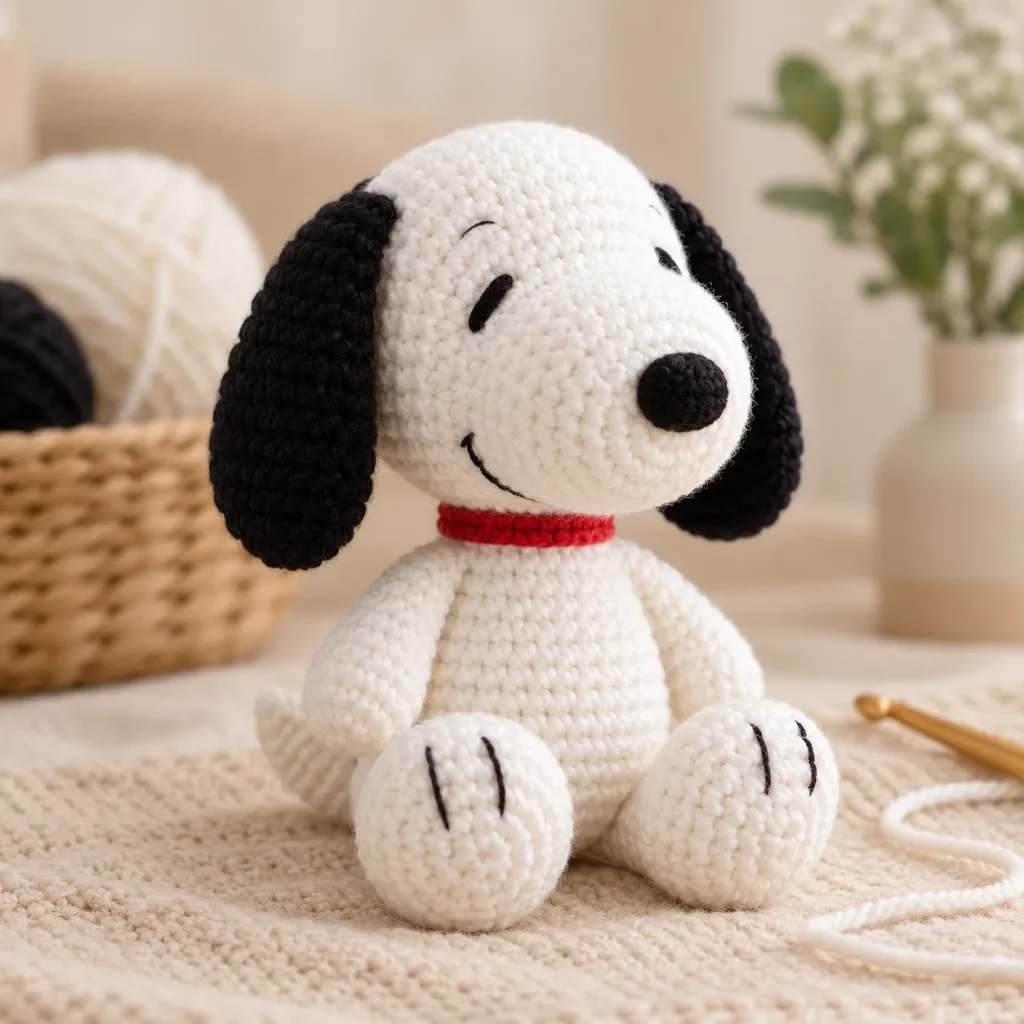
This Snoopy-inspired amigurumi is a fun little project with a large white head, floppy black ears, a black nose, a small seated body, and a red neck detail.
The finished toy measures about 4 in / 10.2 cm and is best for beginner–intermediate crocheters. A few rounds have stitch-count conflicts, so those should be checked before closing the affected pieces.
Prefer to watch? A step-by-step video tutorial is included below to help with the pattern and assembly.
Quick Pattern Details
| Detail | Information |
| Pattern | Snoopy Dog Amigurumi |
| Skill Level | Beginner–Intermediate |
| Finished Size | Approx. 4 in / 10.2 cm |
| Estimated Time | Approx. 4–6 hours |
| Construction | Separate head, body, ears, nose, arms, legs and tail |
| Terminology | US crochet terms |
Materials
You will need:
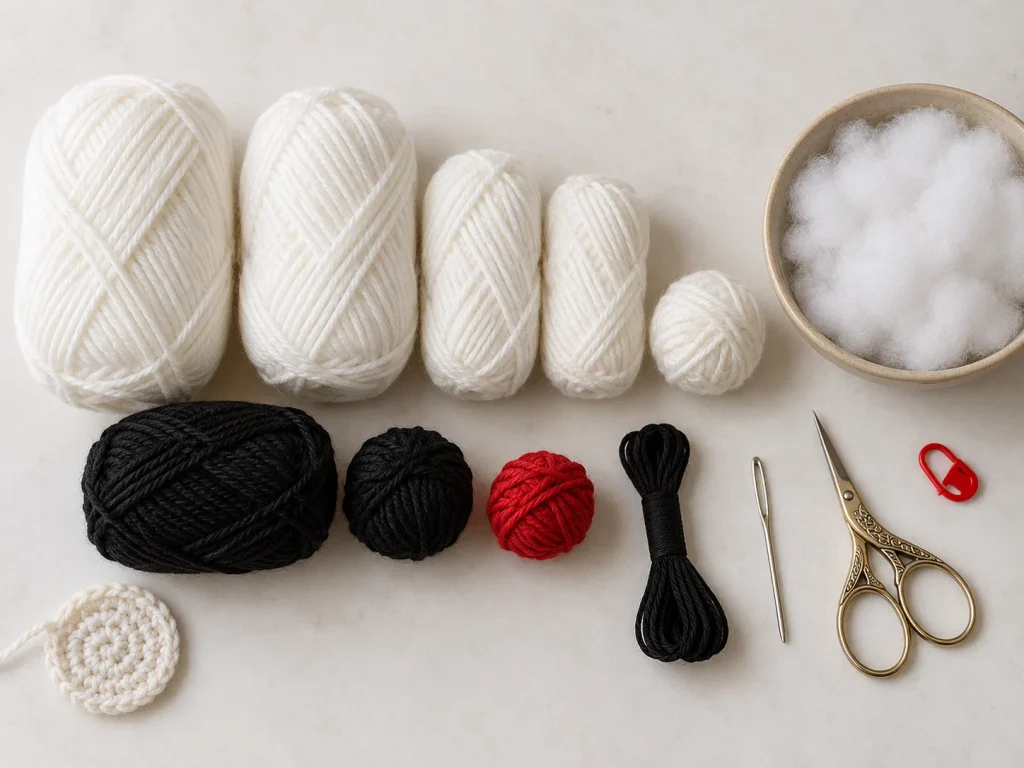
- White yarn for the head, body, arms, legs and tail
- Black yarn for the ears and nose
- Red yarn for the small neck detail
- Black embroidery yarn or thread for the eyes and mouth
- Fiberfill
- Yarn needle
- Scissors
- Stitch marker
Choose a soft yarn that works well for amigurumi and gives you neat, defined stitches.
Abbreviations
- MR – Magic ring
- ch – Chain
- sc – Single crochet
- sl st – Slip stitch
- inc – Increase
- dec – Decrease
- Rnd(s) – Round(s)
- st(s) – Stitch(es)
- FO – Fasten off
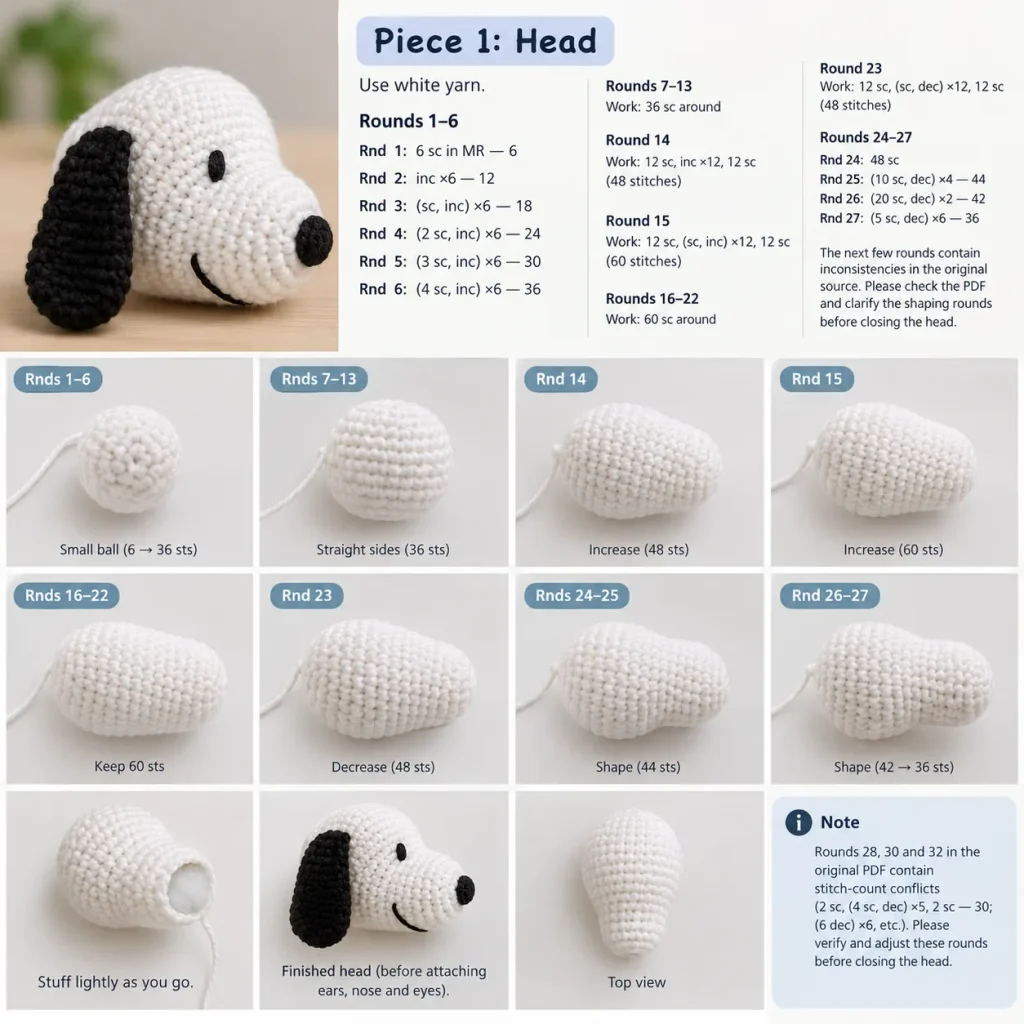
Piece 1: Head
Use white yarn.
Rounds 1–6
- Rnd 1: 6 sc in MR — 6
- Rnd 2: inc ×6 — 12
- Rnd 3: (sc, inc) ×6 — 18
- Rnd 4: (2 sc, inc) ×6 — 24
- Rnd 5: (3 sc, inc) ×6 — 30
- Rnd 6: (4 sc, inc) ×6 — 36
Rounds 7–13
Work:
36 sc around
Round 14
Work:
12 sc, inc ×12, 12 sc
You should have:
48 stitches
Round 15
Work:
12 sc, (sc, inc) ×12, 12 sc
You should have:
60 stitches
Rounds 16–22
Work:
60 sc around
Round 23
Work:
12 sc, (sc, dec) ×12, 12 sc
You should have:
48 stitches
Rounds 24–27
- Rnd 24: 48 sc
- Rnd 25: (10 sc, dec) ×4 — 44
- Rnd 26: (20 sc, dec) ×2 — 42
- Rnd 27: (5 sc, dec) ×6 — 36
Continue shaping the head gradually, checking your stitch count as you go and keeping the decreases evenly spaced for a smooth finish.
Add the stuffing before the opening becomes too small, then close the head neatly and secure the yarn end.
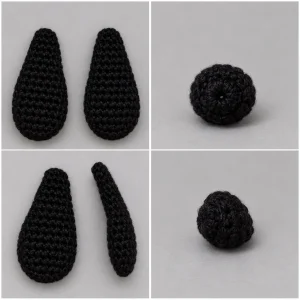
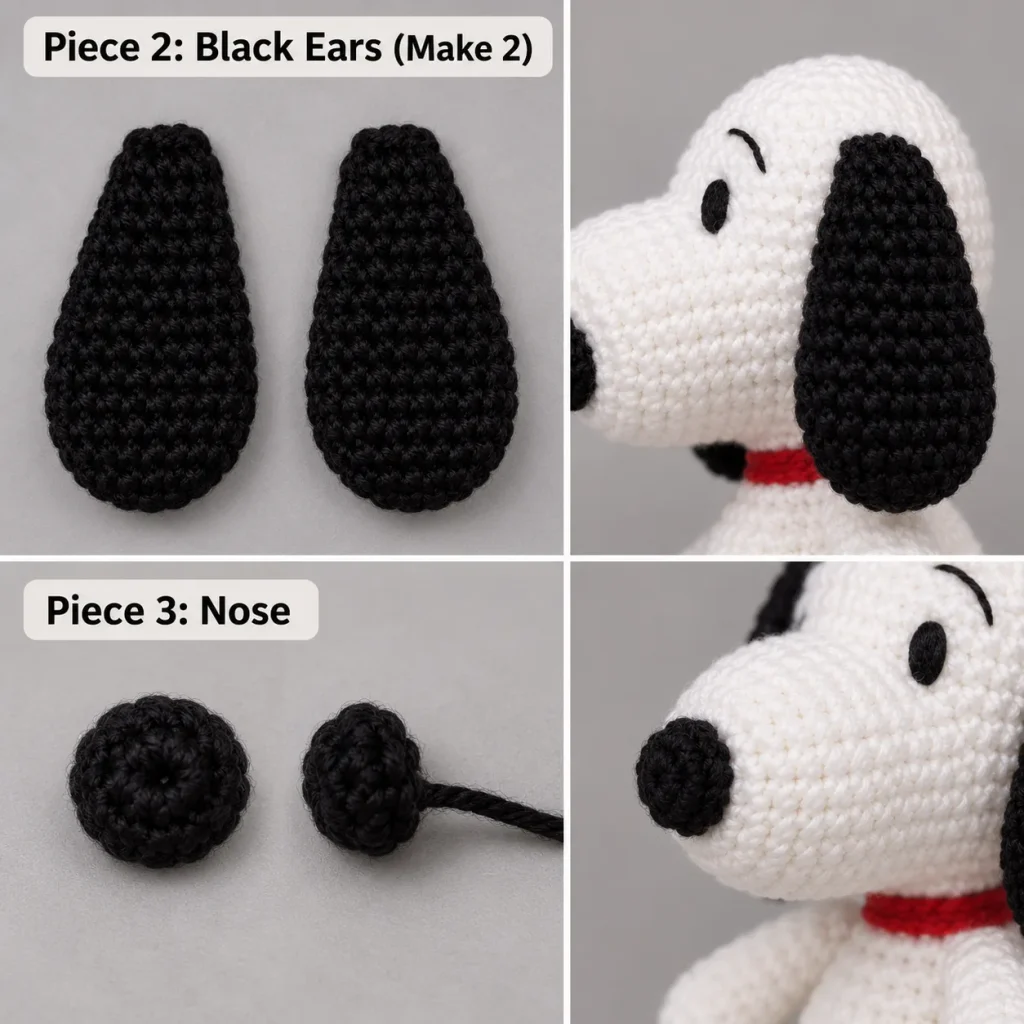
Piece 2: Black Ears — Make 2
Use black yarn.
- Rnd 1: 6 sc in MR
- Rnd 2: (sc, inc) ×3 — 9
- Rnd 3: (2 sc, inc) ×3 — 12
- Rnd 4: (3 sc, inc) ×3 — 15
- Rnd 5: (4 sc, inc) ×3 — 18
- Rnds 6–7: 18 sc
- Rnd 8: (4 sc, dec) ×3 — 15
- Rnds 9–10: 15 sc
- Rnd 11: (3 sc, dec) ×3 — 12
- Rnds 12–13: 12 sc
- Rnd 14: 12 sc, sl st
The finished photos show the ears flattened and hanging against the sides of the head rather than standing upright.
Piece 3: Nose
Using black yarn:
- Rnd 1: 5 sc in MR
- Rnd 2: inc ×5 — 10
- Rnd 3: 10 sc
- Rnd 4: 10 sc, sl st
The nose sits at the end of the projecting muzzle.
Leave a long sewing tail so you can position it carefully during assembly.
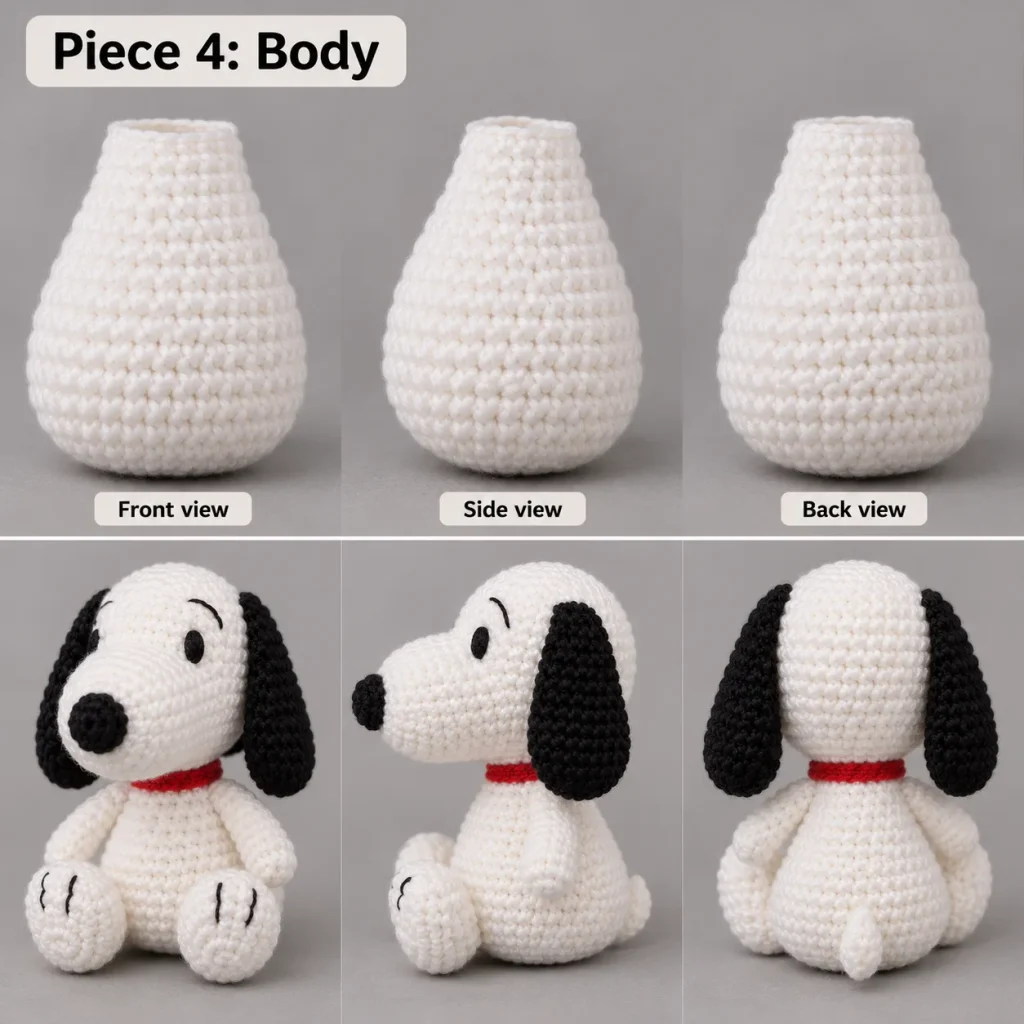
Piece 4: Body
Use white yarn.
- Rnd 1: 6 sc in MR
- Rnd 2: inc ×6 — 12
- Rnd 3: (sc, inc) ×6 — 18
- Rnd 4: (2 sc, inc) ×6 — 24
- Rnd 5: (3 sc, inc) ×6 — 30
- Rnd 6: (4 sc, inc) ×6 — 36
- Rnd 7: (5 sc, inc) ×6 — 42
- Rnds 8–13: 42 sc
- Rnd 14: (5 sc, dec) ×6 — 36
- Rnd 15: 36 sc
Continue decreasing gradually to shape the upper body, keeping the stitches even and the sides smooth.
Add stuffing as needed before the opening becomes too small, then continue with the remaining body rounds.
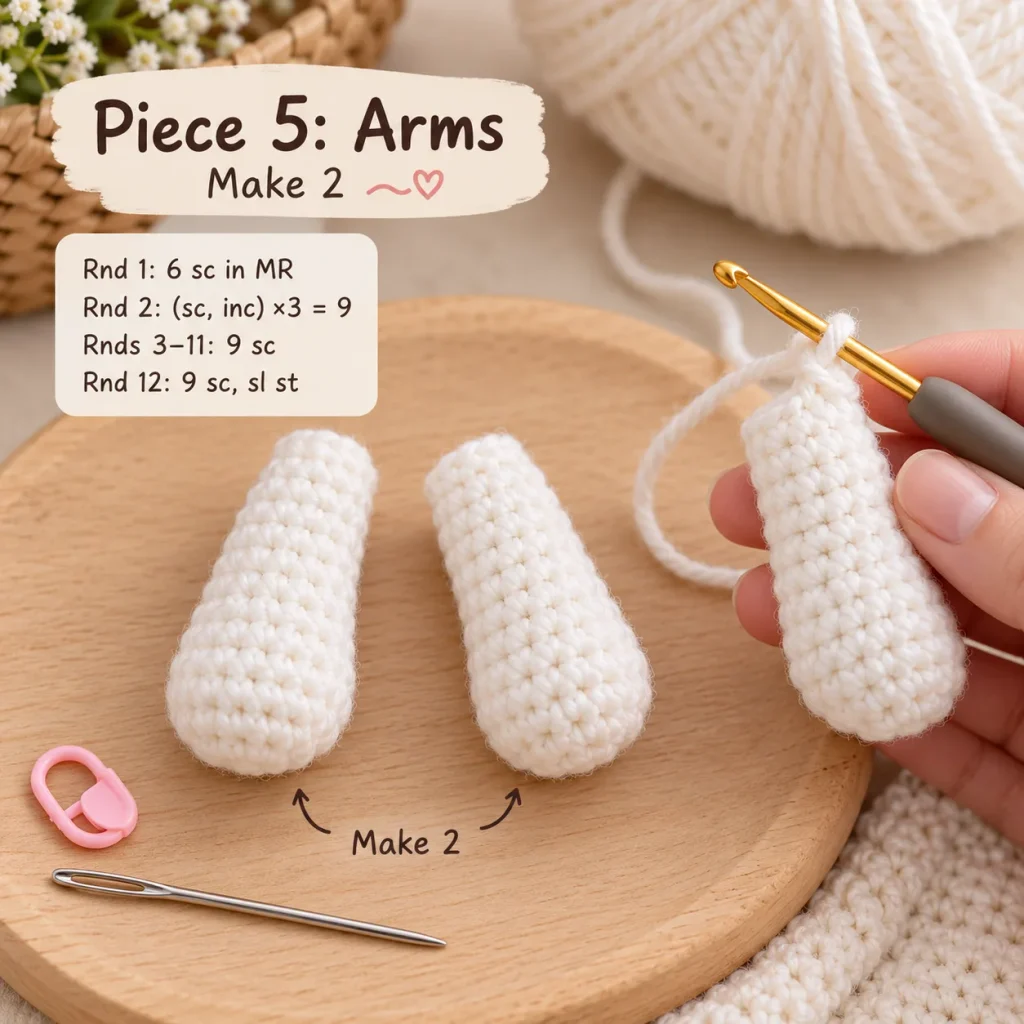
Piece 5: Arms — Make 2
Use white yarn.
- Rnd 1: 6 sc in MR
- Rnd 2: (sc, inc) ×3 — 9
- Rnds 3–11: 9 sc
- Rnd 12: 9 sc, sl st
The arms hang down along the front sides of the body in the finished amigurumi.
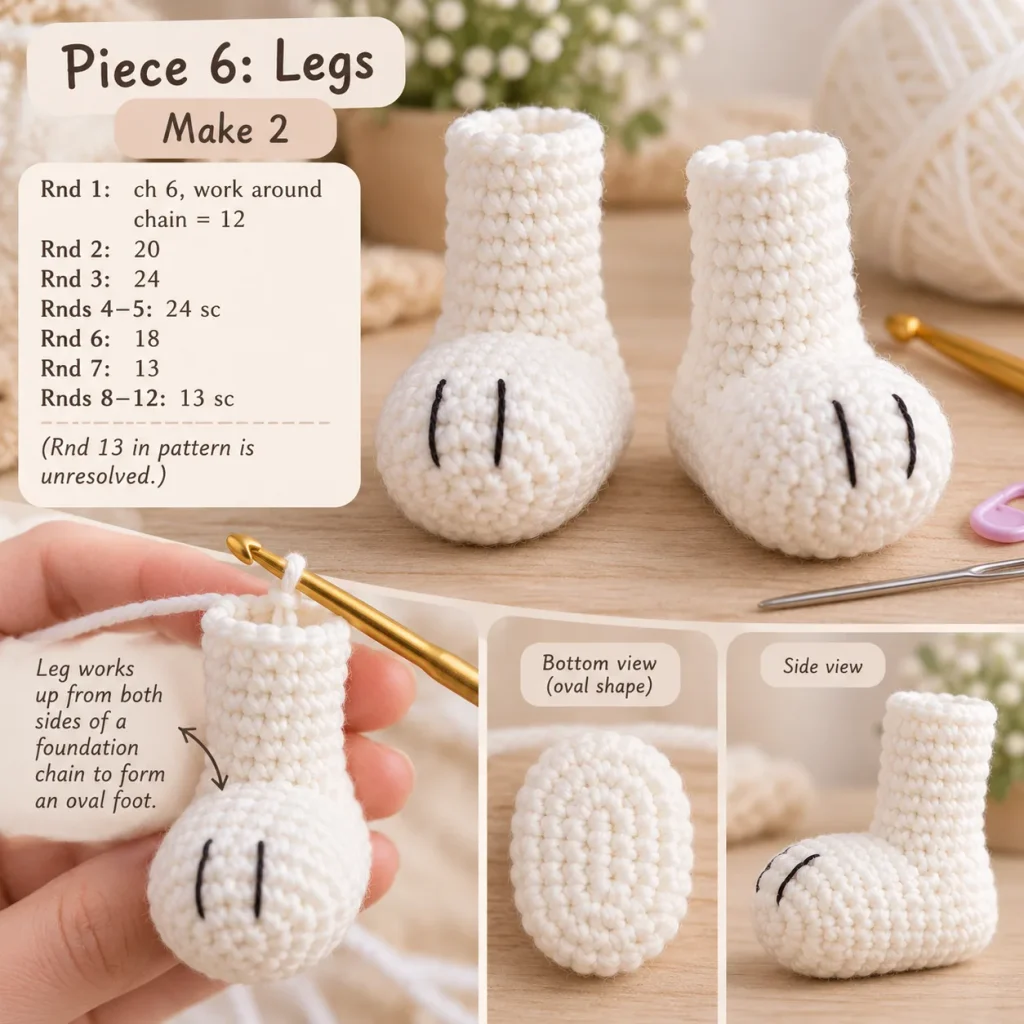
Piece 6: Legs — Make 2
The legs begin around both sides of a foundation chain to create an oval foot.
Round 1
Ch 6.
Starting in the second chain from the hook:
- 4 sc
- 3 sc in the next chain
- continue along the opposite side
- 3 sc
- inc
You should have:
12 stitches
Continue:
- Rnd 2: inc ×2, 2 sc, inc ×4, 2 sc, inc ×2 — 20
- Rnd 3: sc, inc, 6 sc, inc, 2 sc, inc, 6 sc, inc, sc — 24
- Rnds 4–5: 24 sc
- Rnd 6: sc, dec, 5 sc, dec ×4, 5 sc, dec, sc — 18
- Rnd 7: dec, 4 sc, dec ×3, 4 sc, dec — 13
- Rnds 8–12: 13 sc
Piece 7: Tail
Use white yarn.
- Rnd 1: 6 sc in MR
- Rnd 2: 6 sc
- Rnd 3: (sc, inc) ×3 — 9
- Rnd 4: 9 sc
- Rnd 5: (2 sc, inc) ×3 — 12
- Rnd 6: 12 sc, sl st
Leave a long tail for sewing.
Assembly and Finishing
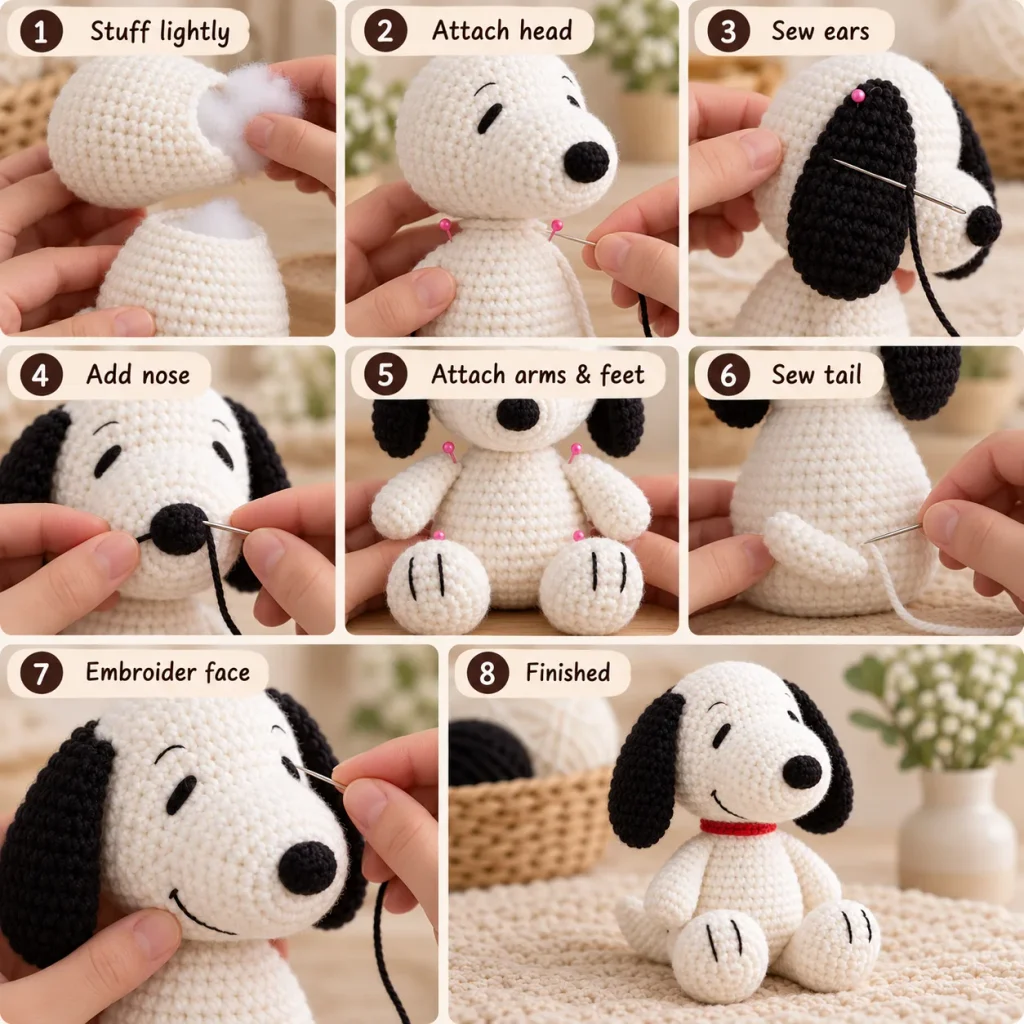
Once all of your pieces are crocheted, lightly stuff the head and body.
Do not overstuff. You want the pieces to hold their shape without stretching the stitches apart.
Pin the large head onto the narrow top of the body with the muzzle facing forward.
Next:
- Sew one flattened black ear to each side of the head.
- Attach the black nose to the tip of the muzzle.
- Position the arms near the upper sides of the body.
- Place both feet at the lower front so the dog sits evenly.
- Sew the short tail onto the lower back.
- Embroider the small black eye marks.
- Add a thin mouth line beneath the muzzle.
- Secure and hide all sewing ends.
Take a moment to adjust the placement of each piece before sewing everything permanently so the face and body look balanced.
Final Thoughts
This little Snoopy-inspired dog is such a cute project because the character comes almost entirely from the proportions.
The oversized head, long muzzle, floppy black ears, little seated feet, and tiny red neck accent are what make the finished amigurumi instantly recognizable.
The individual pieces are straightforward to crochet, and once they are finished, take your time with the assembly and pin everything in place before sewing.
That final placement is what gives the toy its personality.