
How to Crochet a Sage Green Rose From One Simple Lace Strip (Free Pattern)
Key Takeaways
- The whole rose is one strip: a 47-chain openwork base topped with 15 scalloped petals.
- Petals shrink in order, 7 large, 5 medium, then 3 small, so the strip rolls into a rose on its own.
- The pattern uses US terms, DK cotton, and a 3.5 mm hook.
- Leaves are optional and take 13 chains each.
- Stitch counts have been checked on paper, but this exact version hasn’t been crocheted yet, so make a sample first.
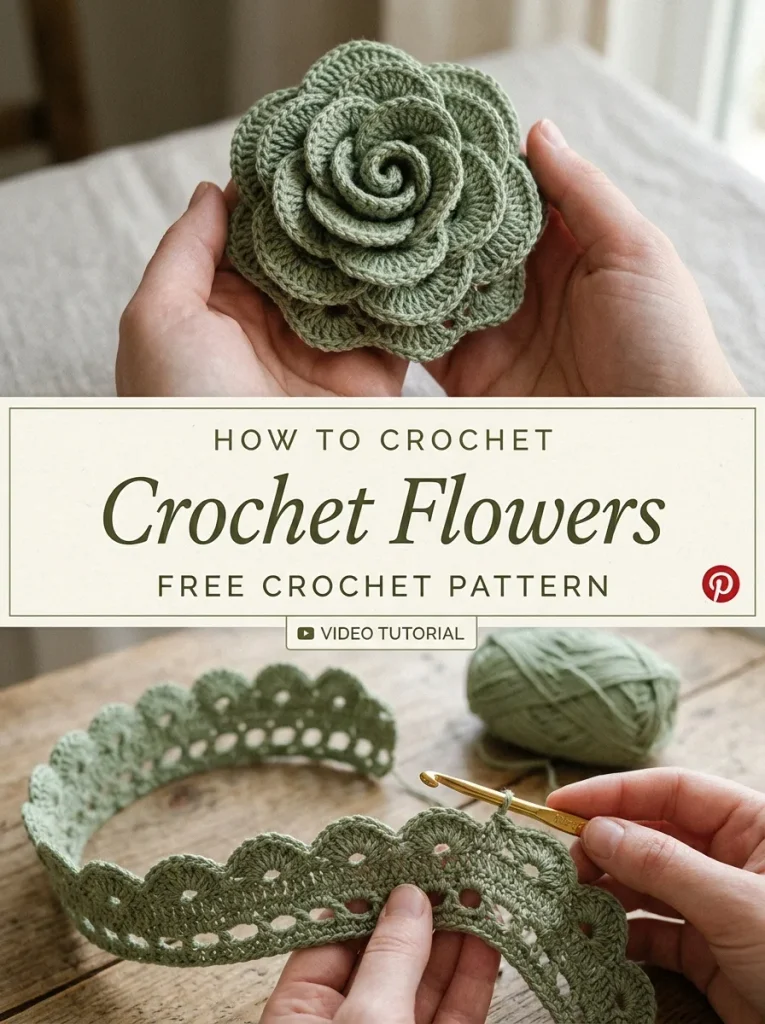
Picture a bouquet that never wilts, in a soft sage green that looks right on a shelf, a gift box, or a hair clip. Now picture making it from a single strip of crochet, with no separate petals to sew on one at a time. That’s the appeal of this rose. You crochet one long lace strip, roll it up, and stitch the base. Then you spread the outer petals and it opens into a layered flower.
Pattern status: I’ve verified the chain, stitch, and petal counts by working them out on paper. A physical sample hasn’t been crocheted yet, so the finished size and exact look may differ from what you imagine. Please make a test rose before you use it for a gift or a sale.
Skill level: confident beginner to intermediate. Terms: US. Yarn color: sage green.
Why This Rose Pattern Works
A traditional crochet flower is worked flat or in the round, and you usually sew the petals together afterward. This one is different because the shape comes from the strip itself. The openwork base gives you a flexible edge that rolls without bunching. Because the petals get smaller toward one end, rolling from the small end puts a tight spiral in the center and leaves the biggest petals on the outside, just like a real rose.
Cotton also matters here. A smooth cotton yarn keeps scalloped edges crisp, and the stitches are easy to see when you’re counting. That’s my recommendation, not a rule, so a soft acrylic will work too if that’s what you own.
What You’ll Need
- Sage green DK weight cotton yarn (weight #3)
- 3.5 mm crochet hook
- Yarn needle
- Scissors
- Stitch markers (optional)
- Matching green sewing thread (optional)
Abbreviations (US terms): Ch = chain, Sc = single crochet, Hdc = half double crochet, Dc = double crochet, Sl st = slip stitch.
Step-by-Step: Crochet the Rose Strip
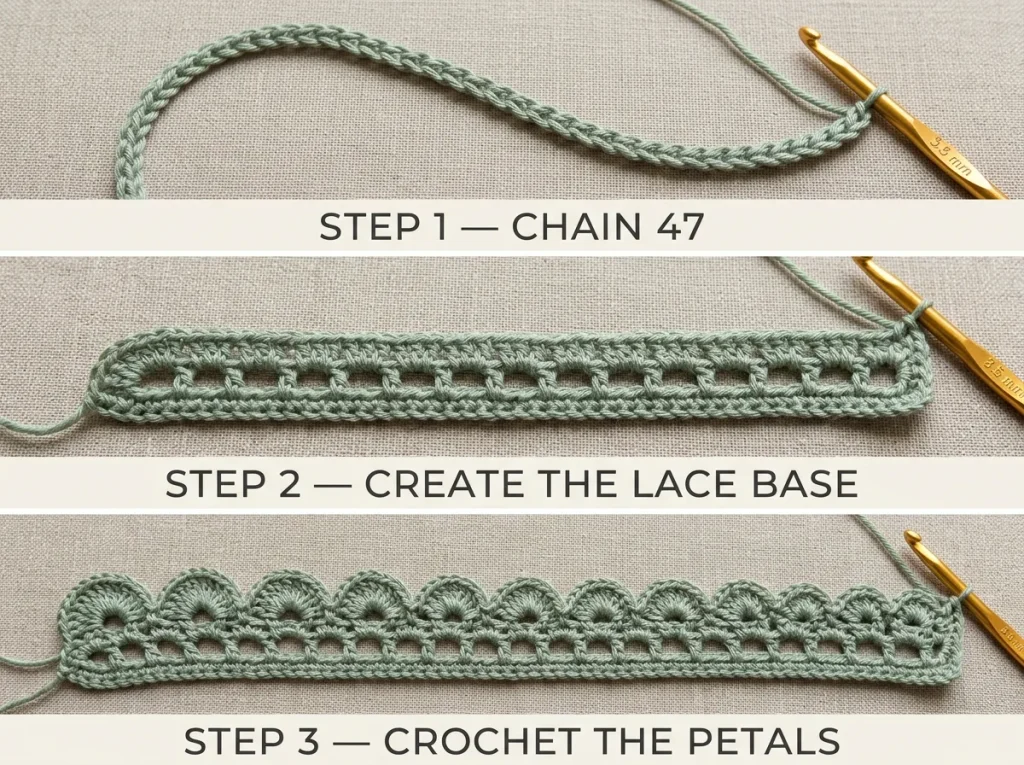
Step 1: Chain 47
Make a slip knot and chain 47. Keep the chain relaxed and even, and check that it isn’t twisted before you start the next row. This chain becomes the bottom edge of the strip.
Why this matters: 47 is a multiple of 3 plus 2, and that’s what makes the lace arches in Step 2 come out even.
Step 2: Work the lace row
Work 1 sc into the second chain from the hook. The loop on your hook doesn’t count as a chain. Then repeat this sequence until you run out of chains: ch 3, skip 2 foundation chains, 1 sc into the next chain.
You’ll end with a single crochet in the last chain. The row should have 15 chain-3 spaces and 16 single crochet anchors, and it should look like a narrow strip of evenly spaced arches.
Why this matters: each arch holds one petal later, so a miscount here changes your petal count.
Step 3: Turn and set up the petal row
Turn your work and ch 1 (this turning chain doesn’t count as a stitch). Work 1 sc into the first sc anchor. From here you’ll make 15 petals, one in each chain-3 space, with a single crochet into the next anchor after every petal.
Step 4: Make 7 large petals
In each of the first 7 chain-3 spaces, work 7 dc, then 1 sc into the next sc anchor. Repeat until you have 7 large petals.
Step 5: Make 5 medium petals
In each of the next 5 chain-3 spaces, work 5 dc, then 1 sc into the next sc anchor. You should now have 12 petals finished.
Step 6: Make 3 small petals and fasten off
In each of the last 3 chain-3 spaces, work 3 dc, then 1 sc into the next sc anchor. The row ends with a single crochet in the final anchor. Fasten off and leave a tail of about 40 to 50 cm for assembly.
Why this matters: that long tail is your sewing thread for Steps 7 to 9, so don’t trim it short.
Step 7: Roll the center
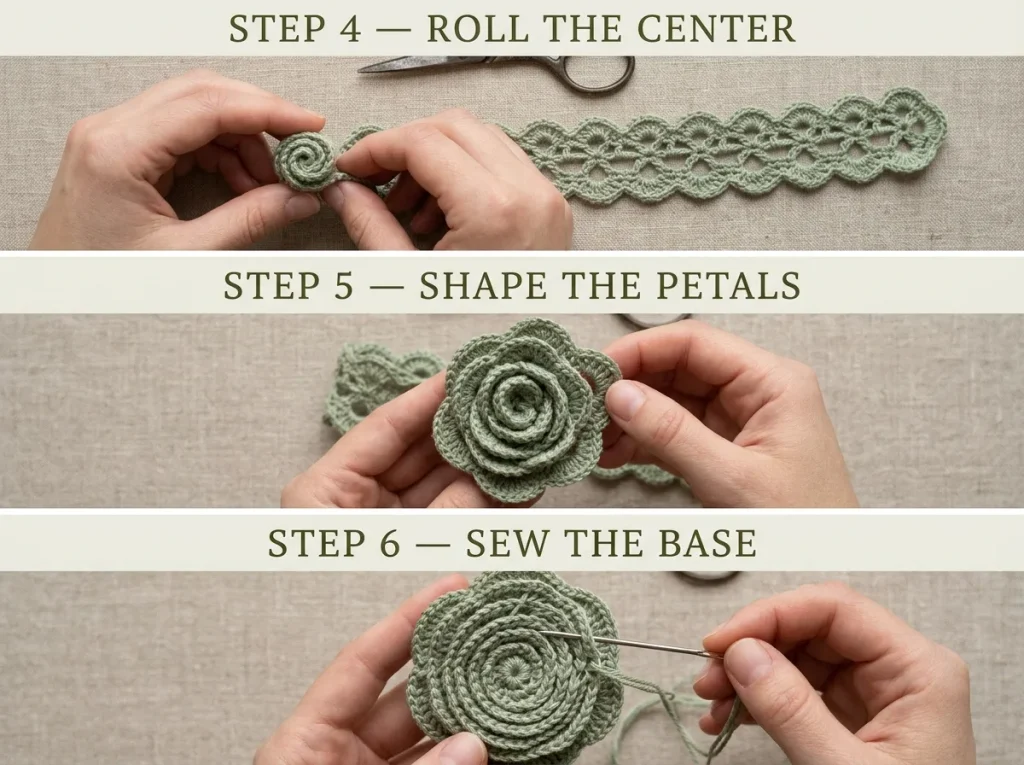
Lay the strip flat with the scalloped edge facing up. Start rolling from the end with the three small petals, keeping the bottom edges lined up. Secure the base of the center with a few stitches from your yarn needle. Keep it snug, but not so tight that you crush the stitches.
Step 8: Wrap the medium and large petals
Wrap the five medium petals around the center and let them overlap naturally. Then continue with the seven large petals, loosening the roll a little with each turn. Finish by gently spreading the outer petals with your fingers.
Why this matters: a tight outer layer gives you a bud. A looser one gives you a bloom.
Step 9: Secure the rose
Turn the flower upside down and thread the long tail onto your yarn needle. Stitch through several layers of the rolled foundation edge, then continue across the base to lock the spiral in place. Add extra stitches wherever it feels loose, fasten off, and weave in the end. Turn the rose right side up and adjust the petals.
Optional: Crochet the Leaves
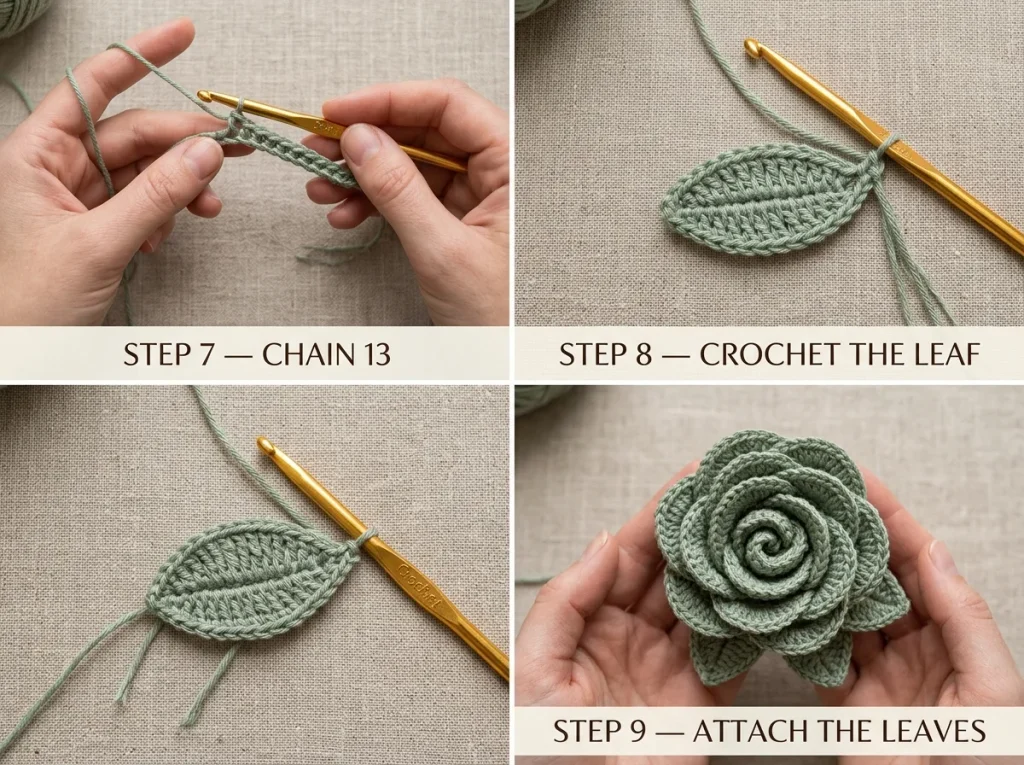
The rose looks complete in sage green alone. If you want leaves underneath, use the same yarn or a slightly darker green.
Step 10: Chain 13
Make a slip knot and chain 13, keeping the chain straight.
Step 11: Work around the chain
Starting in the second chain from the hook, work 1 sc, then 1 hdc in each of the next 3 chains, 1 dc in each of the next 4 chains, and 1 hdc in each of the next 3 chains. Work 3 sc into the last chain to turn the tip. Now work back along the opposite side of the foundation chain, into the bottom loops: 1 hdc in each of the next 3, 1 dc in each of the next 4, 1 hdc in each of the next 3, and 1 sc in the last stitch. Slip stitch into the first sc to close, then fasten off with a tail for sewing.
That’s 25 stitches plus the join. The result is a leaf with a softly pointed tip. Make as many as you like.
Step 12: Attach the leaves
Place two or three leaves under the rose so the tips stick out past the petals. Sew each one to the base with matching yarn, weave in the ends, and reshape the petals one last time.
Petal Count Check
Before you roll, use this table to confirm your strip is right. If your totals don’t match, find the error now rather than after assembly.
| Petal size | Quantity | Dc per petal | Total dc |
|---|---|---|---|
| Large | 7 | 7 | 49 |
| Medium | 5 | 5 | 25 |
| Small | 3 | 3 | 9 |
| Total | 15 | 83 |
Tips for a Better Crochet Rose
- Check your terms. This pattern is in US terms. In UK terms, a US single crochet is called a double crochet, so converting by name alone will give you the wrong stitches.
- Count the lace row twice. It’s the most common place to go wrong, and everything after it depends on it. You want 15 spaces and 16 anchors.
- Keep your tension even. Uneven tension makes the arches and petals look lopsided once rolled.
- Sew through several layers. If you only catch the outer layer at the base, the spiral can slip.
- Try other colors. The construction doesn’t depend on the color. Pink, white, lavender, peach, or red will all work, though I haven’t tested them.
Frequently Asked Questions
Is this crochet rose good for beginners?
It can be, if you’re comfortable with chain spaces and with working several stitches into one space. The assembly is the part that takes practice. If you’ve never rolled a strip into a flower, expect your first one to look rough.
Can I make the rose bigger?
Yes, there are two ways. You can use thicker yarn with a larger hook, or you can lengthen the strip. For a longer strip, keep your foundation chain at a multiple of 3 plus 2. For example, 50 chains gives you 16 chain-3 spaces. Extra petals will change how you roll and assemble, so decide the size of each one before you start. I haven’t tested the larger versions.
Do I need to crochet each petal separately?
No. All 15 petals are worked along one continuous strip. You roll it and sew the base.
What can I use the finished rose for?
Bouquets, hair clips, brooches, bag decorations, gift toppers, and home decor all work. For anything that gets handled a lot, such as a hair clip, sew the base extra securely.
Your Turn
That bouquet that never wilts? It’s one strip of sage green away. Since this exact pattern is new, I’d love to hear how your strip rolled. Did your petals curl the way you expected, and what size did your rose come out at? Leave a comment with your yarn, hook, and result, and tell me which color you’ll try next.
Watch the Crochet Rose Video Tutorial
Want to see how this beautiful crochet rose comes together? Watch the video tutorial below to learn how to create the delicate petals, roll the crochet strip, and shape your flower step by step.
For the best results, follow the written pattern on this page alongside the video, as the stitch counts and techniques may differ slightly. The video is a helpful visual guide to understanding the process and assembling your own beautiful crochet rose.