
Matcha Baby Clogs Booties crochet patterns
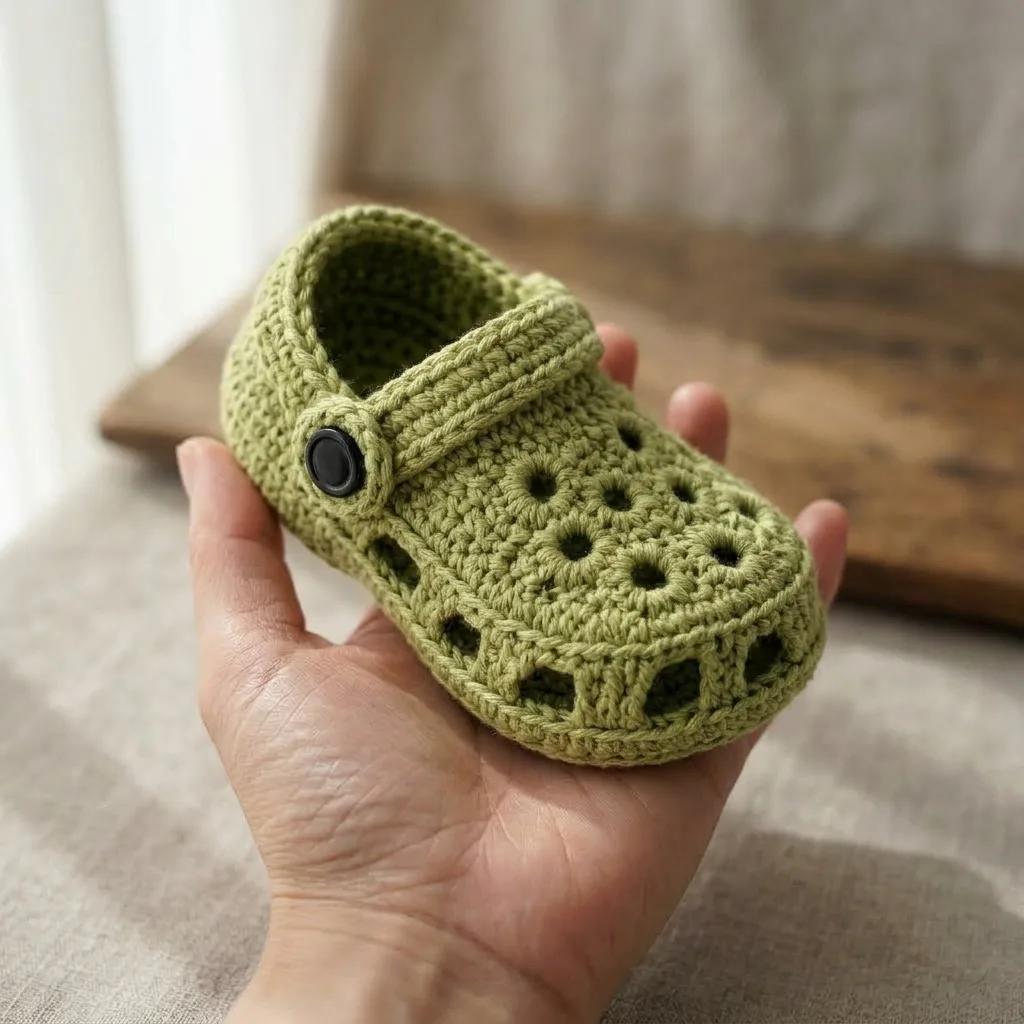
There is something about a tiny pair of shoes that gets me every time, and these little clog booties might be my favorite baby project yet. The soft matcha green color feels gender neutral and a bit different from the usual pastel baby shades, and the small ventilation holes across the toe give them that unmistakable clog shape, just shrunk down to fit a newborn foot.
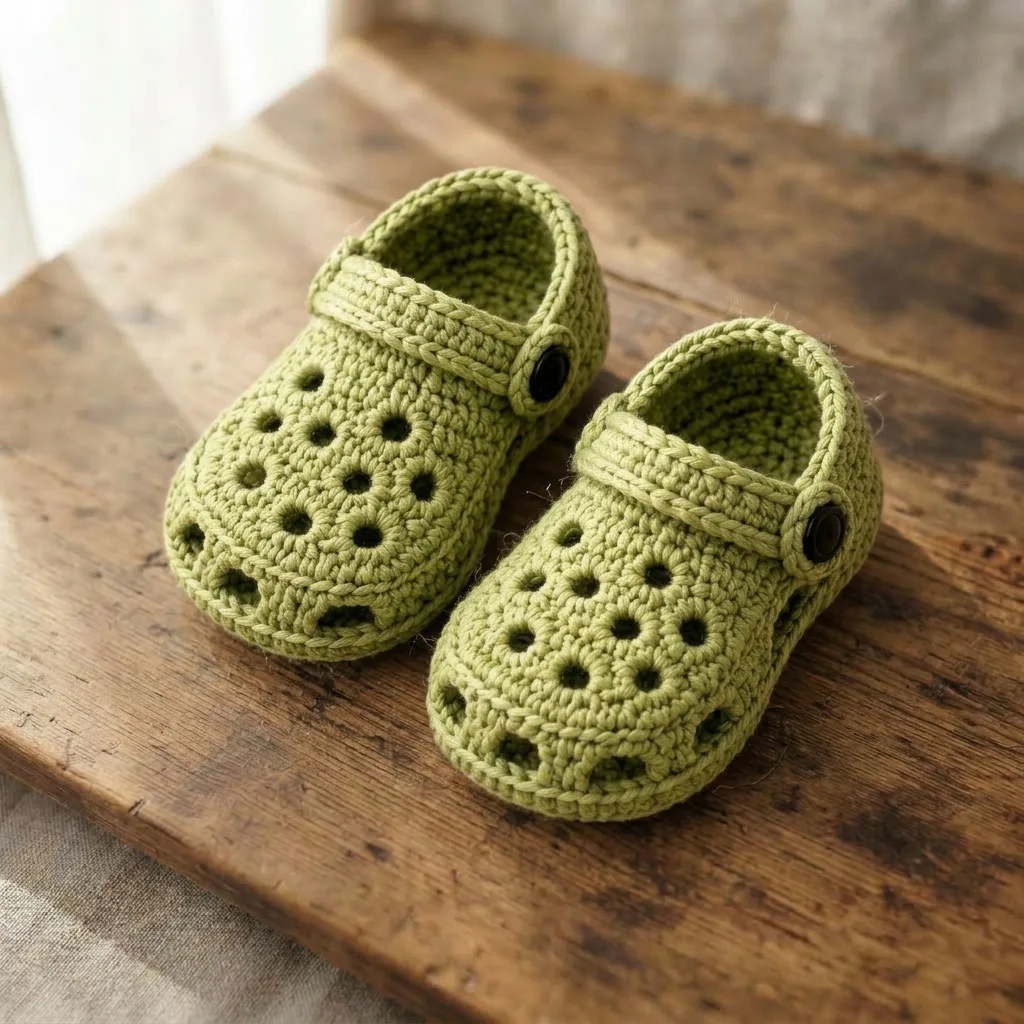
This pattern sits at an intermediate level, mostly because of the eyelet rounds across the toe. Working the ventilation holes evenly, then closing them up slightly in the following round, takes a bit of attention, and getting two matching shoes with the same hole placement is more about careful counting than difficult stitches. If you are comfortable with basic increases and decreases, you will be able to follow along without much trouble.
Each bootie starts with a sturdy oval sole, then the upper is worked upward from there in one continuous piece, narrowing gradually at the toe to build that rounded, closed front. The eyelets are worked in twice, offset from each other for a staggered look, and a simple strap with a buttonhole finishes things off. Plan for around 3 to 4 hours per pair, and know that your second bootie will go noticeably faster once you have the eyelet placement figured out from the first.
Quick Pattern Details
| Detail | Value |
| Skill Level | Intermediate |
| Finished Size | Approx. 3.5 in (9 cm) foot length, newborn to 3 months |
| Time to Complete | 3 to 4 hours per pair |
| Construction | Sole worked flat, upper built upward from the sole in continuous rounds |
| Pieces Made Separately | Sole (x2), upper (x2), strap (x2) |
| Special Detail | Two staggered rows of ventilation eyelets across the toe |
| Closure | Crochet strap with a buttonhole and sew-on button |
| Colors Needed | Matcha or sage green |
Materials Needed
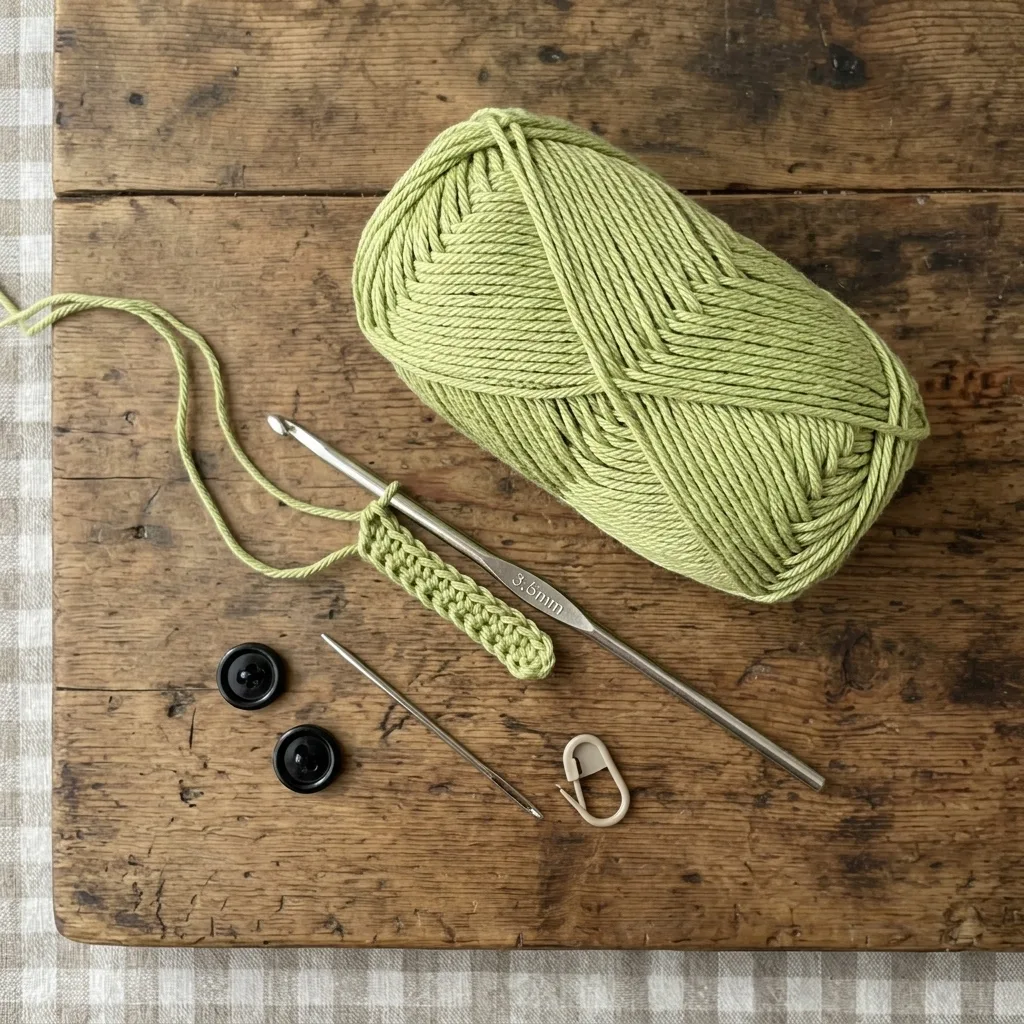
- Medium weight (worsted, weight 4) cotton or cotton blend yarn in matcha or sage green — approx. 30 to 40g, for both booties
- Crochet hook, size 3.5mm (US E/4)
- Two small black shank or flat sew-on buttons, approximately 10mm
- Yarn needle
- Stitch marker
Stitches & Abbreviations Used
- ch – Chain
- sc – Single Crochet
- inc – Increase (2 sc in same stitch)
- dec – Invisible Decrease
- BLO – Back Loop Only
- sl st – Slip Stitch
- st(s) – Stitch(es)
- FO – Fasten Off
- ( ) – Stitch count at end of round or row
Instructions
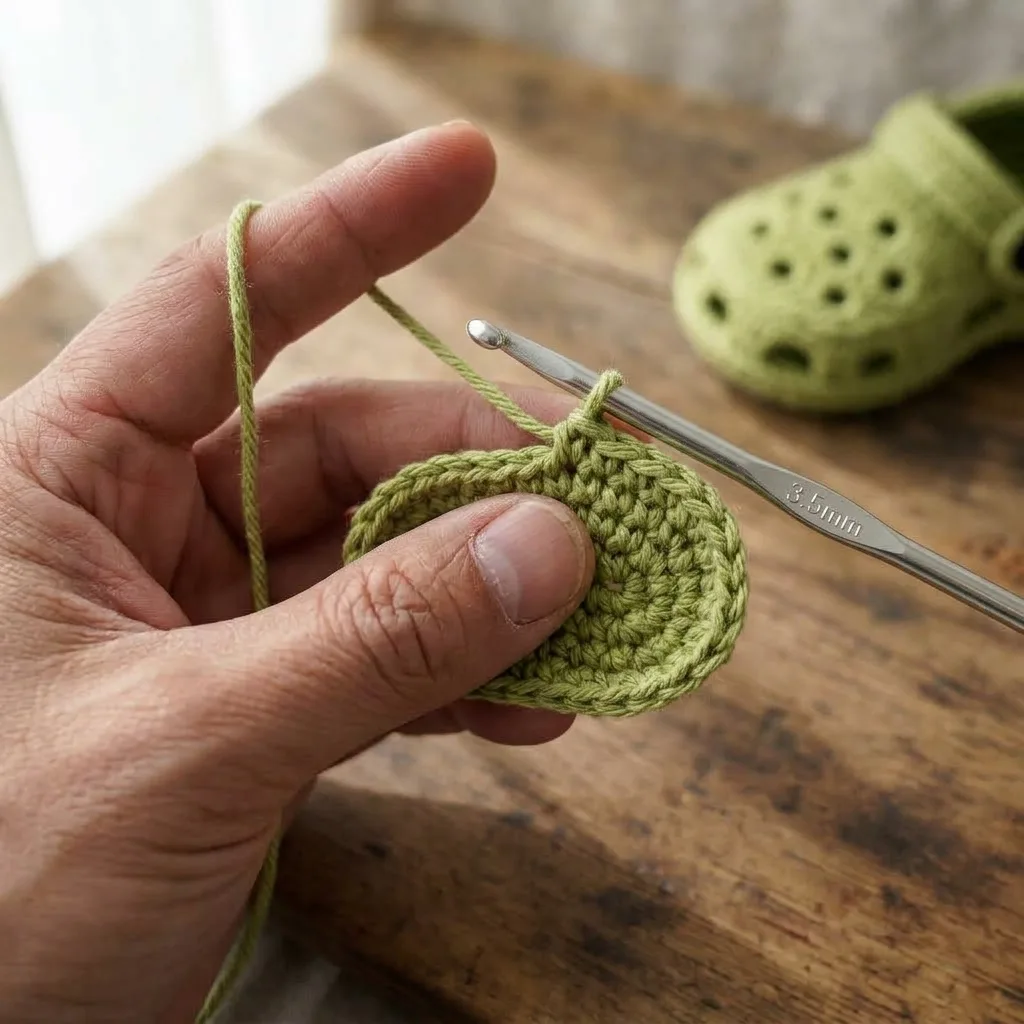
Piece 1: Sole (make 2, worked flat then built up)
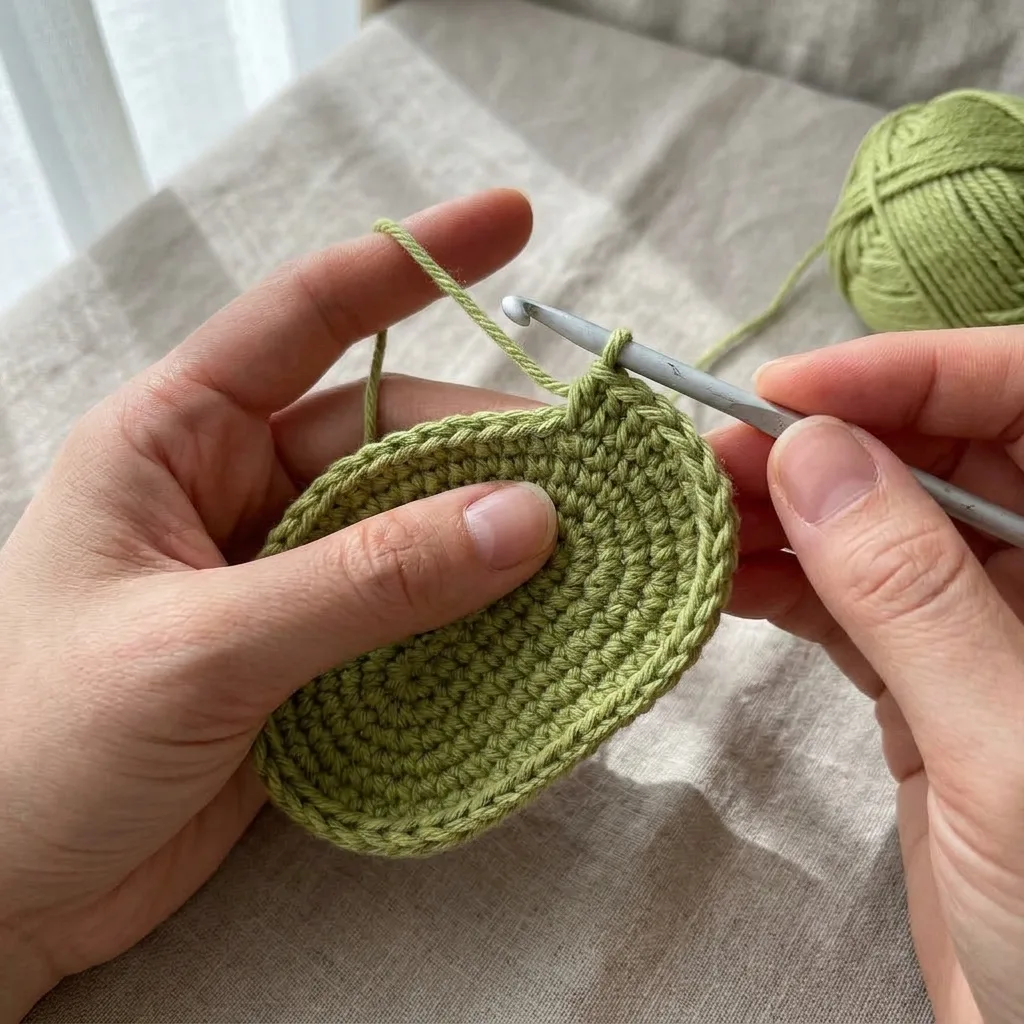
Worked in a continuous oval, starting with a foundation chain.
- Chain 11. This is a good foundation length for a 3.5 in (9 cm) sole, add or remove 2 chains for roughly every 0.5 in size change.
- Rnd 1: starting in the 2nd ch from hook, sc 9 down one side, 3 sc in the last ch to turn the toe, sc 9 back up the other side of the chain, 2 sc in the last ch to turn the heel (24)
- Rnd 2: inc, sc 8, inc x3, sc 8, inc x2 (30). These increases are worked at the toe and heel curves to keep the oval sitting flat.
- Rnd 3: sc around, no shaping (30). This builds up the sole’s thickness and sturdiness. Repeat this round once more if you would like a firmer, double layer sole.
- FO, weave in end.
Piece 2: Upper / Shoe Body (make 2, worked up from the sole)
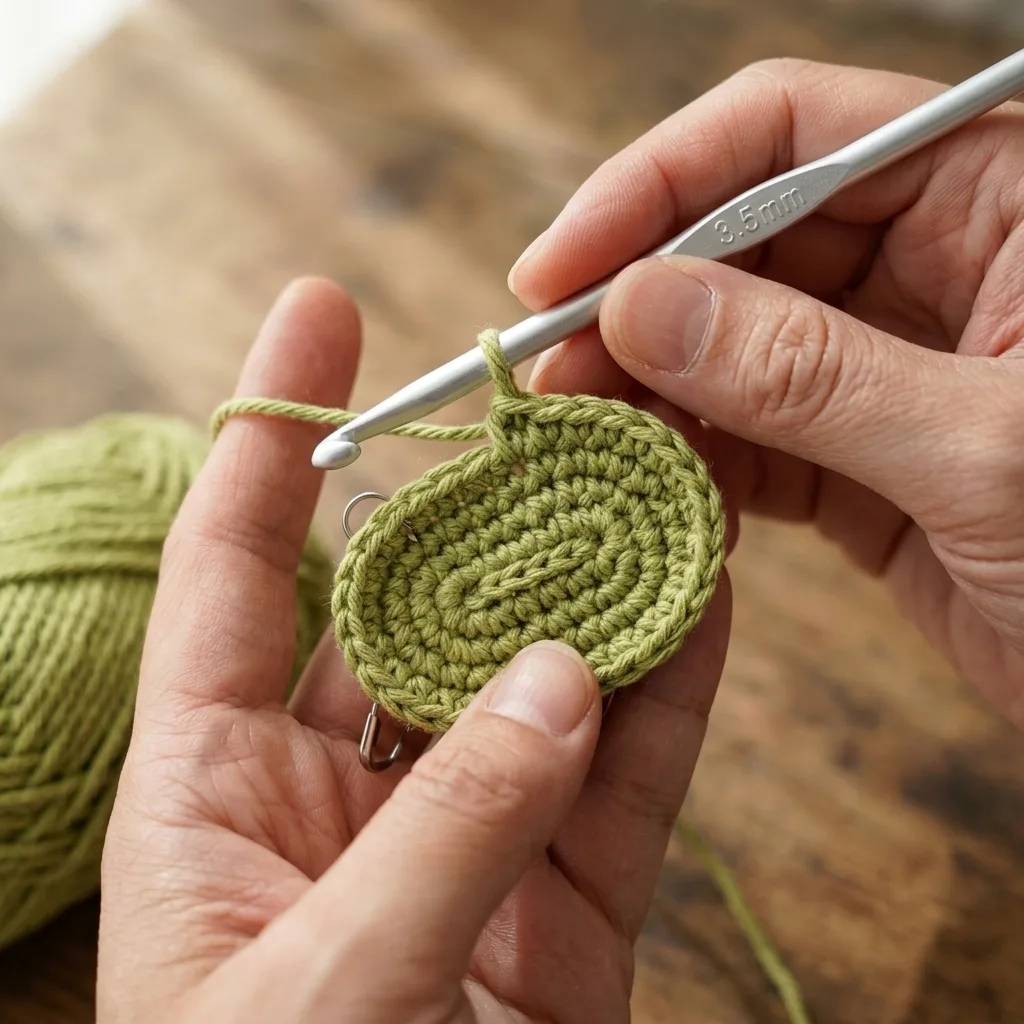
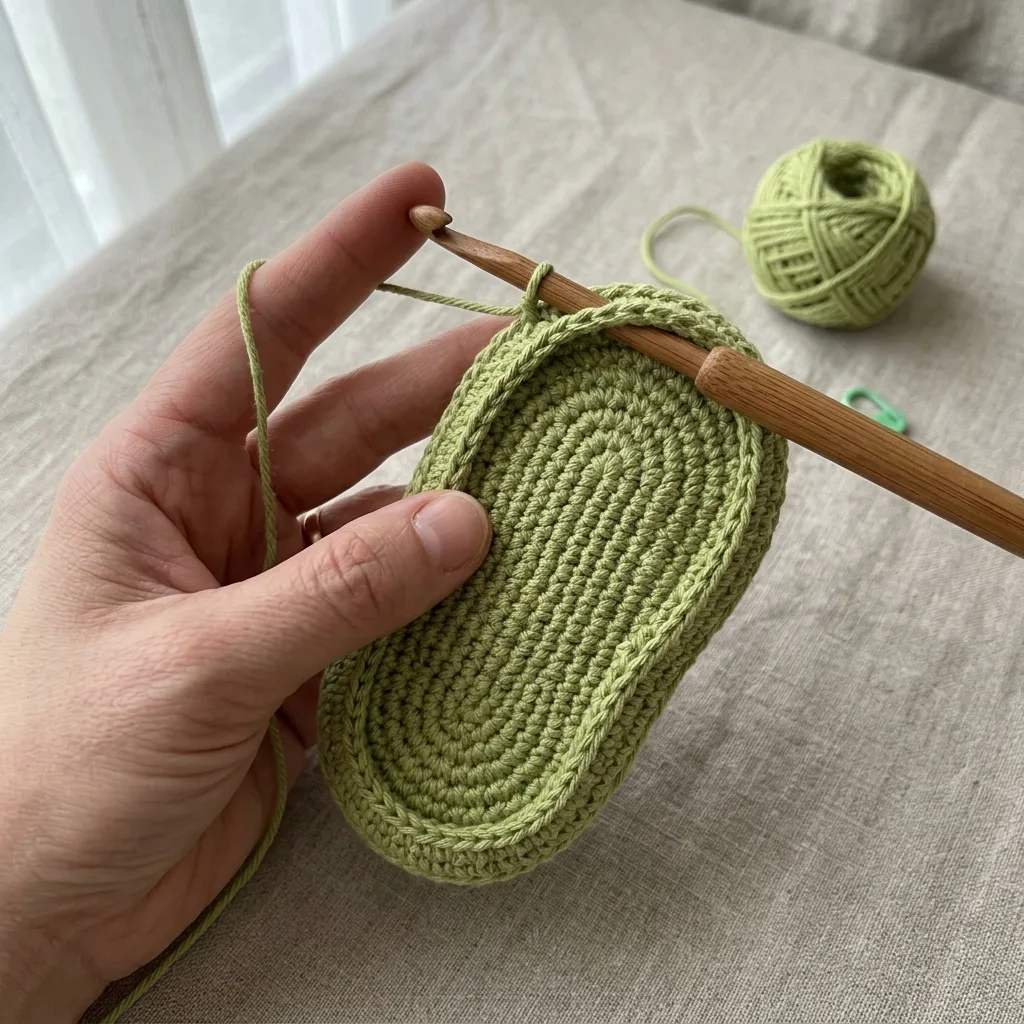
Attach yarn to the sole with a sl st and work upward in continuous rounds, building the closed toe shoe body and leaving the ventilation holes as you go.
- Rnd 1, attach to sole, BLO: working into the back loops only of the sole’s last round, sc around (30). Working in the back loop only here creates a nice defined ridge where the sole meets the upper.
- Rnd 2: sc around (30)
- Rnd 3, begin toe and vamp shaping: sc around the heel portion, then across the toe portion work (sc 2, dec) to gently narrow the toe area (approximately 26 to 28)
- Rnds 4 to 6: sc around, no shaping, continuing to narrow gradually at the toe only and leaving the heel and opening area at full width (approximately 24 to 26). This is what builds the rounded, closed toe shape.
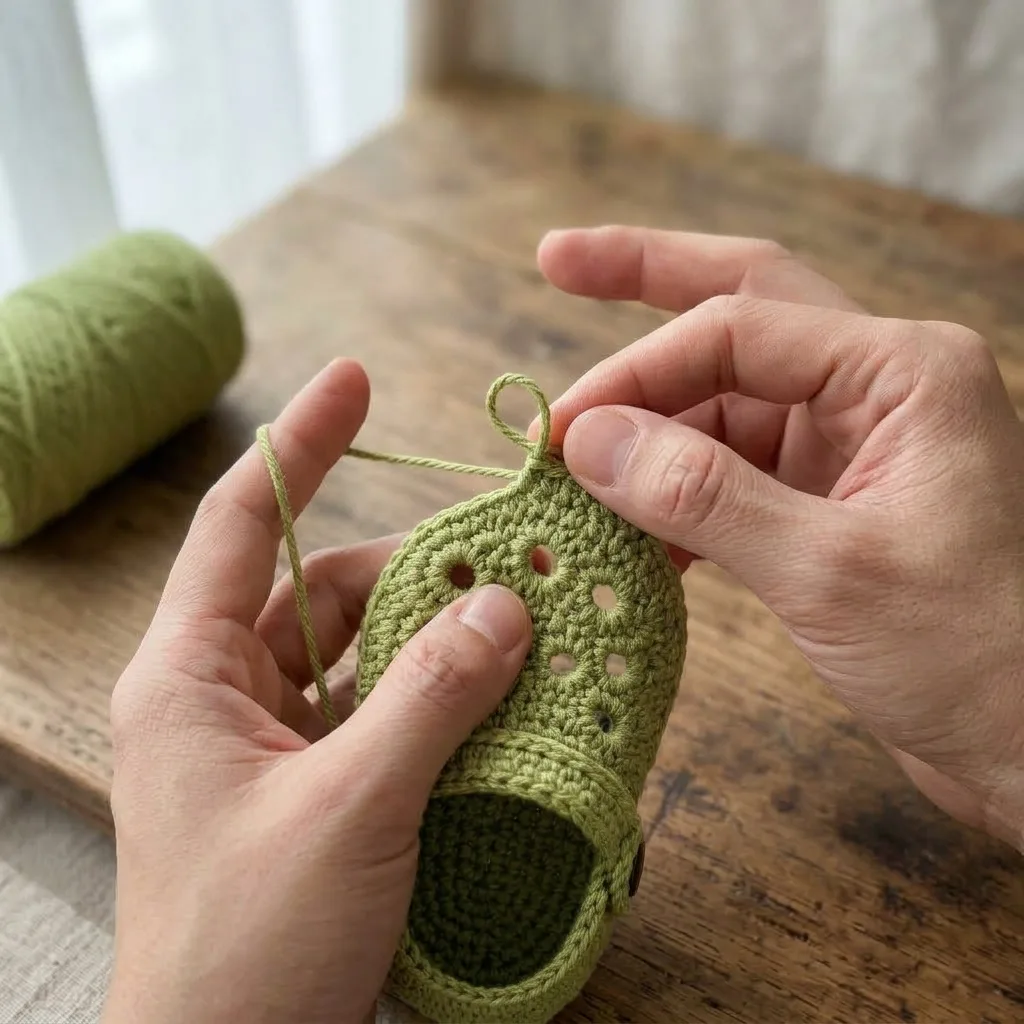
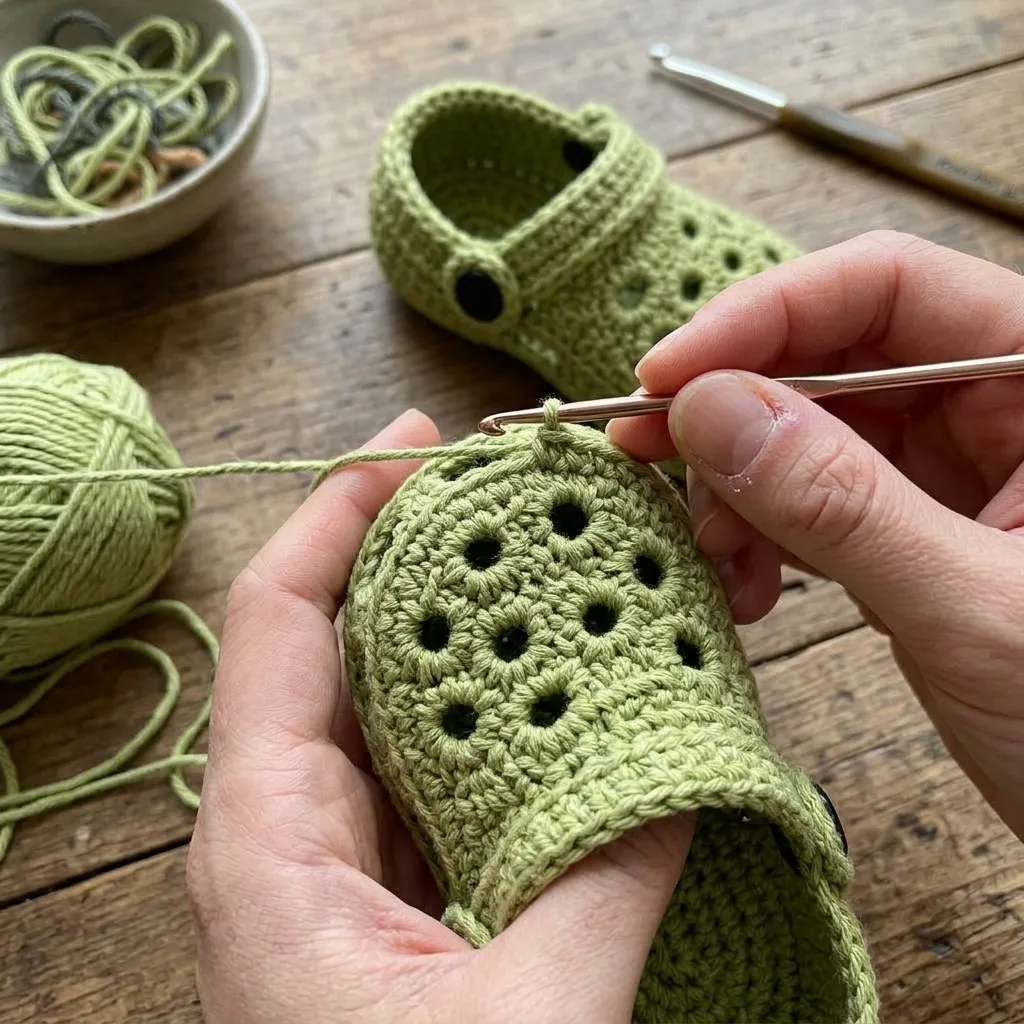
- Rnd 7, eyelet row, toe and vamp area only: work the ventilation holes across the front and top of the shoe by alternating (sc 1, ch 1, skip 1 st) evenly across approximately 12 to 14 stitches of the toe area, then sc around the remaining heel and side stitches without holes (approximately 24 to 26). This mimics the small round ventilation holes seen on a classic clog, adjust the hole spacing if you want them denser or more spread out.
- Rnd 8: sc around, working a regular sc into each ch-1 space from the previous round to close the tops of the holes slightly and neaten the eyelet edges (approximately 24 to 26).
- Rnds 9 to 10, repeat the eyelet pattern for a second row of holes: repeat rounds 7 and 8 once more, offsetting the hole placement slightly from the first row for a staggered look (approximately 24 to 26).
- Rnd 11, heel opening rim: sc around the top opening edge to neaten it, working slightly firmer stitches, either sl st or BLO sc, around the back heel opening where the foot will go in (approximately 24 to 26).
- FO, leaving a long tail. Weave in remaining ends.
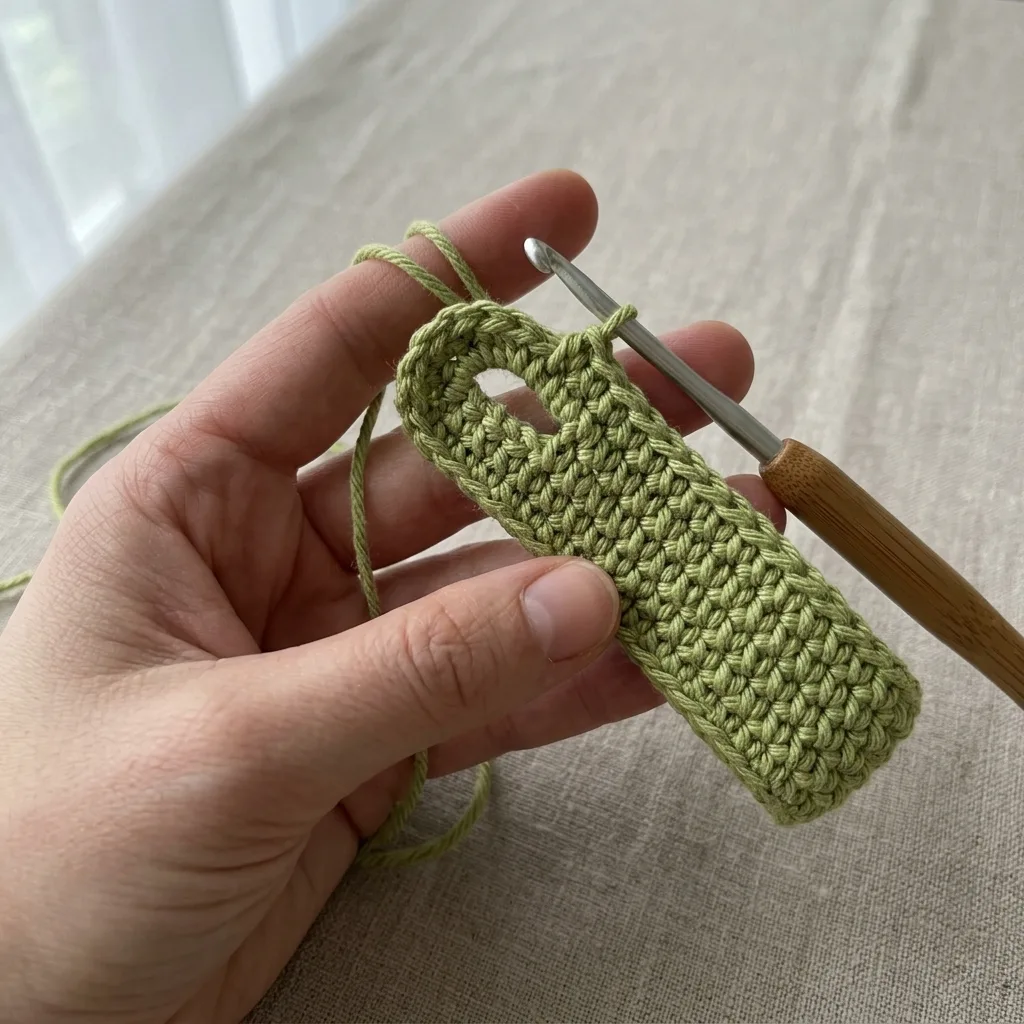
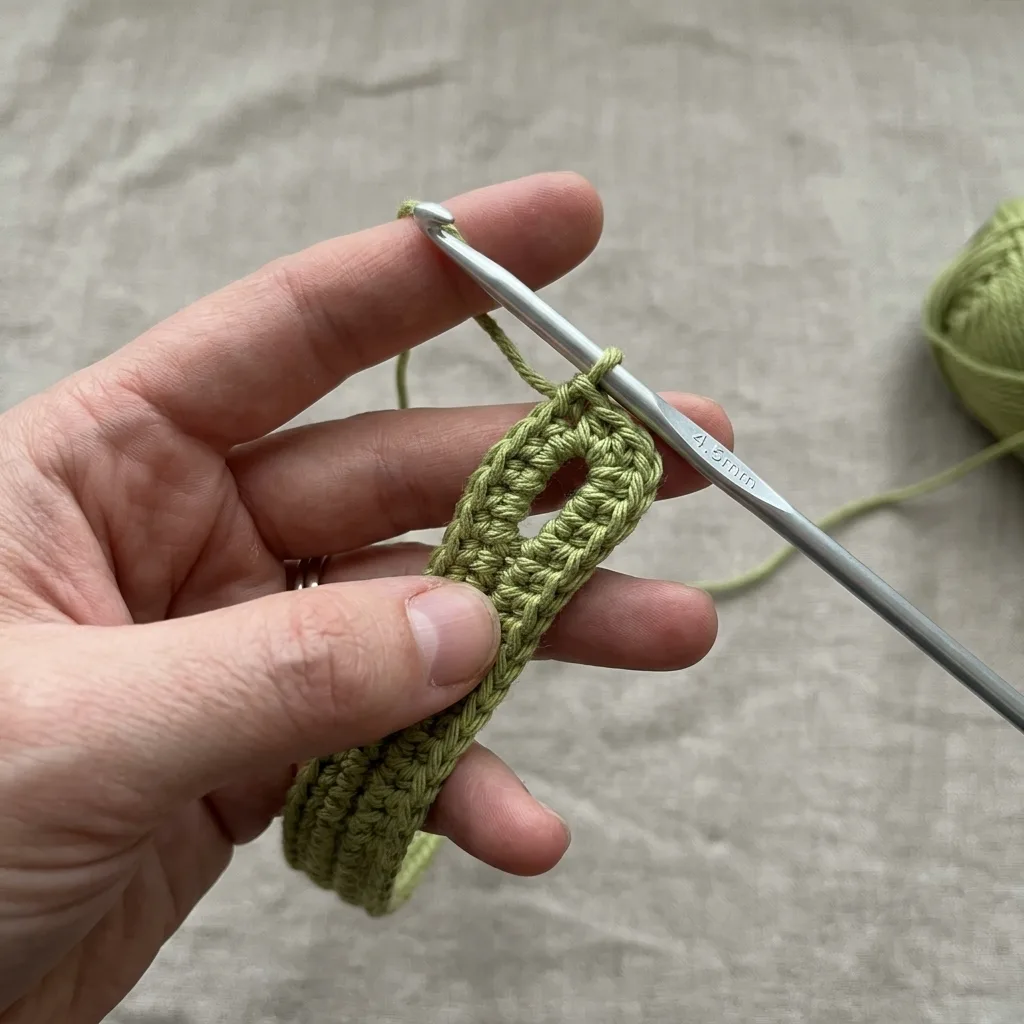
Piece 3: Strap (make 2, one per shoe)
- Chain 12 to 14. This is a good estimated length to comfortably span the top of the foot with a small overlap for the button.
- Row 1: sc in the 2nd ch from hook and each ch across (approximately 11 to 13)
- Row 2: ch 1, turn, sc across, for a firm, doubled strap (approximately 11 to 13)
- Row 3, buttonhole end: ch 1, turn, sc 4, ch 2, skip 2, sc across the remaining stitches to form a small buttonhole near one end.
- FO, leaving long tails at both ends.
Assembly
- Weave in all loose ends before assembly.
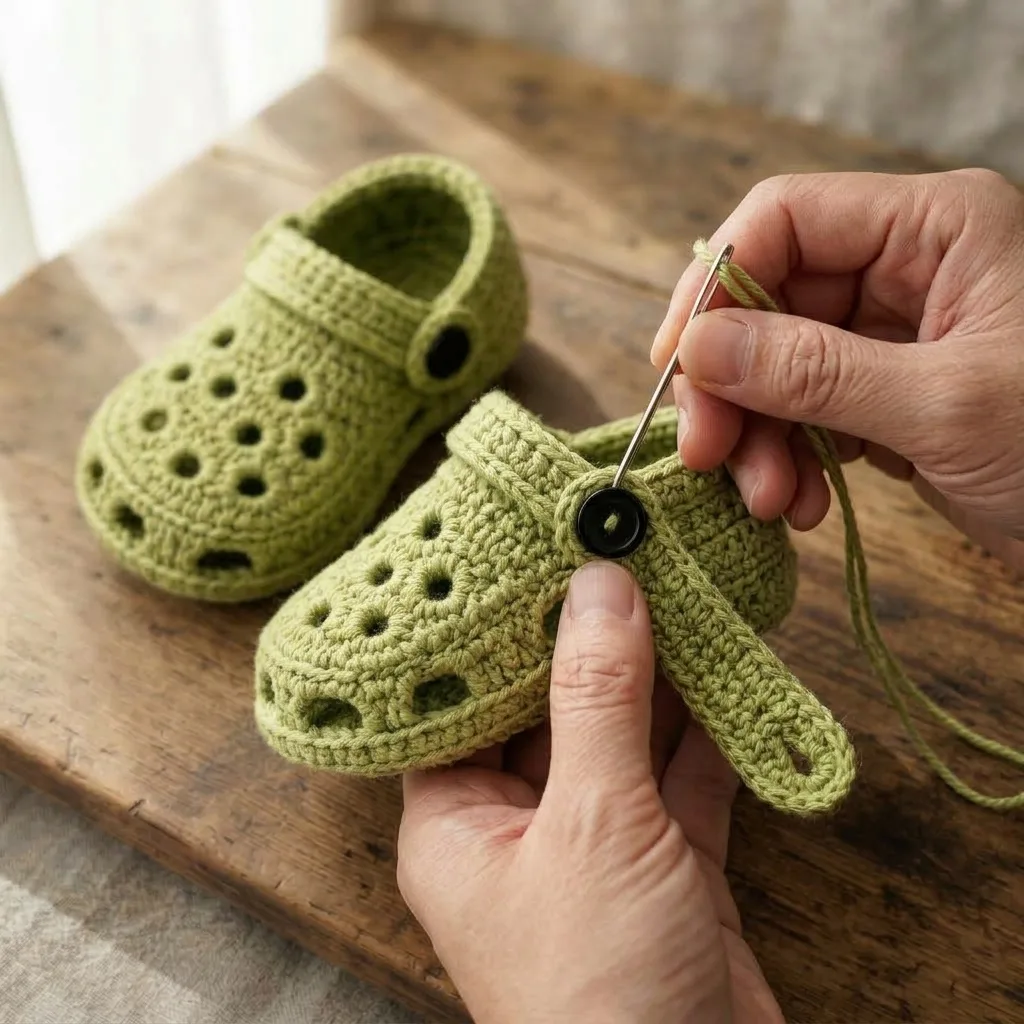
- Sew the plain end of each strap securely to the inside of the shoe near the heel opening, on one side.
- Try the strap across the top of the foot opening to check the fit, then sew a button to the outside of the shoe at the point where the buttonhole end of the strap naturally meets it.
- Fasten the strap through the buttonhole and adjust as needed for a snug but comfortable fit.
- Steam or lightly block both booties to even out the stitches and help the eyelet rounds sit neatly, checking that both shoes match in size and hole placement.
Tips for This Pattern
- Count your stitches out loud or mark them as you go during the eyelet rounds, it is very easy to lose track of the sc, ch 1, skip 1 sequence partway across.
- Make both soles and both uppers to the same stopping point before starting the eyelets, this makes it much easier to keep the two booties identical in size.
- If the buttonhole ends up a little loose once finished, a couple of extra sc stitches worked into the ch-2 space on the next pass will tighten it up nicely.
Loved this pattern? Browse more [Wearables] patterns on Learn Crochet Daily, and tag us if you make your own pair, we would love to see it.